First usb recording, Starting the application – Teledyne LeCroy Voyager M3 Quick Start Guide User Manual
Page 3
First USB Recording
After installing and launching the software, you can test the
system by performing the following steps:
1.
Connect a USB cable to each of the two connectors on the
Analyzer module, then connect the other ends to the USB
device under test and USB host system.
2.
Select Recording Options under Setup on the Menu Bar.
3.
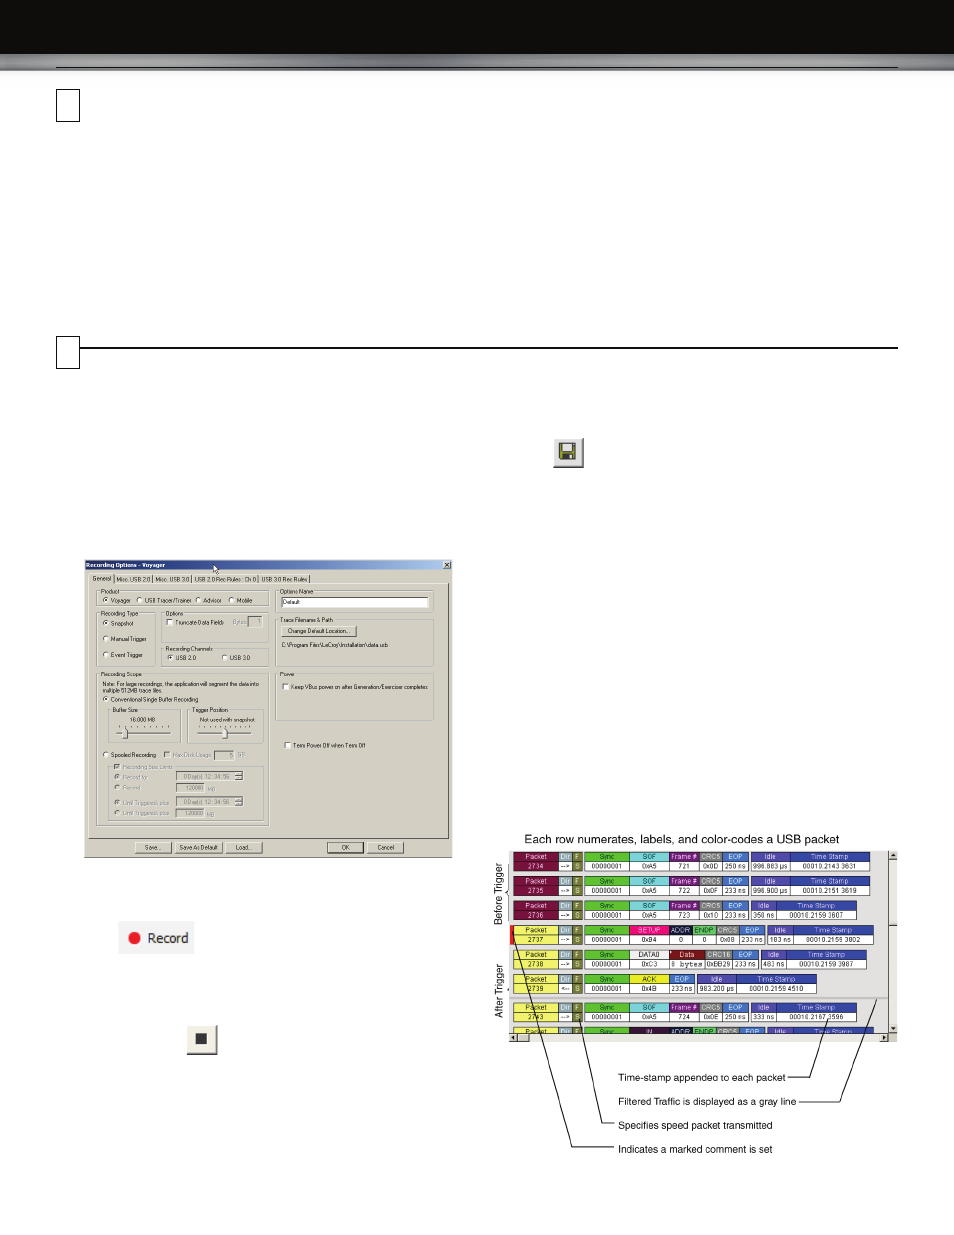
Select the General tab to display the following dialog box
showing factory default settings such as Snapshot and 16 MB
buffer size. For the first recording, you can leave these
settings unchanged
4.
Click OK to activate the recording options you selected.
5.
Turn on the USB devices that are to be tested and cause
them to generate USB traffic.
6.
Click
on the Tool Bar.
The system starts to record the USB traffic immediately. After
16 MB of traffic are recorded, the Analyzer uploads the data
and displays the packets in the trace window.
7.
To terminate recording before the snapshot automatically
completes, click
on the Tool Bar.
When the recording session is finished, the traffic is uploaded
from the Analyzer to the hard drive on your PC as a file
named data.usb or the name you assigned as the default
filename. While the file is being uploaded, you should see a
brown progress bar at the bottom of the screen. When the
bar disappears, it indicates that the data has been uploaded
to disk.
8.
To save a current recording for future reference, select
Save As under File on the Menu Bar
OR
Click
on the Tool Bar to display the standard Save As
screen.
Give the recording a unique name and save it to the
appropriate directory.
Trace View Features
After a moment, the recording terminates and the results display.
•
The packet view display makes extensive use of color and
graphics to fully document the captured traffic.
•
Packets are shown on separate rows, with their individual
fields both labeled and color coded.
•
Packets are numbered (sequentially, as recorded),
time-stamped (with a resolution of 2 ns on 3.0 signalling), and
highlighted to show the transmitted speed (low-speed,
full-speed, high-speed, or superspeed).
•
Display formats can be named and saved for later use.
•
Data fields can be collapsed to occupy minimal space in the
display.
The display software can operate independently of the hardware
and so can function as a stand-alone Trace Viewer that may be
freely distributed
Starting the Application
To start the application, launch the LeCroy USB Protocol Suite program from the Start Menu:
Start > Programs > LeCroy > USB Protocol Suite > USB Protocol Suite
to open the main window.
You can use the software with or without the system connected to the host. Without the Analyzer, the program functions as a trace viewer
to view, analyze, and print trace files.
The first time you open the USB Protocol Suite application, confirm proper installation by selecting About from the Help menu to view the
Software Version, Firmware Version, BusEngine™ Version, and Unit Serial Number.
6
7