Starting the application, Running the software and hardware – Teledyne LeCroy Sierra M6-4 SAS_SATA Protocol Analyzer Quick Start Guide User Manual
Page 4
Trademarks and Servicemarks
LeCroy, Catalyst, and Sierra M6-4 are trademarks
of LeCroy Corporation.
Microsoft and Windows are registered trademarks
of Microsoft Inc.
Intel and Pentium are registered trademarks of
Intel Corporation.
AMD Duron and AMD Athlon are trademarks of
Advanced Micro Devices, Inc.
All other trademarks are property of their
LeCroy Customer Support
Online Download
Periodically check the LeCroy Protocol Solutions
Group web site for software updates and other
support related to this product. Software updates
are available to users with a current Maintenance
Copyright © 2008 by LeCroy Corporation. All rights reserved.
Part Number: 916155-00
This document may be printed and reproduced without additional permission, but all copies should contain this copyright notice.
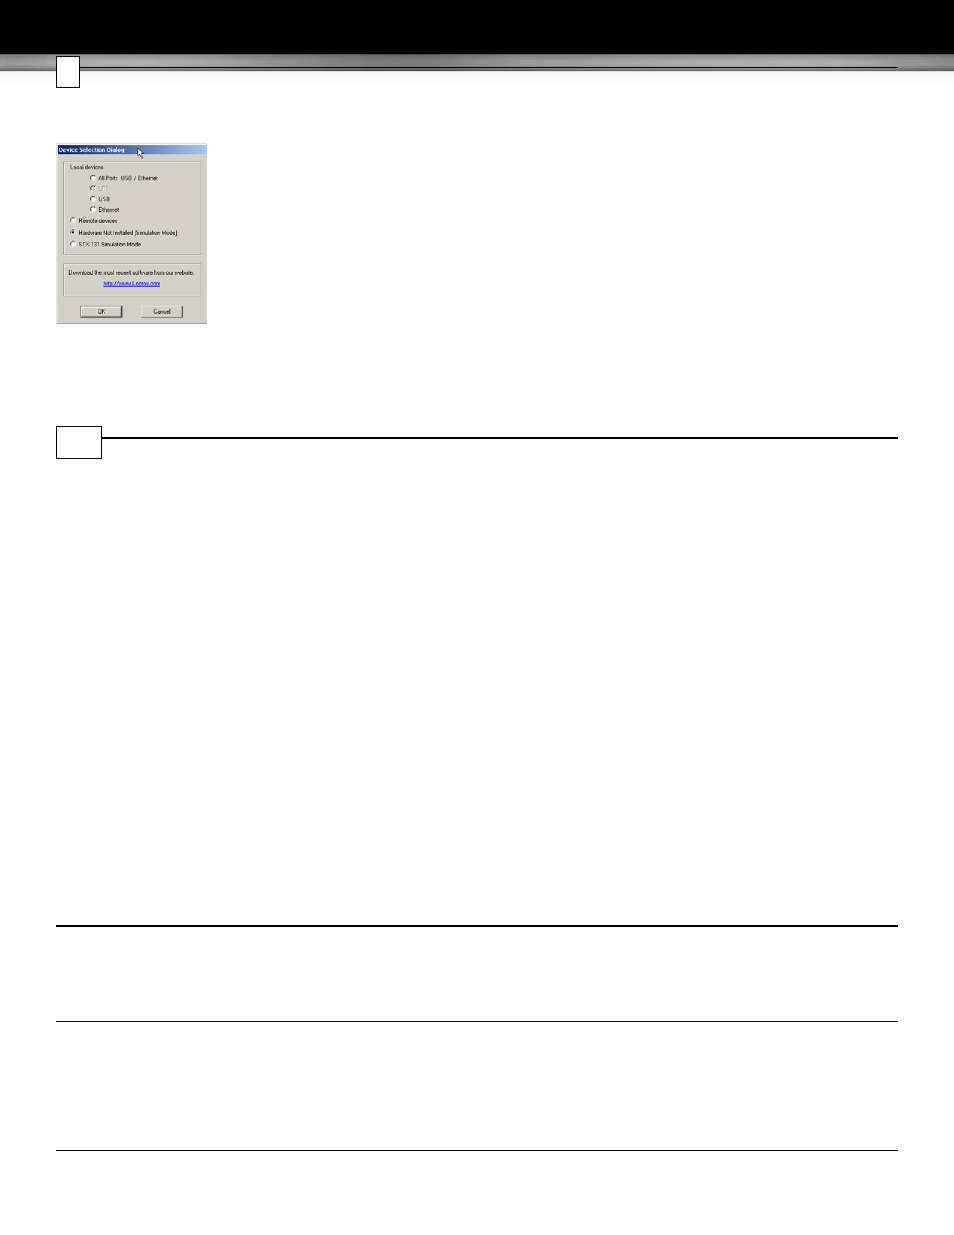
Starting the Application
To launch the software, double-click the SAS or SATA Icon in the Program Manager Window. The first time you run your software, the
software displays the Device Selection dialog. Select an interface and click OK to display the software
Operating in Simulation Mode
The system operates in Simulation Mode by default, if the software detects no hardware. However, you can operate in Simulation Mode
directly, without installing the Analyzer hardware. To operate without hardware, select Hardware Not Installed (Simulation Mode) in the
Device Selection dialog box and click OK.
To start using the
protocol analyzer and software
, see the Protocol Analyzer chapter of the Sierra M6-4 User Manual.
9
Running the Software and Hardware
The Sierra M6-4 application has the LeCroy SAS Protocol Suite and the LeCroy SATA Protocol Suite.
Protocol Analysis
To use the software for protocol analysis, first select File > New > Protocol Analyzer for a new project protocol analysis file: .sac for
SAS or .stc for SATA. (You can also open a .scs SAS Sample file or .sts SATA Sample file from the Examples folder.
1.
In Easy Mode, on the Capture tab, select to capture Everything or Pattern. For Pattern, select a Pattern. You can exclude patterns
and frames. You can use different patterns for pre-trigger and post-trigger.
2.
In Easy Mode, on the Trigger tab, select the trigger type. For Pattern, select the pattern.In Easy Mode, on the Settings tab, select
trigger position and memory use.
3.
Change the Analyzer settings if necessary. Change the port Speed if necessary.
4.
Use Advanced Mode only after you become familiar with the hardware and software and have special needs.
Protocol Analyzer Initiator Emulator or Host Emulator
To use the software for protocol analysis
to generate host traffic
, first select File > New > Protocol Analyzer Initiator Emulation or
Protocol Analyzer Host Emulation for a new project Pattern Generator file: .ppf for a dual-role file or .spg for a single-role file.
1.
In Easy Mode, on the Initiator Emulator or Host Emulator tab, insert instances of ATA, SCSI, TASK, SMP, Frame, or Event. Select
the type of each from the drop-down lists. You can also loop, go to, wait, delay, if...then, and stop.
2.
In Easy Mode, on the Capture tab, Trigger tab, and Settings, follow the steps for Protocol Analysis.
3.
In Easy Mode, on the Initiator Setting or Host Setting tab, select the port and speed. Select to run the Pattern Generator or Initiator
Emulator or Host Emulator.
Target Emulator or Device Emulator
To use the software as a target or device emulator, first select File > New > Target Emulator or Device Emulator for a new project .std
Target Emulator file or .sde Device Emulator file.
1.
In the Pages tab, change settings for the supported pages if necessary.
2.
In the Error Injection tab, select General periodic errors, Identify frames, Connection Management open and close connection errors,
SAS Commands and events errors, ATA Commands errors, or SATA Signature content.
3.
In the Settings tab, select addresses, sizes, times, and ports, if necessary.
To change viewer options and see more detail about operation, see the Introduction chapter of the Sierra M6-4 User Manual.
10