Wtpsce_instructpg4.pdf – Luxor|H.Wilson WTPSC User Manual
Page 4
4
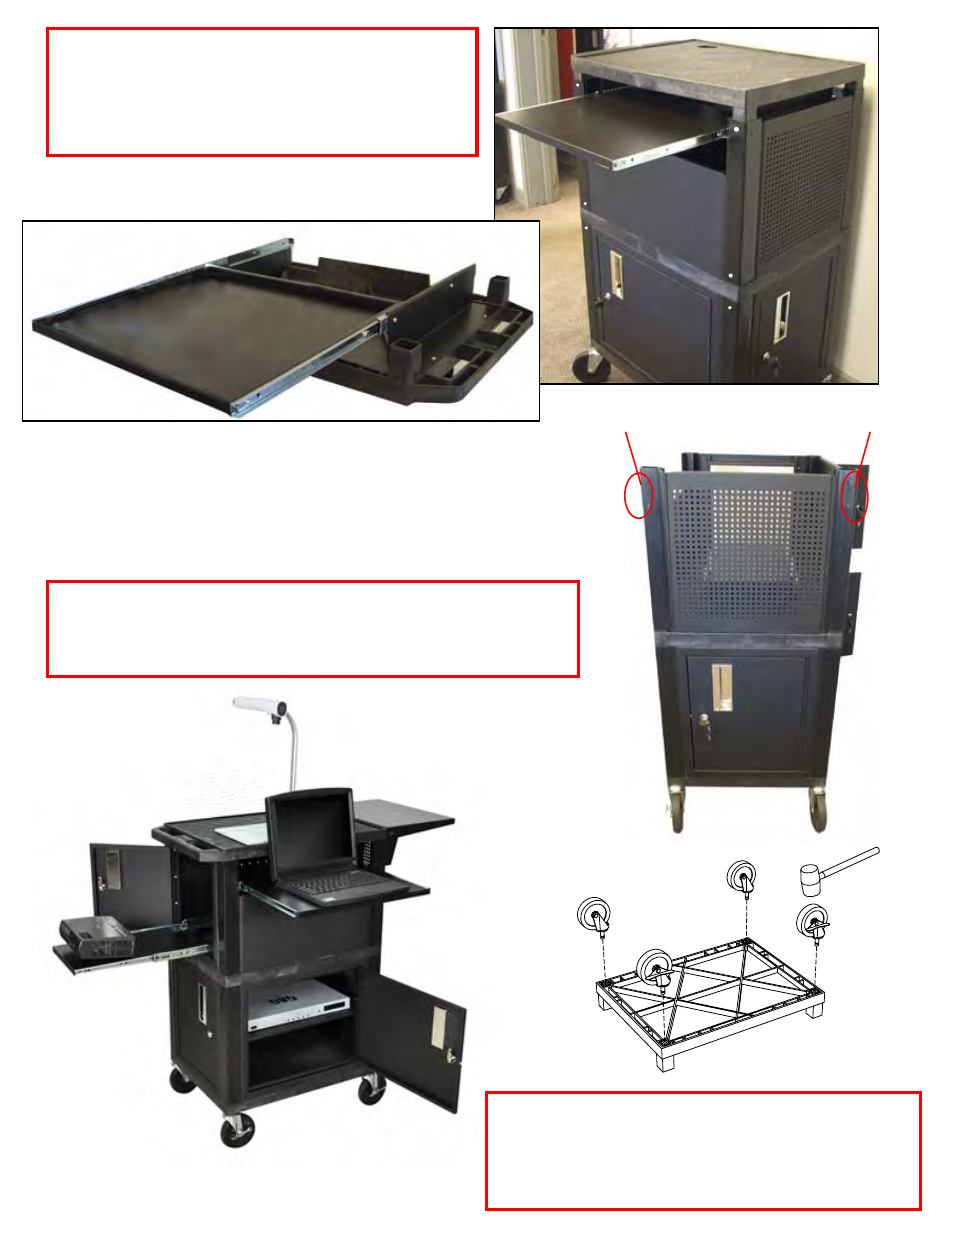
STEP 10 - Take top shelf assembly (below) and place onto legs
so that the bosses are fitting into the holes in the top of the legs
and handle is to the left. The keyboard tray will be accessible
through the short panel. Be sure that the ribbed side is facing
down. Push shelf down as far as you can by hand. Gently tap
with mallet if necessary. (See photo right)
The drop down shelf attaches to the right side legs
STEP 11: Hold TDDS up to upper legs on right side of cart FLUSH WITH THE TOP
OF THE SHELF. Mark where to pre drill holes for drop down shelf attachment
with punch if desired. Turn unit on it's side and attach the brackets with screws.
Turn unit right side up.
STEP 12: Turn cart upside down on a level and firm floor surface.
Insert the stems of the 4 casters into the holes in the underside
of the bottom shelf, locking casters in the front 24"W side. Tap
casters into socket with rubber mallet until fully seated. Turn
right side up.
Finished Cart
Top Shelf Assembly