Wtpsce_instructpg2.pdf – Luxor|H.Wilson WTPSC User Manual
Page 2
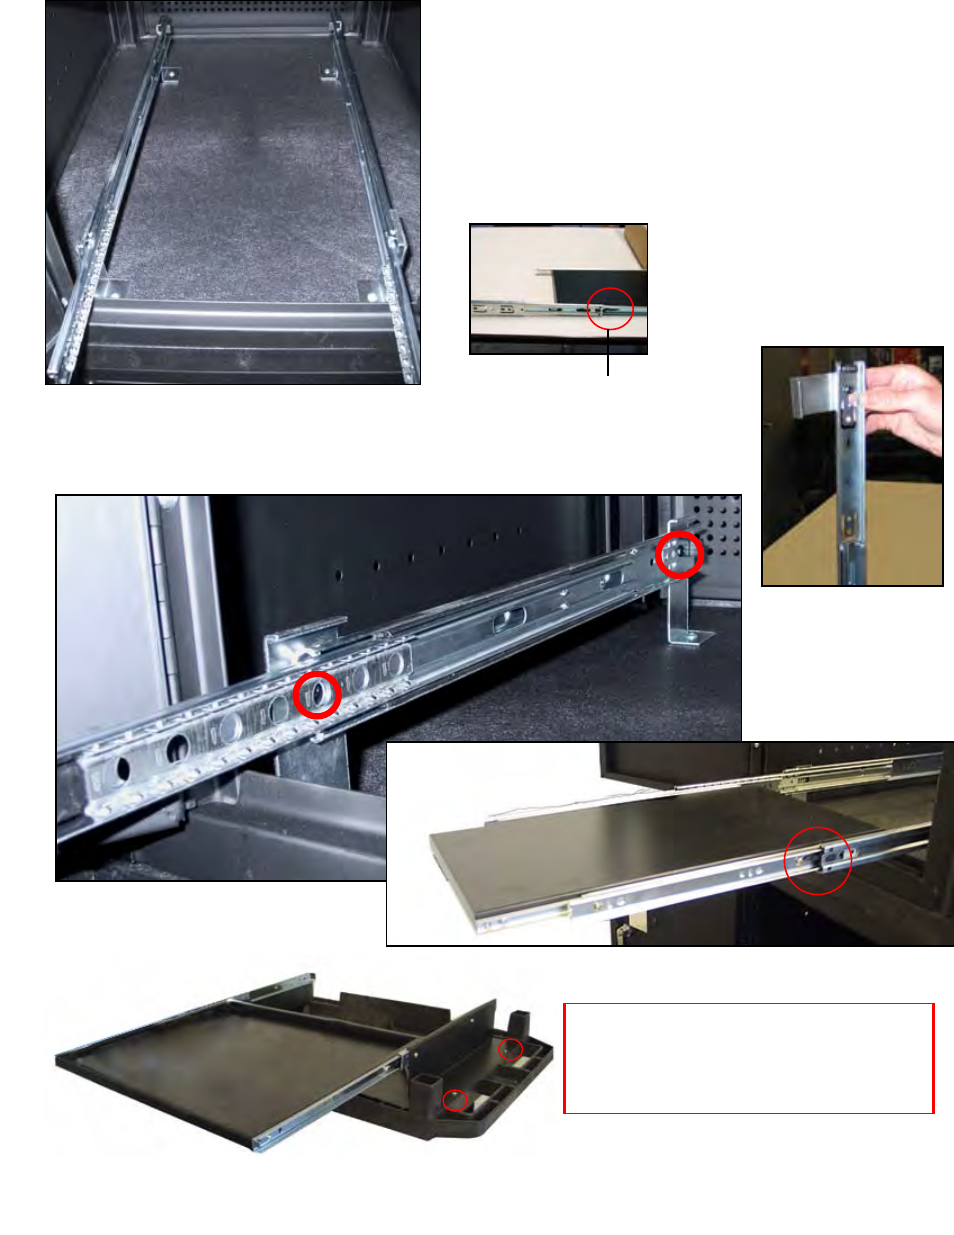
STEP 5 - Assemble LCD Shelf & Brackets.
First you must separate the rails. This is
done by extending the rails out until you
see a small black plastic lever. Depending
on how you are holding the assembly,
you will push the lever up or down until
the rails release. Do this for both rails.
(See Figure 5)
STEP 6: Mark hole pattern onto middle
shelf by holding LCD shelf assembly in
position. If you like, you may pre drill into
the middle shelf. The LCD projector shelf
will attach here when built. (See Figure
4 (previous page) for placement- do not
put legs on or put panels in yet)
Figure 5
You will then attach the brackets to the outer part of the rails,
two brackets per rail. Attach with the included hardware to the outermost holes on the outside of the
rails. One hole is a bit tricky to get to and you will have to adjust the sliding rail (see left) and attach
through a hole on the sliding rail. Make sure that you are attaching the brackets so that the rail will be
attached to the shelf as shown in Figures 7, circled in red.
Figure 7
You may then slide the
LCD Projector Tray back
onto the rails. Slide in
and out a few times to
make sure everything
is secure.
Figure 8
STEP 7 - The Keyboard assembly needs to be attached
to the top shelf. Turn the top shelf upside down.
Line the holes in the metal bracket up with the four
small holes on the underside of the top shelf. Attach
with screws.
Figure 9
Lever
2
Figure 6