Unpack & inspect your new heater, Tools needed, Hardware needed – King Electric Model KBS User Manual
Page 2: Mounting height, Distance from walls, Mounting bracket & heater, Location of heater
Unpack & Inspect Your New Heater
Remove heater from the box and inspect it for any
damage. Verify you have received the mounting
bracket or thermostat if needed. (optional)
Tools Needed
You will need the following tools to install your unit
heater:
• Screwdriver - (Phillips head & slotted)
• Pliers
• Electric Drill
• Wire Cutters
• Adjustable Wrench
Hardware Needed
You will also need the following hardware, which
can be purchased from your local hardware store or
electrical supply house:
• adequate gauge and length of wire for your applica-
tion
• proper size fuses or breakers to handle amperage
• proper wire connectors for your application
• fasteners appropriate for application that are strong
enough to hold unit
For certain applications conduit may be required.
Check local electrical codes. Also, if you run the wir-
ing in conduit and wish to be able to turn the heater,
be sure to purchase enough flexible conduit to allow
the heater to be turned.
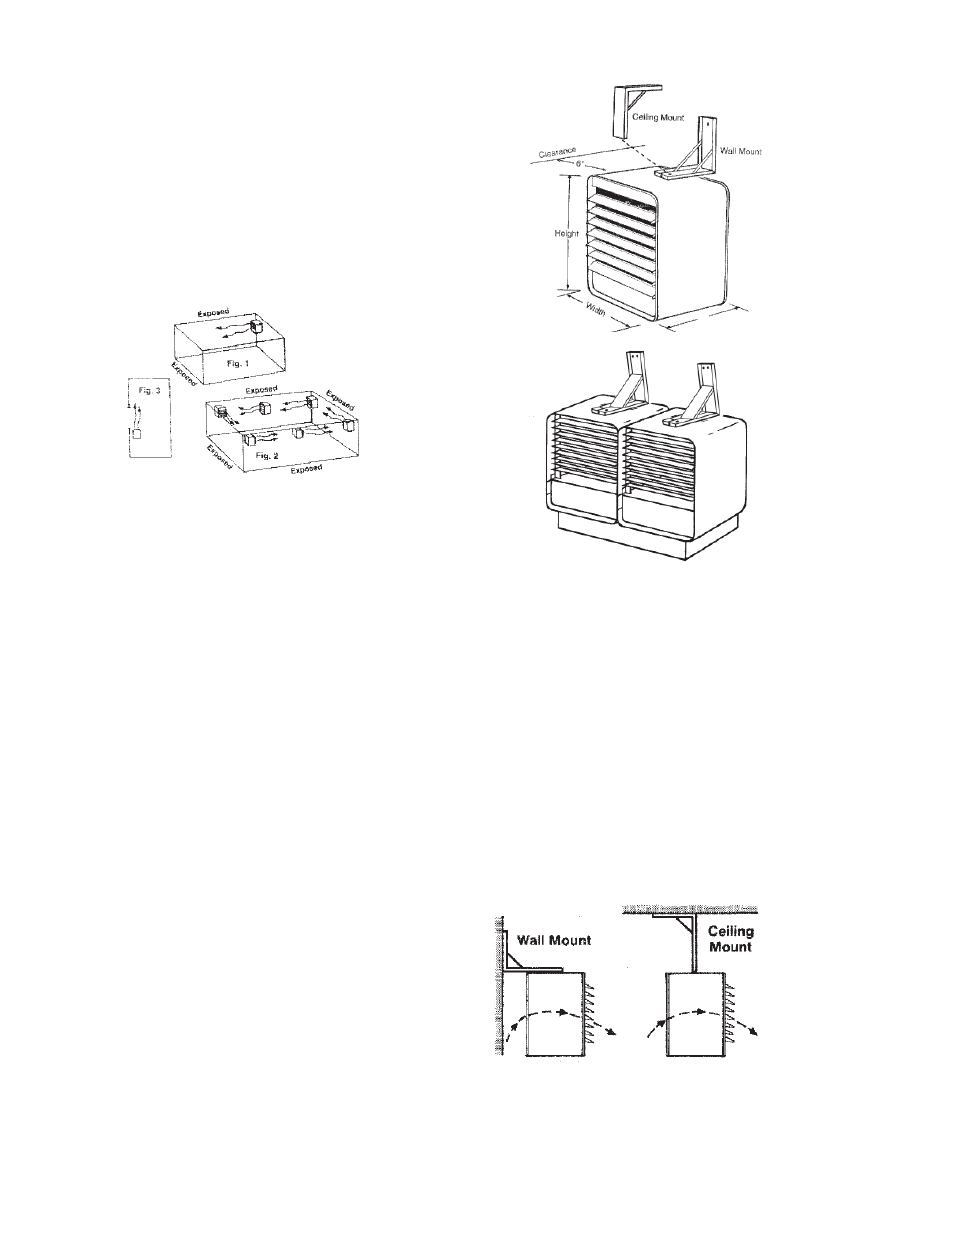
Mounting Height
When the airflow of the heater is directed vertically or
horizontally the minimum mounting height is 6 feet.
Mounting heights depend upon building utilization and
heater kW capacity.
Distance From Walls
Be sure to maintain 6" minimum clearance to walls
and ceilings.
Mounting Bracket & Heater
Locate a stud in ceiling or wall and securely fasten
bracket to supporting surface with 3 1-1/4" screws.
Attach heater to bracket with 3/8" x 1" bolt & lock washer
supplied with bracket. After desired air discharge po-
sition has been determined, tighten bolt so the heater
will not pivot.
Location of Heater
The heater should be installed out of the reach of
persons. The direction of air flow should not be
restricted by machinery, beams, etc., and the air
flow should wipe exposed walls rather than blowing
directly at them. When more than one heater is used
in an area the heaters should be arranged so that
the air discharge of each heater supports the air flow
of the others to provide best circulation of warm air.
(see air flow chart)
KB.indd : 10/08