Sonata pro 24 nubus video card – Sonnet Technologies Sonata Pro NuBus Video Card User Manual
Page 2
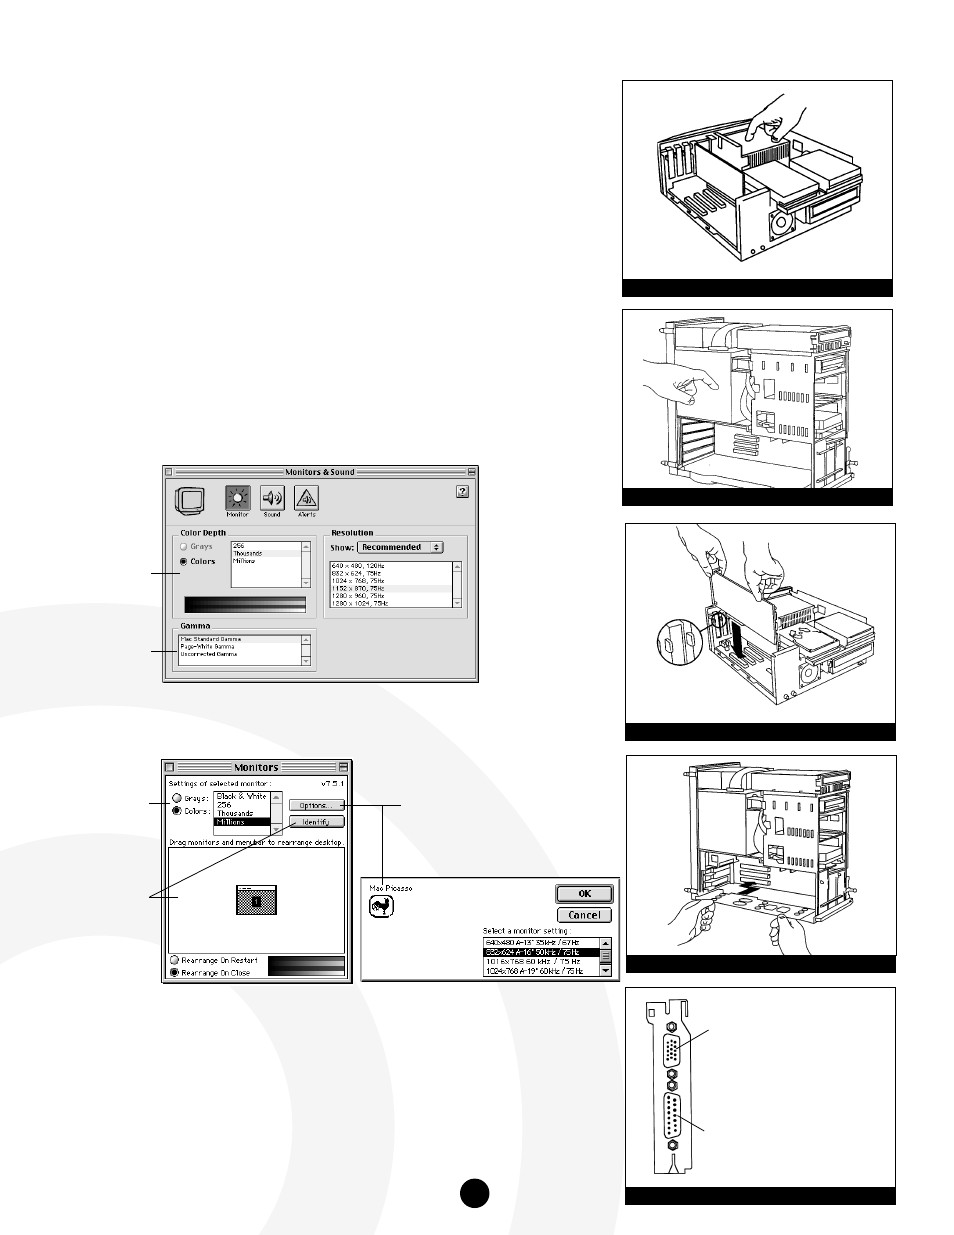
5. Identify the internal components of your computer. Touch the internal
power supply (Figure 2a & 2b) to discharge any potential damaging
static electricity.
6.
Choose a NuBus slot to install the Sonata Pro 24 NuBus Video Card.
Remove the back port cover from the slot you have chosen.
7. Install the Sonata Pro 24 NuBus Video Card into the slot (Figure 3a & 3b).
8. Connect your monitor to the Sonata Pro 24 NuBus Video Card. The
Sonata Pro 24 provides you with a choice between two monitor
connectors (a VGA monitor connector and an Apple monitor connector).
Choose the appropriate connector for your monitor type (Figure 4).
9. Replace the case cover onto your computer and tighten the security
screw(s).
10. Restart your computer.
11. To select a desired resolution and color depth, use the Monitors and
Sound Control Panel (Figure 5) or the Monitors Control Panel (Figure 6)
from the Control Panels folder.
Figure 3a: Install Sonata Pro 24 into 7100
Figure 3b: Install Sonata Pro 24 into 8100
Figure 4: Sonata Pro 24 video connectors
VGA Monitor connector supports:
DDC2 Sync-on-green
Apple Monitor connector supports:
Apple monitors
Composite-Sync, Sync-on-green
Figure 5: Apple Monitors & Sound Control Panel
Figure 6: Apple Monitors Control Panel
Resolution
Select from several
resolution options
Color Depth
Displays the current color
bit depth
Gamma
Displays the current
gamma settings
Color Depth
Displays the current color
bit depth
Monitor Selection/
Identify
Displays the active monitor
settings
Options
Clicking on this button allows you to select from
several resolution options
Sonata Pro 24 NuBus Video Card
Figure 2a:Touch 7100 internal power supply
Figure 2b:Touch 8100 internal power supply
2