About the presto gigabit pcie pro card, Installation steps – Sonnet Technologies Presto Gigabit PCIe Pro Gigabit Ethernet Adapter Card User Manual
Page 4
4
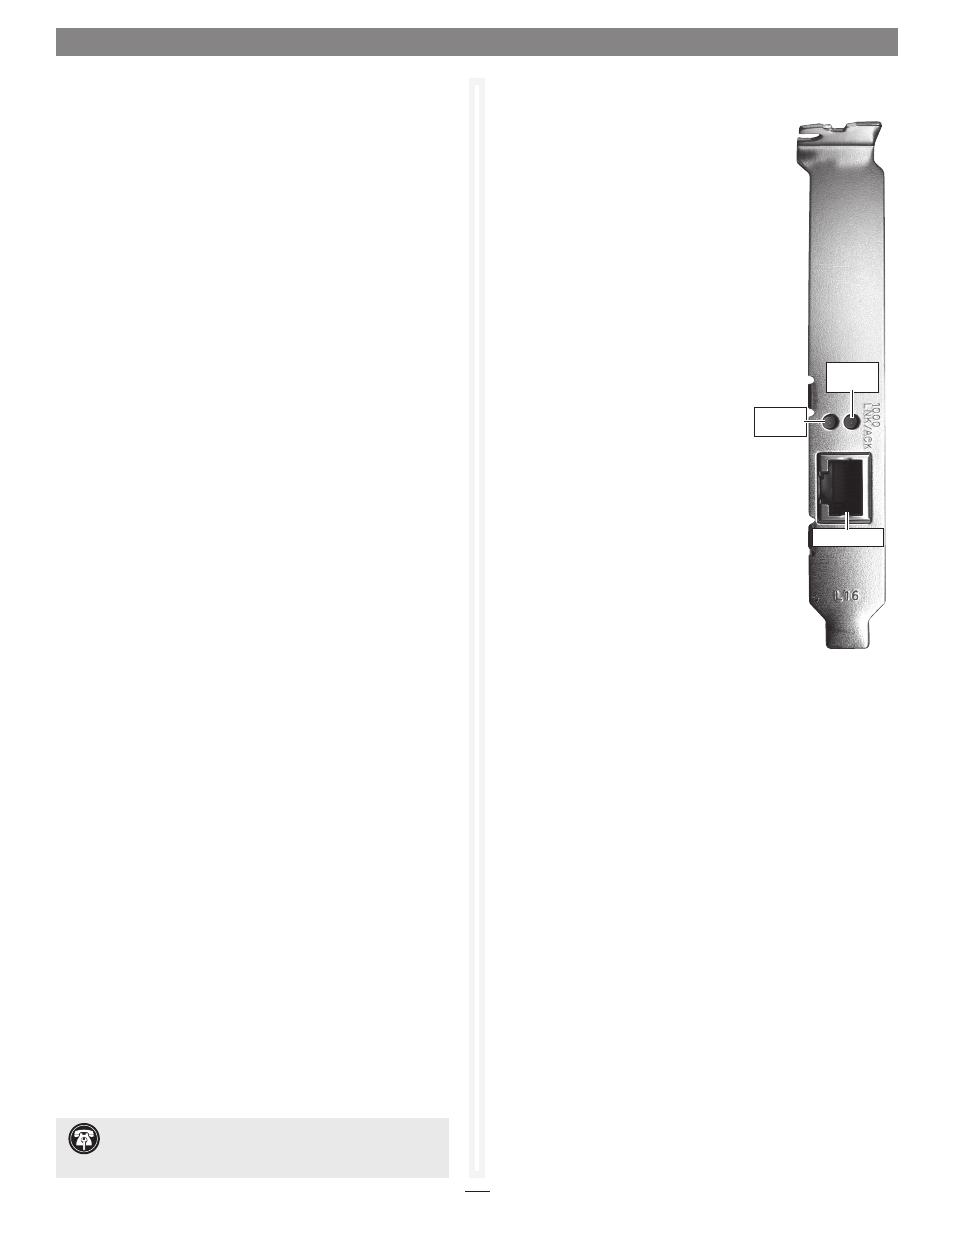
LINK/ACK Indicator - This lEd displays
the link status.
• When the LED is off, there is no link
between the Presto card and the network.
• When the LED is on, a link is established,
but there is no traffic on the network.
• When the LED is flashing, there is traffic
on the network to which the Presto card
is connected.
1000 Indicator - This lEd displays
1000BaseT (Gigabit Ethernet) connection
status.
• When the LED is on, a 1000BaseT link is
established.
Ethernet Port - Plug in any Category
5 or 6 unshielded twisted pair (UTP)
cable with RJ-45 connectors.
• Use standard cables when you are
connecting your computer through
a hub.
LINK/ACK
indicator
Ethernet port
1000
indicator
About the Presto Gigabit PCIe Pro Card
Driver Software Installation and System
Configuration Steps—Server 003 and XP
(continued)
2. When the next window appears, select the “Install from a
list or specific location” option, and then click next.
3. When the next window appears, select the “don’t search. I
will choose the driver to install” option, and then click Browse.
4. In the next window, click Have disk…
5. In the Install From Disk window, click Browse, navigate to
the location where you extracted the .zip file, and then
locate and click the GElaWinx32 (or GElaWinx64) folder
to view the sub-folders. Click the folder with the name of
the Windows version your computer is running, click Open,
select the yk51x86.inf file, and then click Open.
6. Back in the Install From Disk window, click OK.
7. Back in the Found New Hardware Wizard Window, click next;
the driver software will be installed. When informed that
the software was installed successfully, click finish.
8. depending on your setup, Windows may configure itself
to automatically enable Internet usage; launch your Internet
browser application of choice and browse a Web site to verify.
9. If the Presto Gigabit card is working to your satisfaction and
you do not need link aggregation support, the installation is
complete. If your system did not configure itself (or if you
need to make changes to your network settings), click the
Start button, and then select Control Panel > network
Connections > new Connection Wizard.
link Aggregation Software Installation Steps—
Server 003 and XP
1. locate and double-click the GElaWinx32 (or GElaWinx64)
folder to view its sub-folders, double-click the folder with the
name of the Windows version your computer is running,
and then double-click the link aggregation folder.
2. double-click CPawin.exe to launch the installer; when the
Marvell CPA-InstallShield Wizard window appears, click next.
4. When presented with the license agreement, select “I accept
the terms”, and then click next.
5. When the Readme information appears, click next.
6. When the next window appears, click Install; the software
will be installed. When the InstallShield Wizard Completed
window appears, click finish.
Installation Steps
Support Note:
To enable link aggregation, use Marvell
Network Control (click Start > Control Panel, and then
double-click Marvell Network Control).