Quick start guide for tempo ata100 – Sonnet Technologies Tempo ATA100 PCI Host Adapter Card User Manual
Page 4
4
Quick Start Guide for Tempo ATA100
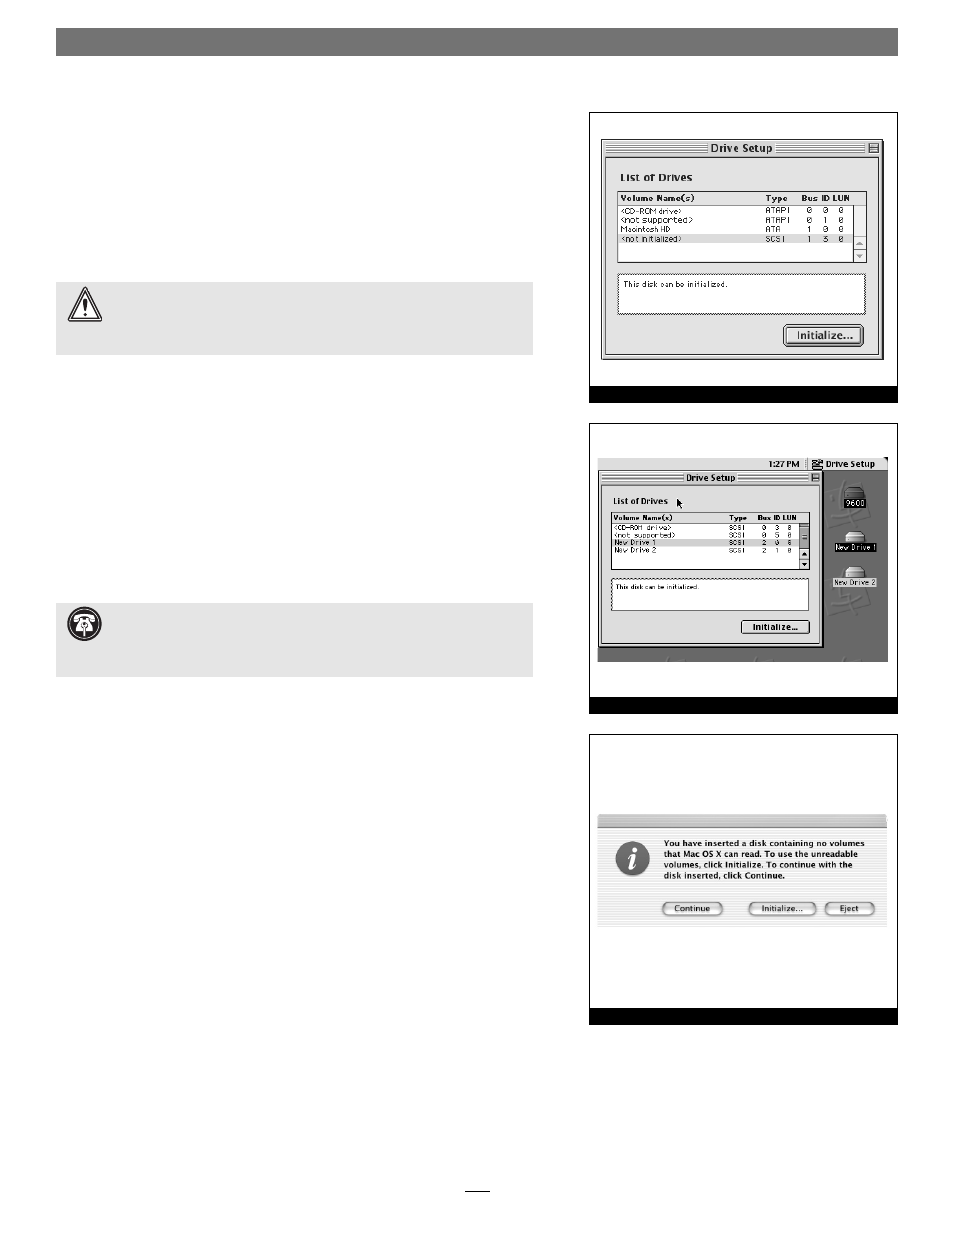
Figure 7
Figure 8
Figure 9
12. Attach the Ultra ATA cables’ host (blue) connectors to the Tempo ATA100
card.
13. Check the cable connections; make sure all cables are connected
securely to the Tempo ATA100 and the hard drives.
14. Close the computer and carefully replace its cover; be very careful not to
crimp the cables.
Drive Formatting—Mac OS 8.0 through OS 9.x
This section describes the process of formatting (initializing) hard drives con-
nected to the Tempo ATA100 using Apple Drive Setup under Mac OS 8.0
through Mac OS 9.x. The Drive Setup application is installed during the Mac
OS installation process and is usually located in the Utilities folder on the hard
drive containing your active System Folder. If you wish to format your drives
with Disk Utility under Mac OS X, please skip to the next section.
1. Turn on your computer.
2. Open Drive Setup (Figure 7).
3. At this point, you may optionally choose to partition each drive to cre-
ate smaller “virtual” drives to store and retrieve data faster and more effi -
ciently; in the Drive Setup menu bar, select Functions: Volume Settings…
Partition, and set up the partitions. When ready, select the drive listed as
drives (Figure 7). For drives larger than 2 GB, you should format them as
Mac OS Extended to take full advantage of their storage capacity.
4. Name each drive or volume once it has been initialized; each volume will
appear on the desktop as a single “virtual” drive (Figure 8). You can now
use your drive(s).
Drive Formatting—Mac OS X
This section describes the process of formatting (initializing) hard drives con-
nected to the Tempo ATA100 using Disk Utility under Mac OS X Version
10.1; the process under Version 10.2 is the same. The drive formatting utility
is installed during Mac OS X installation and is located in the Utilities folder
(within the Applications folder) on your OS X volume.
1. Turn on your computer.
2. During the boot process under Mac OS X, you may see an information
window appear stating “You have inserted a disk containing no volumes
that Mac OS X can read.” If this message appears, click the Initialize… but-
ton to launch Disk Utility (Figure 9).
WARNING:
Hard drives attached to the Tempo ATA100 will not mount
(appear on the desktop) until they have been formatted; this includes
drives with data on them, previously used in other computers. Please be aware
that formatting a drive erases any data present.
Support Note:
IDE hard drives attached to the Tempo ATA100 will
register as SCSI devices to the computer under Mac OS versions prior to
OS X. For example, in Figure 7 the newly installed hard drive appears as