Quick start guide for tempo hd – Sonnet Technologies Tempo HD (With or Without Drive) Mac Version User Manual
Page 6
4
Quick Start Guide for Tempo HD
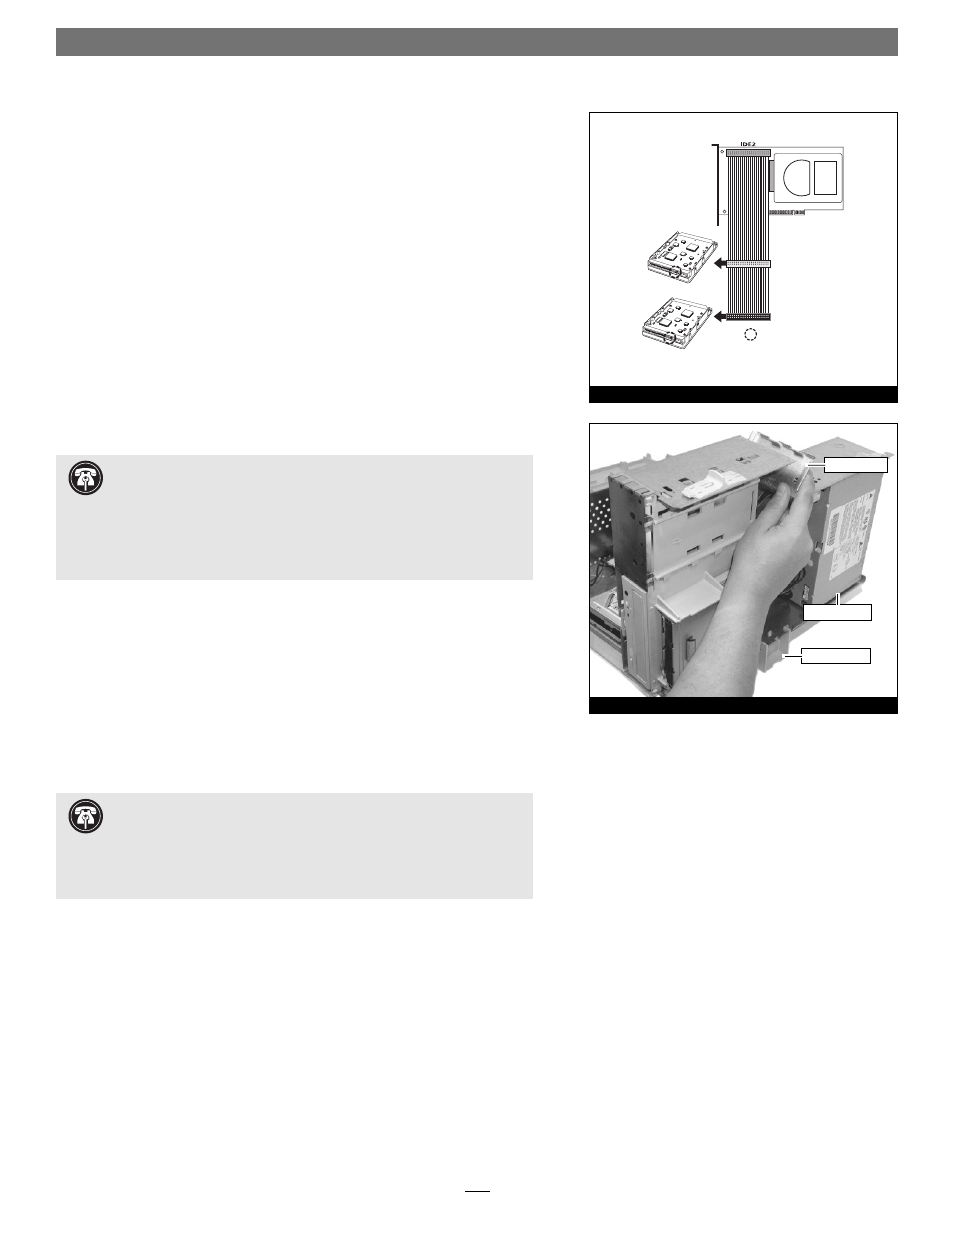
5. Connect the drive(s) to the Ultra ATA cable (sold separately) as follows:
• When connecting one drive, plug in the Ultra ATA cable’s master (black)
connector to it. Verify the connector is plugged in securely (Figure 5).
• When connecting two drives, connect the Ultra ATA cable’s master
(black) connector to the drive with jumpers set in the master setting;
connect the slave (gray) connector to the drive with jumpers confi gured
in the slave setting. Verify the connectors are plugged in securely
(Figure 5).
6. Locate the 4-pin power connector plugged into your computer’s exist-
ing hard drive. You should fi nd at least one extra power connector near
the existing drive; if you have installed only one new drive, plug the extra
power connector into it. If you have installed two new drives, or there are
no additional power connectors, you must use a power cable Y-adapter
(sold separately). Verify the connectors are plugged in securely.
7. Route the Ultra ATA cable to the Tempo HD card; avoid the processor’s
heat sink and make sure it will not get crushed or pinched by any part of
the case when you reassemble your computer.
8. Attach the Ultra ATA cable’s host (blue) connector to the Tempo HD card.
Verify the connector is plugged in securely (Figure 5).
9. Check the cable connections; make sure the cable is properly
connected to the Tempo HD and the hard drives.
10. Close your computer and carefully replace its cover; be very careful not to
crimp the cables.
Figure 6
Tempo HD Integrated
Hard Drive/PCI Card
Ultra ATA cable
slave
single (or master*)
- jumpers
*jumpers must be set to the master setting when two drives connected
Figure 5
power supply
access cover
support stand
Support Note:
Power Macintosh 7200, 7300, 7500, 7600 and G3
Desktop users must remove the access panel on the main chassis to
route the Ultra ATA cables from the drives to the Tempo HD. You may need tools
to perform this procedure. To remove the access panel, first unlock and tilt up the
internal assembly; remember to lower the assembly support stand. Next, firmly
twist the top edge of the panel forward toward the power supply, then lift the
panel out (Figure 6). Save the panel in case you ever need to use it again.
Support Note:
If your computer has an original internal SCSI hard disk
drive, and you disconnect it when you install the Tempo HD and one or
more drives, you must terminate the SCSI chain properly; installation of a
SCSI terminator connector may be required. Failure to properly terminate
any SCSI chain may result in system freezes and errors. Consult your computer’s
user guide or a qualified technician for more information.