Ransburg REA III Auto Applicator 70393 User Manual
Page 30
AA-82-01.3
2 7
2 7
2 7
2 7
2 7
REA III 100kV Automatic Applicator - Maintenance
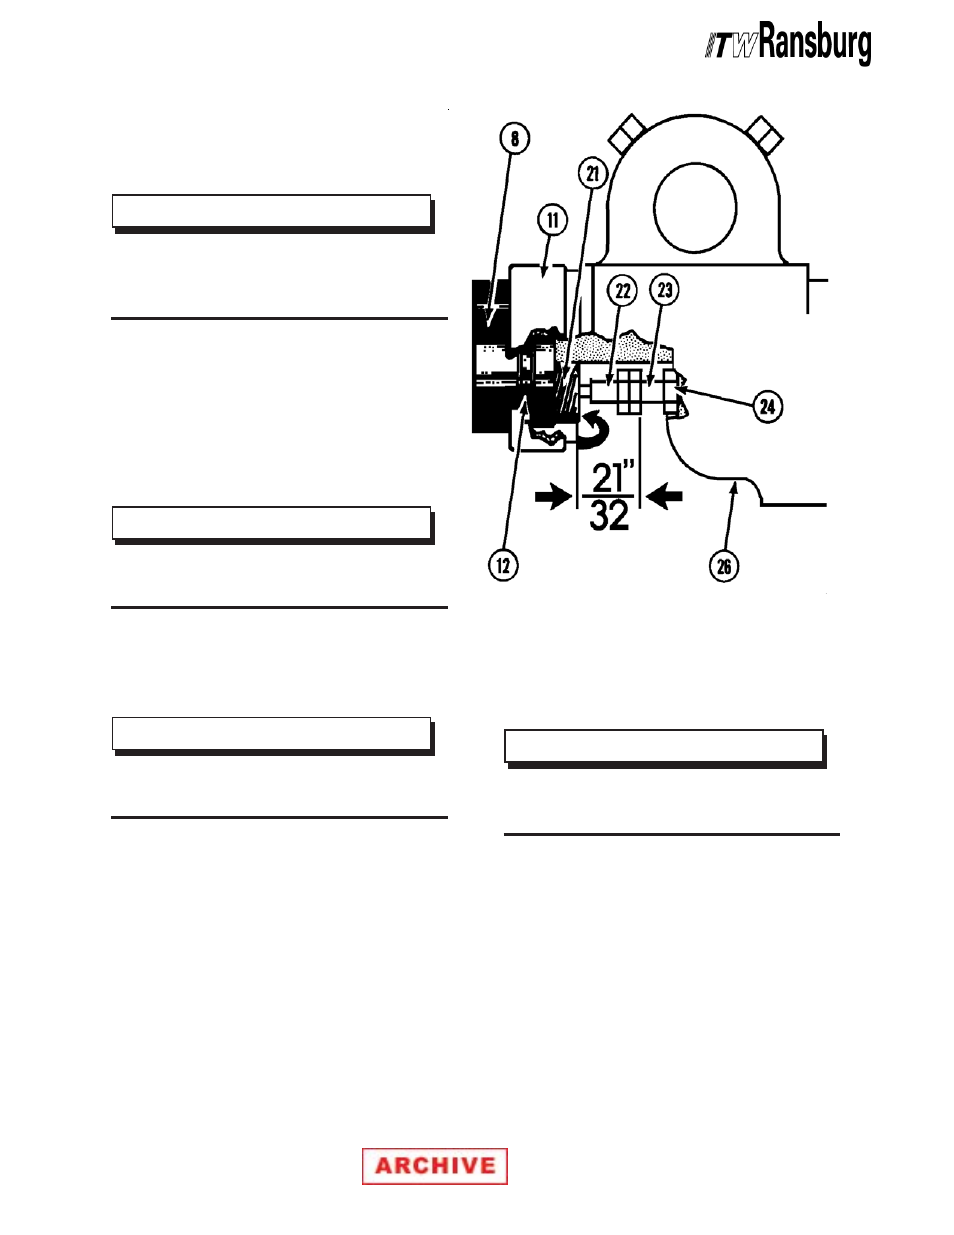
14. Screw packing nut [21] into the chamber and
secure it with the spanner wrench.
>
The packing nut should be tight enough
that shaft [7] slides in and out with firm
resistance.
N O T E
N O T E
N O T E
N O T E
N O T E
15. Screw trigger adjustment nut [33] onto shaft
[7] with the flanged end toward the rear.
16. Screw valve rod extension [23] onto shaft [7]
with the flanged end toward the front.
>
The hexagonal flanges of [22] and [23]
should face each other.
N O T E
N O T E
N O T E
N O T E
N O T E
17. To adjust [22] and [23]:
>
To prevent shaft [7] from rotating, secure
it with a wire through the hole at the rear.
N O T E
N O T E
N O T E
N O T E
N O T E
a. Push shaft [7] fully forward.
b. Measure 21/32-inch (16.6mm) from the
rear face of packing nut [21] to the rear
face of hexagonal flange of the valve rod
extension [23].
c. Secure the nut and rod extension together
at that dimension by rotating nut [22]
rearward until the two will not turn on the
shaft.
d. Tighten the two by holding rod extension
[23] with a 3/8-inch wrench and turning
nut [22] against it with another 3/8-inch
wrench.
>
Fluid nozzle [2] must be firmly in place
(see Step 6).
N O T E
N O T E
N O T E
N O T E
N O T E
Figure 2: Barrel Assembly
Figure 2: Barrel Assembly
Figure 2: Barrel Assembly
Figure 2: Barrel Assembly
Figure 2: Barrel Assembly