Regulator disassembly / reassembly procedure – Ransburg MCV2 Modular Color Changer A10800-XX_A11077-XX User Manual
Page 28
5. Add plate [13], upper diaphragm [6], and lid
[14]. Tighten the eight (8) screws [16] in a cross
pattern to 10 lbs•in. Then follow by tightening
each screw in a circular pattern to 20 lbs•in.
NOTE
> The seat and stem are matched sets of
parts, each having a serial number engraved
on them. Care must be taken not to mix non-
matching seats and stems or the regulator
will not perform properly.
Reassembly
1. Install all removed o-rings [9] and [4] on the
insert and the seat. Push the seat [5] into the insert
(straight in) using an arbor press if possible.
2. Insert spring [10], stem [5], and one o-ring [4]
into the regulator body [1].
3. Using a 3/16” Allen wrench, tighten the insert
down until it bottoms out.
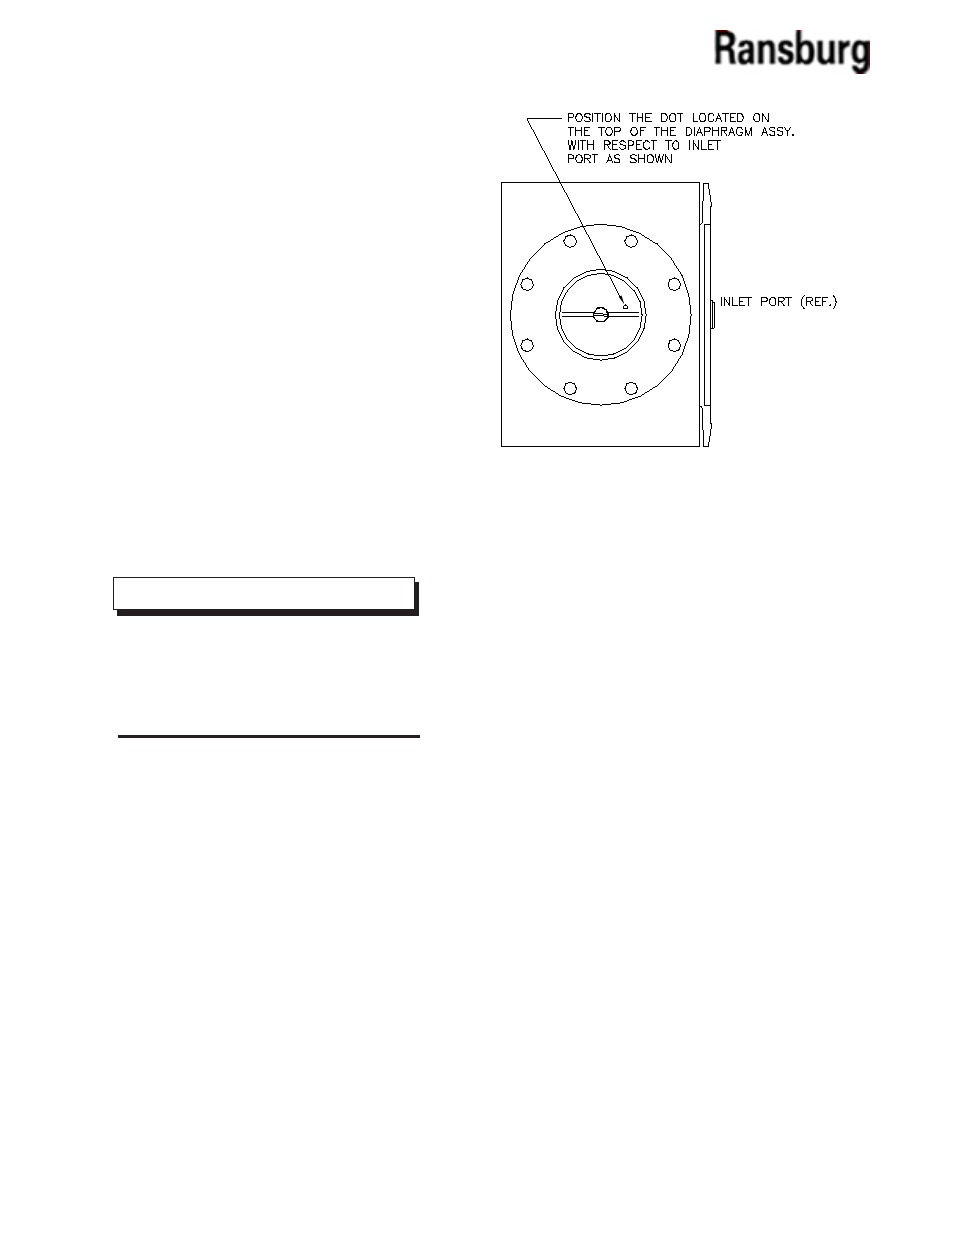
4. Locate the dot on the diaphragm assembly [2]
and place it so it is 180
° from the outlet hole of
the body.
MCV 2 Collet Series Color Changer - Maintenance
23
Figure 13: Diaphragm Assembly Position
REGULATOR DISASSEMBLY /
REASSEMBLY PROCEDURE
Disassembly
1. Remove eight (8) screws [16] using a 5/32” Allen
wrench.
2. Pull cap [14], upper diaphragm [6], and plate
[13] from the assembly.
3. Pull diaphragm assembly [2] from the assem-
bly.
4. Using a 3/16” Allen wrench, remove the regu-
lator insert [8]. By removing the insert, the seat
will be removed [5]. To remove the carbide seat from
the insert, blow compressed air in the hex end of the
insert and the carbide seat will come out.
CS-02-01.10