Ransburg Solo Installation & Set-Up Kit User Manual
Page 2
SI-08-06.1
Below is a detailed description and proper usage
instructions for each item in the kit:
Items 1 and 2 - Cap Pressure Test Gauges and
Test Air Caps
The cap pressure test gauges (Item 1) are used
along with the test air caps (Item 2) to measure
the fan and atomization air pressures at the air
cap. To use the cap pressure test gauges and
test air caps, follow these steps:
1. Hook the applicator to main air. Turn main
air on.
2. Remove the retaining ring and air cap from
the applicator.
3. Place one of the test air caps (Item 2) onto the
applicator. To determine which test air cap to
use, look at the original air cap that was just
removed from the applicator. On one of the
faces, it will say 65V, 98V, or 122V. Select the
test air cap with the same numbers as on the
air cap.
4. Put the retaining ring back onto the applicator
and tighten.
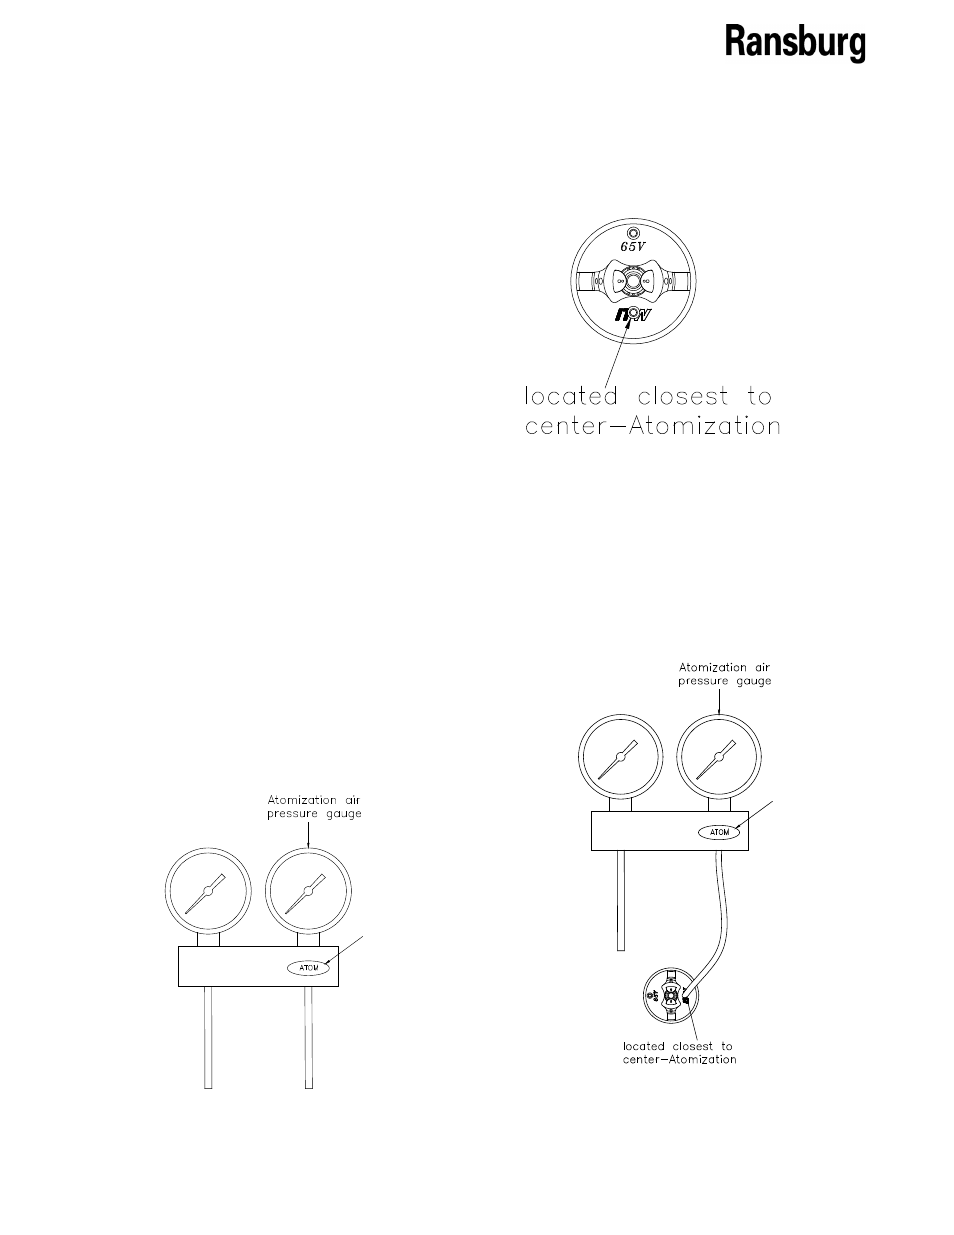
5. Determine which gauge measures the
atomization air cap pressure. This will be the
gauge located above the word "atom" on the
gauge mounting bracket.
6. Next, determine which barbed fitting on the air
cap is the atomization air barb. This will be the
one located closest to the center of the air cap.
7. Place the tubing coming out from directly
underneath the atomization air pressure
gauge onto the atomization air barb on the air
cap.
Figure 2: Locate Atomization Air Pressure Gauge On Item
2
Figure 3: Locate Atomization Air Barb Fitting On Test Air
Cap
Figure 4: Connect Atomization Air Gauge to Atomization
Air Fitting
79651-00 Installation and Setup Kit