Finish Thompson FM2000 Series User Manual
Page 7
d) When finished, press the button. The screen changes to the RATE 2 (“2” is in left corner of display) screen.
Do no make changes on this screen. Go to the next screen by pressing the button.
e) The screen changes to the RATE 3 (“3” is in left corner of display) screen. Do no make changes on this screen. Go to the next screen by
pressing the button.
f) The screen changes to the Total 1 (“1” is in left corner of display) screen. Enter the Total Scale Factor from Step four.
g) Total Scale Factor from “Step Four “
h) Press the button to select the digit to be modified. The selected digit will blink. The decimal point will blink after all the numbers have
been cycled through. Do not change the decimal point.
i) Press the button to modify the selected digit. Repeat the process until all digits have been modified.
j) To save setting and exit Programming Mode, press and hold the button for at least two seconds.
NOTE: There are two additional screens that are not required for calibration that have been skipped by exiting at this point.
Note: To verify that the meter is properly calibrated, repeat Step one. If not, repeat calibration process. Return the Rate Scale Factor and Total
Scale Factor to factory settings prior to repeating steps one through six.
Disabling the Front Panel Programming Mode:
The programming mode can be disabled by using a jumper to prevent changing of parameters, for instance after the meter has been field
calibrated.
To disable the Front Panel Programming Mode, remove four Phillips head screws from front of meter. Remove cover to expose meter internals.
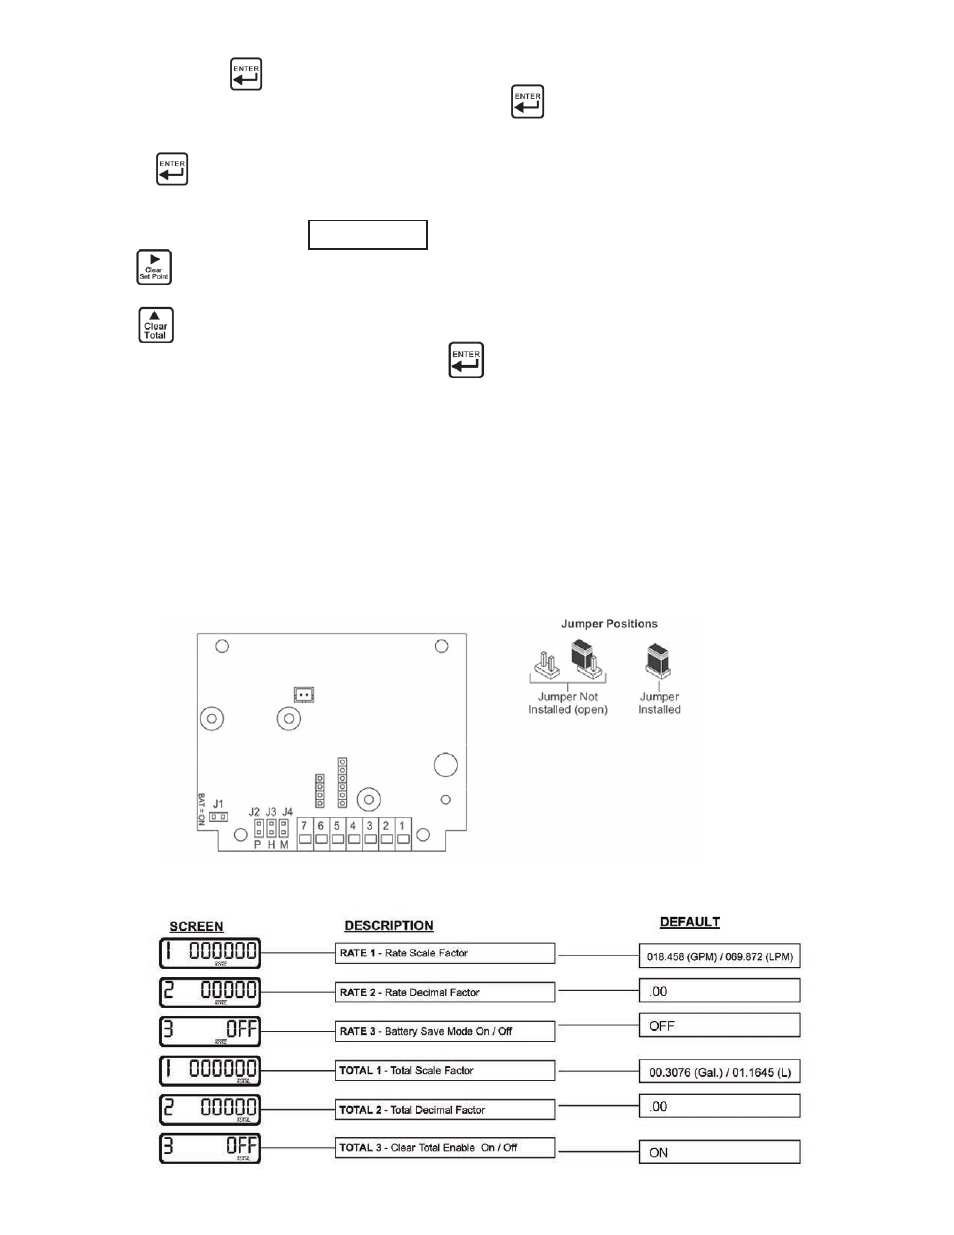
Install jumper on J2 (“P” is also underneath). See Figure 1 below.
Figure 1
5
Figure 2 - Factory Default Chart