Instructions, Owner service, Tractor requirements and preparation – Farm Star SRTC-406A User Manual
Page 19: Caution, Warning, Danger, Safety . . . you can live with it, Continued) blade servicing, Shear bolt replacement, Important
25
18
TRACTOR REQUIREMENTS
AND PREPARATION
The models STTC-404A, SRTC-405A and SRTC-406A
Standard Duty Cutters require a Category I 3-pt. hitch
tractor of at least 20 horsepower or up to 45 horsepower
and equipped with a 540 rpm PTO (power takeoff) in
good working condition.
It is recommended that only tractors with wide front
axles be used with this cutter. Tricycle front wheel
arrangements are inherently unstable and tractor
roll-over accidents are more likely to occur.
The tractor also needs lift arm stabilizer bars or sway
blocks to control side movement of the cutter.
Check the tractor’s 3-pt. hydraulic lift system. Refer to
your tractor operator’s manual or dealer for any adjust-
ments necessary to put the hydraulic system in good
working order. (I&T shop manuals will list most specifica-
tions and adjustment instructions - available from most
farm equipment dealers.)
Be sure tires and rims are in good condition. Inflate tires
to the proper recommended air pressure.
All tractors that are not equipped with a “live” power
takeoff (PTO) need to be equipped with an over-running
PTO clutch attachment.
Check the tractor master shield over the PTO stub shaft.
Make sure it is in good condition and fastened securely
to the tractor. Purchase a new shield if old shield is
damaged or missing. (You may have to use a tractor
salvage yard for replacement parts on older tractors.)
Power unit must be equipped with ROPS or ROPS cab
and seat belt. Keep seat belt securely fastened. Falling
off power unit can result in death from being run over or
crushed. Keep foldable ROPS systems in “locked up”
position at all times. Contact your local dealer for a ROPS
for your tractor.
CAUTION!
Be sure your tractor is in good condition. Read all
the safety precautions and make sure all tractor
operators are familiar with the safety rules of
operation.
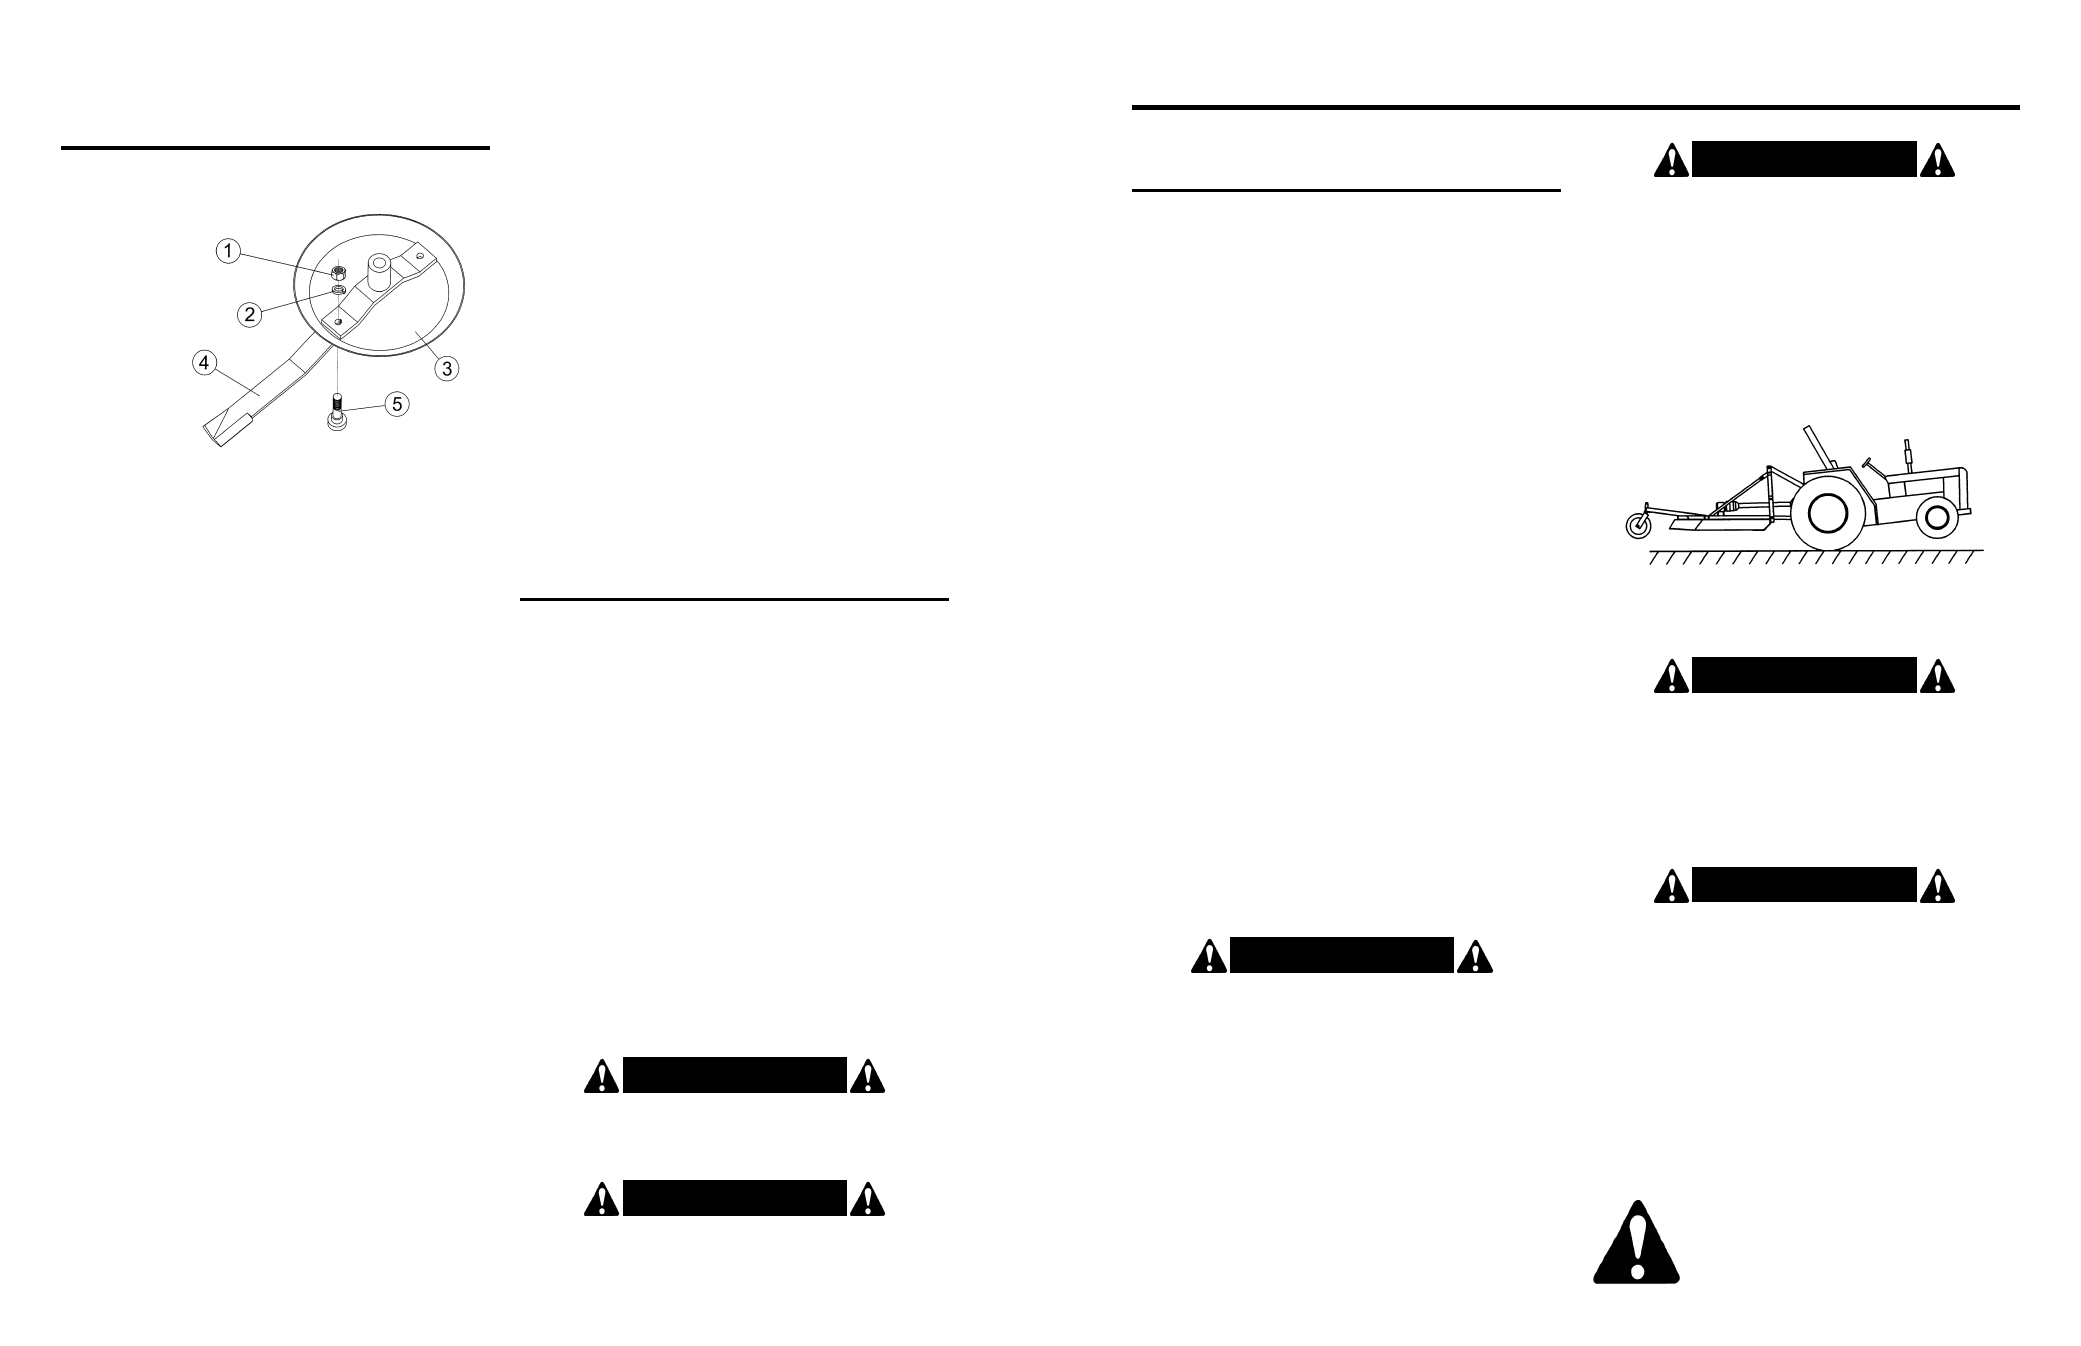
Figure 1. Tractor Stability
WARNING!
When using the unit, a minimum 20% of tractor and
equipment weight must be on tractor front wheels.
Without this weight, tractor could tip up, causing
possible loss of control and possible personal injury
or death. The weight may be attained with a front end
loader, front wheel weights, ballast in tires or front
tractor weights. When attaining a minimum 20% of
tractor and equipment weight on the front wheels,
you must not exceed the ROPS weight certification.
Weigh the tractor and equipment. DO NOT GUESS
OR ESTIMATE!
WARNING!
A heavy load can cause instability in driving a
tractor. Make sure the front of the tractor is properly
counterbalanced with weights. Always drive slowly
– especially around turns. An unstable tractor could
steer badly and possibly tip over, causing injury or
death.
DANGER!
FOR AGRICULTURAL USE ONLY!
When this equipment is operated in populated areas
or other areas where thrown objects could injure per-
sons or property, full chain or rubber shielding
(which is designed to reduce the possibility of
thrown objects) must be installed. If this machine is
not equipped with full chain or rubber shielding,
operation must be stopped when anyone comes
within several hundred feet.
NOTE: Optional chain shield kits are listed on page
23.
SAFETY . . .
YOU CAN LIVE WITH IT!
INSTRUCTIONS
The operator is responsible for the safe operation of this
cutter. The operator must be properly trained. Operators
should be familiar with the cutter and tractor and all safe-
ty practices before starting operation. Read the safety
rules and safety signs on pages 5-17.
This standard duty cutter is designed for grass and
weed mowing and shredding.
Recommended mowing speed for most conditions is
from two to five mph.
OWNER SERVICE
(continued)
BLADE SERVICING
BLADE REMOVAL
(Figure 7)
1. Nut, Blade Lock
2. Lockwasher
3. Blade Pan
4. Blade
5. Bolt, Blade
Figure 7. Blade Installation
SHEAR BOLT REPLACEMENT
Remove driveline shield bell.
IMPORTANT: Avoid shear bolt failure at start up by
engaging the PTO slowly at low engine rpm.
Make sure the input shaft of the gearbox is greased.
This reduces the chance of the PTO shaft yoke from
galling to the input gearbox shaft if the shear bolt should
break.
Rotate driveline to align holes in yoke and shaft. Install
shear bolt and secure with locknut. Replace driveline
shield bell.
If necessary remove sheared bolt with hammer and
punch and realign holes in yoke and shaft.
Disconnect driveline from tractor PTO.
It is necessary to gain access to bottom side of cutter
for blade removal. Raise cutter and block securely.
Align crossbar (3) with blade access hole in the cutter
deck. Remove nut (1) and lockwasher (2) then carefully
drive bolt (5) out of crossbar.
Insert blade bolt (5) through blade, align key on blade
bolt with keyway in blade beam and push blade bolt
through blade beam. Insert lockwasher (2) and nut (1)
through blade access hole in the cutter deck, install on
bolt (5) and tighten to 350 lbs.-ft.
Repeat for opposite blade.
Sharpen both blades at the same time to maintain bal-
ance. Follow original sharpening pattern. Do not sharpen
blade to a razor edge, but leave at least a
1
/
16
” blunt edge.
Do not sharpen back side of blade.
Rotate blade beam (3) and repeat for opposite blade.
Always replace or sharpen both blades at the same
time.
Inspect blade bolt (5) for nicks or gouges; replace if any
are found. Insert bolt through blade. Blade should swivel
on bolt. Determine cause if it does not and correct.
Align blade beam (3) with blade access hole in the cut-
ter frame. Apply a liberal coating of Never Seez
®
or equiv-
alent to blade bolt and blade beam hole. Make sure blade
is offset away from cutter.
Never Seez is a registered trademark of the
Never Seez Corporation.
WARNING!
FAILURE TO USE CORRECT SIZE SHEAR BOLT
MAY CAUSE PERSONAL INJURY OR DEATH.
WARNING!
FAILURE TO INSTALL RETAINING CLIP WILL
ALLOW DRIVELINE TO SWING FREELY IF BOLT IS
SHEARED CAUSING POSSIBLE INJURY OR DEATH.
IMPORTANT
If blade bolt (5) is seized in blade beam and extreme
force will be required to remove it, support blade
beam from below to prevent gearbox damage.
IMPORTANT
When sharpening blades, grind each blade the same
amount to maintain balance. Replace blades in pairs.
Unbalanced blades will cause excessive vibration
which can damage gearbox bearings. Vibration may
also cause structural cracks to cutter.
IMPORTANT
Always use approved
1
/
2
” NC x 3” grade 2 shear bolt
as a replacement part. Using a hardened bolt or
shear pin may result in damage to driveline or
gearbox.
IMPORTANT
Blade beam rotation is counter-clockwise when
looking down on cutter. Be sure to install blade cut-
ting edge to lead in counter-clockwise rotation.
BLADE SHARPENING