Farm Star HK-1132 User Manual
Page 7
5
6
Fig. 4 for HK-426 & HK-432
Remove the bolt securing the PTO engagement lever.
Place the top link bracket against the tractor housing and
secure it in place with the
5
/
8
” - 11 x 1
3
/
4
” bolts and
5
/
8
”
lockwashers. Bolt the PTO engagement lever to the
small block on the top link bracket with the same bolt
removed with it. Attach the top link to the top link bracket
using the pin and linchpin provided.
Fig. 5, 6, 7, 8 & 9 for HK-526, HK-626, HK-632,
HK-726, HK-732, HK-826, HK-1126 & HK-1132
Place the top link bracket against the tractor housing
and bolt it in place with the bolts and lockwashers pro-
vided. Attach the top link to the top link bracket with the
pin and linchpin provided.
Fig. 10 for HK-1026 & HK-1032
Place the top link bracket into position. Secure the R.H.
end to the leveling screw hammer strap arm with the two
(2)
5
/
8
” x 2” carriage bolts. The L.H. end of the top link
bracket bolts to the left side of the tractor differential
housing with the two (2)
3
/
4
” bolts. NOTE: Use care in
routing the hose to the hydraulic lift cylinder. Be sure it
doesn’t chafe against the top link bracket. Wrapping a
section of the hydraulic hose with a protective cover may
be the best protection.
I N S T R U C T I O N S
(continued)
When using a 3 pt. hitch rear blade in a reverse
position (bulldozing), use extra care. DO NOT RAM
BLADE into dirt or packed snow piles! Tractor lift
arms and the blade are not built to take high impact
loads in this position. RAMMING backwards can also
dislodge operator from seat and/or tractor controls,
resulting in possible serious injury or death.
Always ease the tractor into the load. It may be
necessary to reposition and take less “bite” on the
material to move it safely.
Watch for and avoid hidden obstructions, i.e.,
buried pipes, rocks, concrete piers, uneven con-
crete slabs, stumps, etc., when operating. This is
especially of concern when removing snow.
C A U T I O N !
A heavy load can cause instability in driving a trac-
tor. Make sure the front of the tractor is properly
counter-balanced with weights. Always drive slowly
– especially around turns. An unstable tractor could
steer badly and possibly tip over, causing injury or
death.
W A R N I N G !
Tractor Stability
W A R N I N G !
When using a 3 pt. hitch, a minimum 20% of tractor
and equipment weight must be on tractor front
wheels. Without this weight, tractor could tip up,
causing possible loss of control and possible per-
sonal injury or death. The weight may be attained
with a front end loader, front wheel weights, ballast
in tires or front tractor weights. When attaining a
minimum 20% of tractor and equipment weight on
the front wheels, you must not exceed the ROPS
weight certification. Weigh the tractor and equip-
ment. DO NOT GUESS OR ESTIMATE!
Read manual before operating.
C A U T I O N !
S A F E T Y T R A I N I N G
• Know your controls and how to stop tractor, engine,
and PTO quickly in an emergency. READ THIS
MANUAL AND THE ONE PROVIDED WITH YOUR
TRACTOR.
• To avoid accident or injury, do not allow anyone to
operate this equipment without proper instructions.
Any person who operates this equipment must be
instructed in and be capable of the safe operation of
the tractor, implement and all controls.
• Do not allow children to operate this machine.
W A R N I N G !
MAKE SURE THAT ALL OPERATING AND SERVICE
PERSONNEL
KNOW THAT IN THE EVENT
HYDRAULIC FLUID PENETRATES THE SKIN, IT
MUST BE SURGICALLY REMOVED WITHIN A FEW
HOURS BY A DOCTOR FAMILIAR WITH THIS FORM
OF INJURY, OR GANGRENE MAY RESULT.
I N S T R U C T I O N S
(continued)
W A R N I N G !
O P E R AT I O N
Make sure all operators have read all the safety
warnings and precautions in this manual and those in the
tractor operator’s manual.
Be sure tractor is properly counterbalanced with
weights before attempting to lift any load or implement.
Since the tractor prong sockets and prongs can only
be moved apart an inch or two, you may have to use the
following procedure to connect to the implement. Back
the tractor to within 3-5 inches of the implement. Then
get off the tractor and unlock the prong latch and partially
pull the prong assembly from the prong socket. This
should allow you enough movement to slide the ball on
the end of the prongs on to the implement pull pins. Then
slowly back the tractor to reconnect the prong arms into
the prong sockets.
On a few pieces of equipment, it may be necessary to
attach the prongs to the implement first and then connect
to the tractor.
You may want to consider adding a 3 pt. Quick Hitch
to your tractor to make connecting and unhooking imple-
ments easier. A Quick Hitch will allow you to connect or
unhook most implements from the tractor seat.
These kits are designed to lift up to 2000 lbs., but, of
course, lifting capacity is dependent on the size of the
tractor and on the pressure and condition of the tractor’s
hydraulic system. You will also find that the closer the
load is kept to the tractor, the more you will be able to lift.
Safety is a primary concern in the design and
manufacture of our products. Unfortunately, our
efforts to provide safe equipment can be wiped out
by a single careless act of an operator.
In addition to the design and configuration of
equipment, hazard control and accident prevention
are dependent upon the awareness, concern, pru-
dence and proper training of personnel involved in
the operation, transport, maintenance and storage
of equipment.
It has been said, “The best safety device is an
informed, careful operator.” We ask you to be that
kind of an operator.
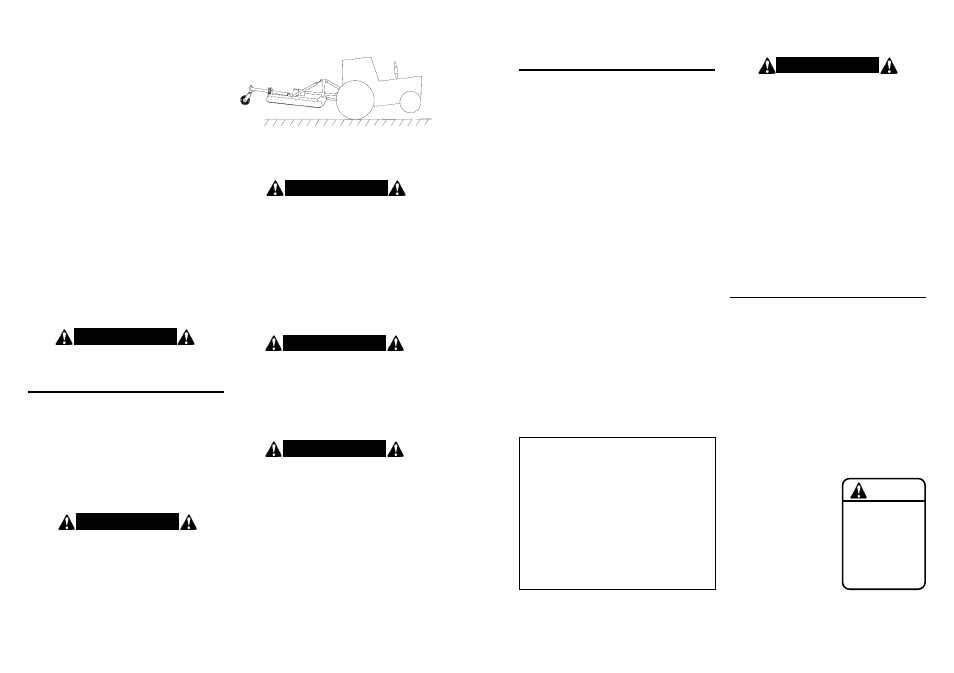
WARNING
Pull from drawbar
or 3-Pt. lower lift
arms only. Failure
to hitch properly
could cause tractor
flip-over, resulting
in serious injury or
death.
101082
S A F E T Y
S I G N
M A I N T E N A N C E
Inspect the hitch kit for loose, damaged or worn parts
and adjust or replace if needed.
Repaint parts where paint is worn or scratched to
prevent rust.
Check all bolts and nuts to be sure they are tight.
Periodically oil the following:
a. Top link (upper 3rd link) threads
b. Ball sockets
c. Leveling assembly threads
REPLACE SAFETY SIGNS
IF DAMAGED OR MISSING!
When completing a maintenance or service function,
make sure all safety shields and devices are installed
before placing unit in service.
▲
Keep clear of rotating parts; stay on tractor seat
until all motion has stopped.
▲
Be sure tractor engine is off and key is removed
before making any adjustments.
▲
Do not get under machine to make measurements
or adjustments without securely blocking imple-
ment first.
▲
Always wear relatively tight and belted clothing to
avoid entanglement in moving parts. Wear sturdy,
rough-soled work shoes and protective equip-
ment for eyes, hands, and hearing. Never operate
tractor in bare feet, sandals, or sneakers.
▲
Operate only in daylight or good artificial light.
▲
Ensure implement is properly mounted, adjusted
and in good operating condition.
▲
Ensure that all safety shielding and safety signs
are properly installed and in good condition.