Pillar and beam assembly, Continued – Fairbanks BPP2000 Portable Platform Scale User Manual
Page 15
Section 2: Installation
Pillar and Beam Assembly,
Continued
5. Place the cast iron Beam Support (
#39
) over the Steelyard Rod with the hook
facing to the right (when facing the scale platform).
6. Insert the Beam Cap (
#45
) onto the pillar rods.
• The long side will be to the right.
7. Place Washers over the pillar rods, and then screw on the
two (2) Acorn Nuts (
#44
).
• Hand-tighten only, at this time.
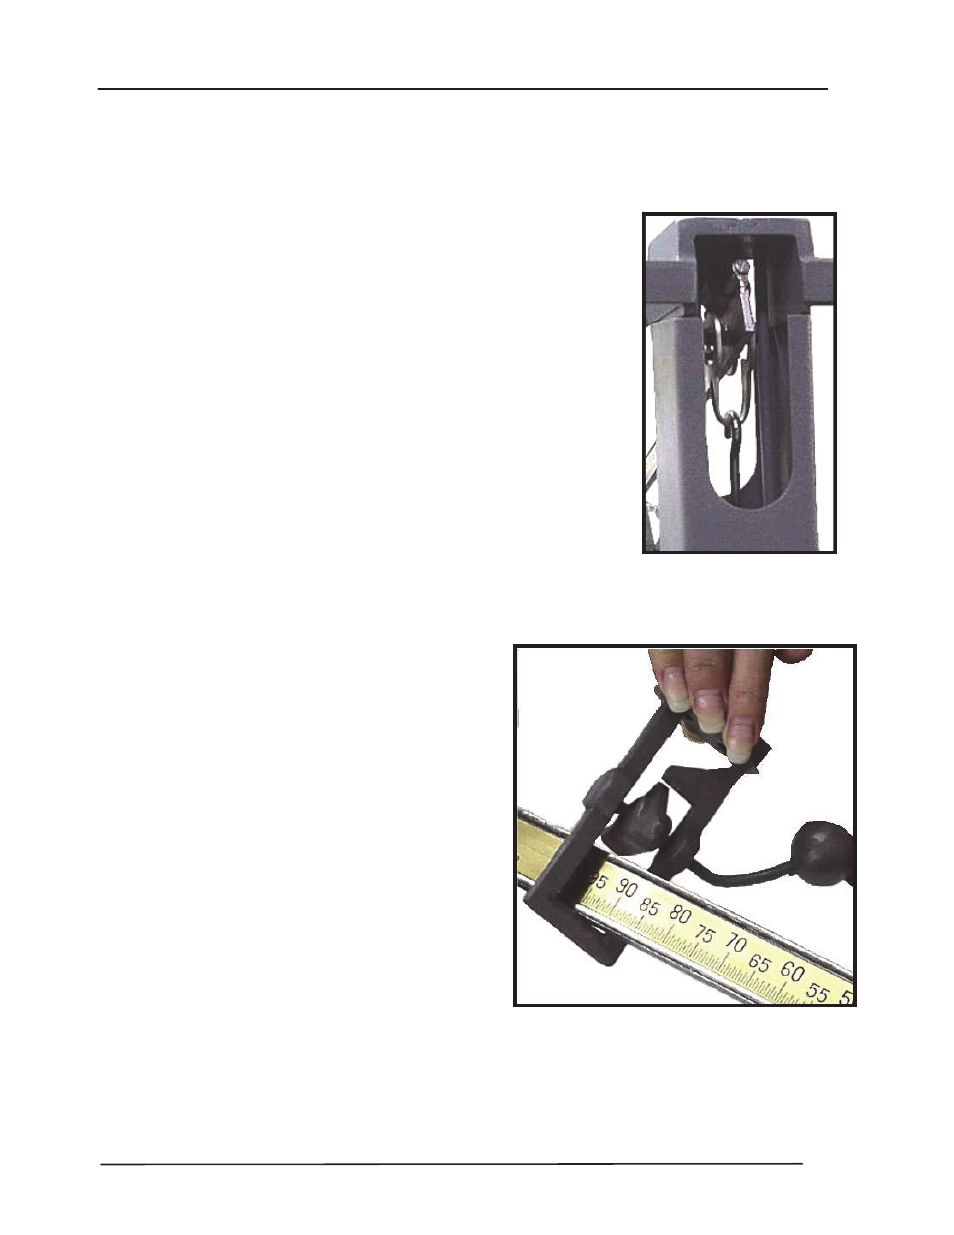
8. On the butt end on Beam Assembly, hook the bottom
Load Loop to the Steelyard Rod.
• See
image
to
the
right.
9. Pulling the Beam up, hook the top Fulcrum Loop (of the
Beam Assembly) to the hook on the Beam Support (
#39
).
• The beam should hang loosely from the two hooks.
10. Insert the Beam Lock (
#43
) onto the front end of the
Beam Assembly.
• See
image
to
the
right.
Hook the bottom Load Loop
to the Steelyard Rod. Pulling
the Beam up, hook the top
Fulcrum Loop.
11. Slide the Beam Lock (
#43
) over the
Beam and align it with the two (2) holes
in the Beam Cap (
#45
).
12. Fasten the Beam Lock to the Beam Cap
with the two (2) Hex Bolts (
#46
).
• The
handle
faces
the
scale
platform.
13. Hang the Counterpoise Assembly
(
#54
) from the Beam Tip Loop.
14. Set the Sliding Poise (
#52
) to
zero
and
hand tighten the screw on its under-side.
• Check that the beam is straight and does
not touch the sides of the Beam Lock.
• Shift the Cap if necessary to straighten,
and then tighten the acorn nuts securely
with an adjustable wrench.
03/13 15
50699
Rev.
4
Insert the Beam Lock onto the end of the Beam
Assembly, then align the Beam Lock under the
two holes in the Beam Cap. Fasten this
assembly with the two Hex Bolts.