Assembly – Elite Screens Evanesce Tension (U.S) User Manual
Page 8
8
Rev.122411-AS
www.elitescreens.com
Assembly
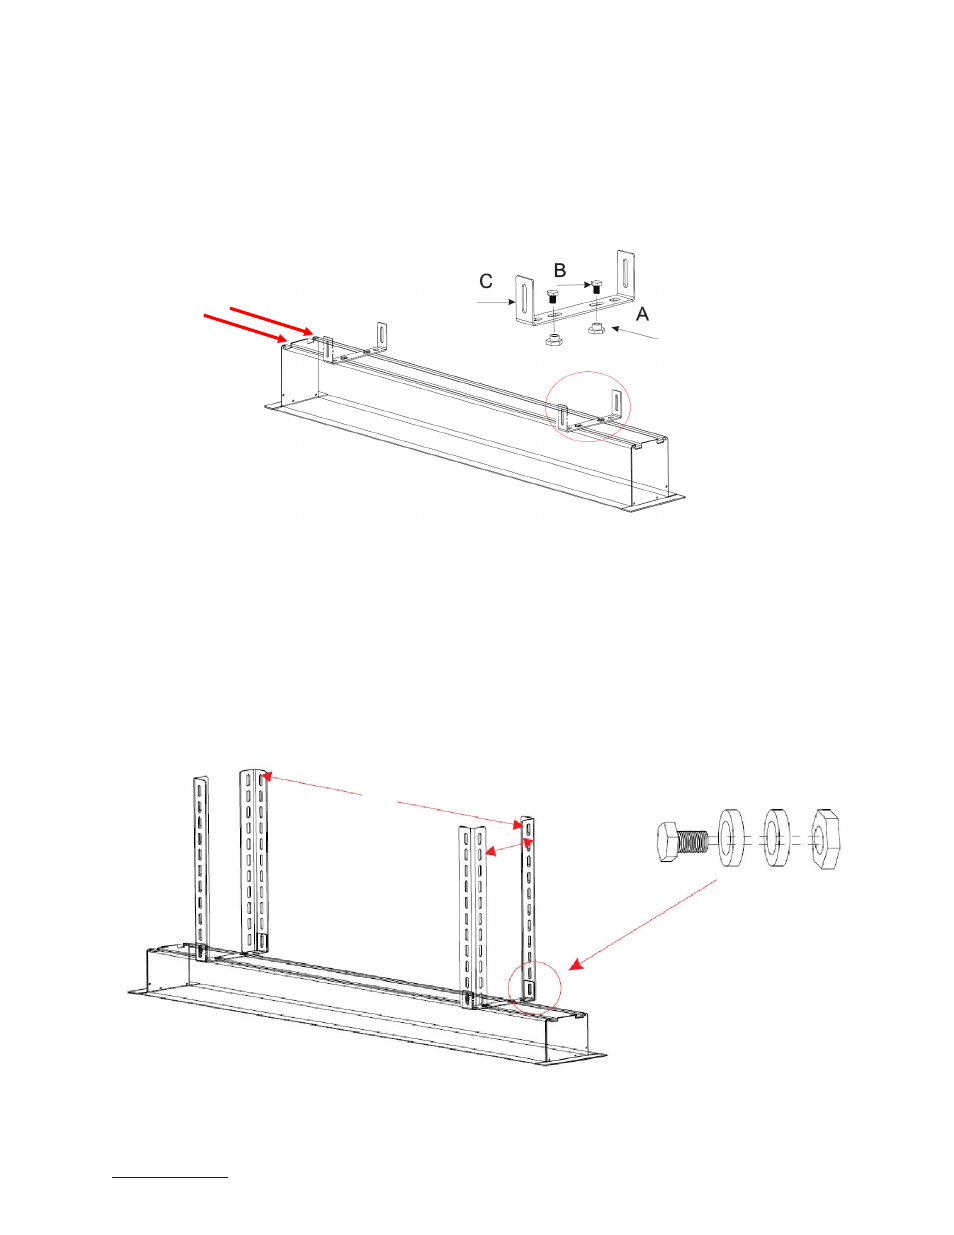
2. Insert the Hex Screw (B) through the Hanging Bracket’s (C) screw hole and secure with the Case
Rail Nut (A). Slide the Hanging Bracket (C) through the railing on top of the case.
3. Place the Suspension Bar (D) on the Hanging Bracket (C) and align with the hole as shown below.
Secure the Suspension Bar (D) with the Hex Screw (B), Washer (E) and the Hex Nut (F). Install the
Suspension Bars (D) to your ceiling according to their distance.
D
B
E
E
F
See also other documents in the category Elite Screens Multimedia:
- Manual B Series (2 pages)
- Manual Series (8 pages)
- Manual SRM Series (8 pages)
- Manual SRM Pro Series (5 pages)
- Spectrum Series (9 pages)
- Spectrum Series (8 pages)
- CineTension2 Series (10 pages)
- Evanesce Tension B Series (9 pages)
- VMAX2 Series (9 pages)
- Spectrum2 Series (7 pages)
- Starling Series (4 pages)
- Evanesce Tension (EU) (10 pages)
- VMAX Plus Series (8 pages)
- Evanesce Series (7 pages)
- Starling Tension Series (5 pages)
- Evanesce Plus Series (6 pages)
- Home2 Series (9 pages)
- Evanesce B Series (9 pages)
- PowerMax Series (16 pages)
- SableFrame Series (7 pages)
- Lunette Series (9 pages)
- Starbright 7 Series (13 pages)
- SableFrame2 Series (7 pages)
- ezFrame Plus Series (8 pages)
- Tripod Series (6 pages)
- QuickStand Series (10 pages)
- Pico Sport Series (2 pages)
- ezCinema Series (7 pages)
- DIY Series (6 pages)
- Yard Master(Front) (3 pages)
- ezCinema Plus Series (7 pages)
- DIY Wall Series (2 pages)
- Yard Master(Rear) (5 pages)
- Reflexion Series (6 pages)
- PicoScreen™ Series (6 pages)