Welch Vacuum 2028 Self-Cleaning Dry Vacuum System User Manual
Page 19
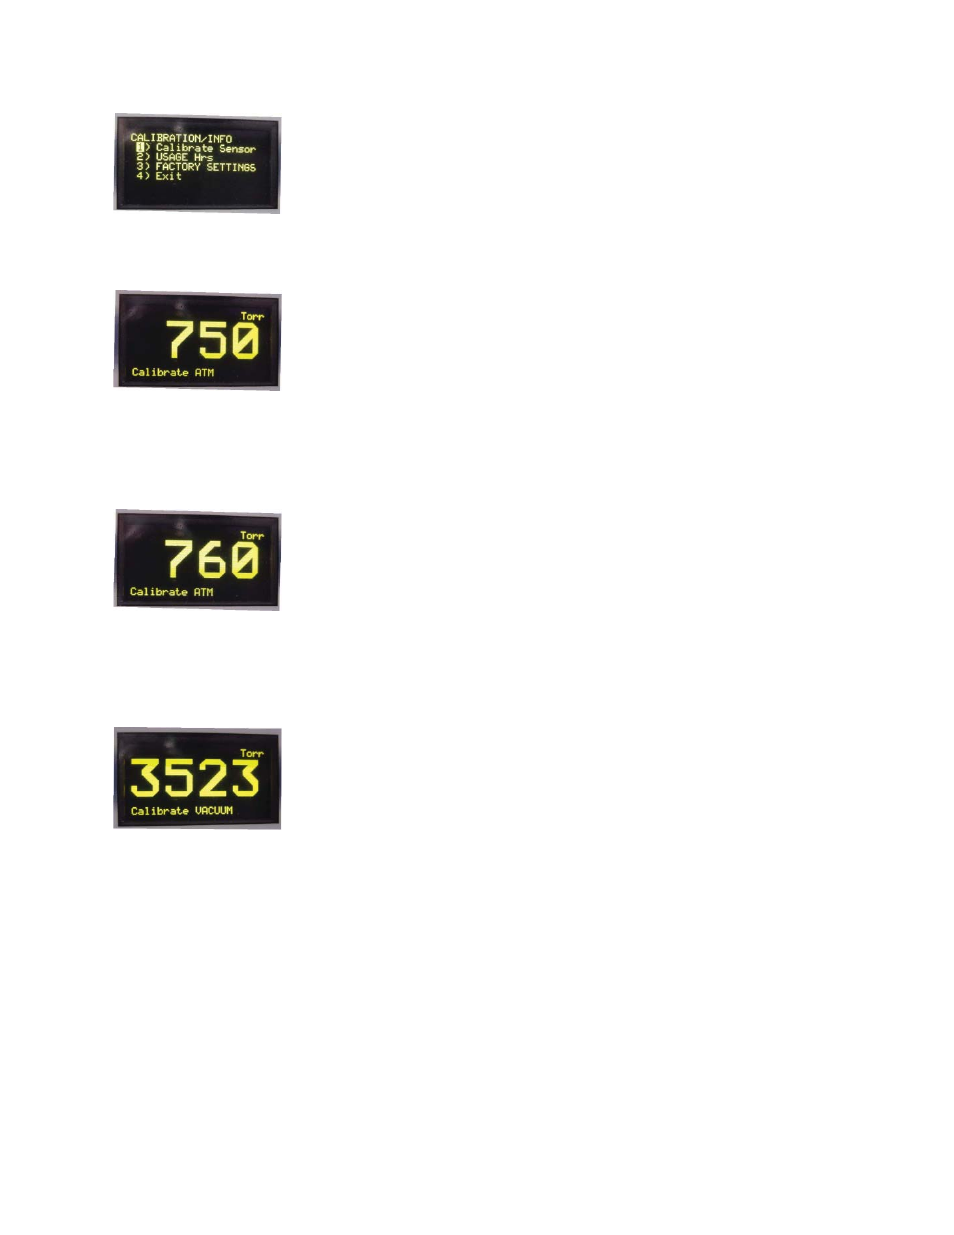
Step 4: Use the Vent button to select Calibrate Sensor (menu item 1).
When Calibrate Sensor is selected press the power button.
The unit will now go into calibration mode with Calibrate ATM in the bottom line of the display and 750
in the main line.
Step 5: Use the VENT button to change the display so that the correct atmospheric pressure is
displayed. Each press of the Vent button will increment the display by one. When the display reaches
800 it will go to 700 and start going up again. When the correct pressure is reached press the Power
button. The top end of the sensor is now calibrated for atmospheric pressure.
Step 6: The pump will now turn on and the Vent valve will close. Calibrate vacuum will be displayed
in the bottom line and a value above 3000 in the main line depending on the vacuum. Make sure the
variable leak valve and Gas Ballast are completely closed. Attach the pump to the secondary gauge
with bleed valve attached and adjust pressure to 3 ± .1 Torr.
Step 7: When the vacuum on the secondary gauge is 3 Torr press the Power button. This will calibrate
the bottom end of the vacuum sensor. The calibration message in the bottom line will go away and the
main line will now display the vacuum in Torr. Calibration is now completed.
19