Assembly, Portion control, Disassembly – Server INS User Manual
Page 2: Safety guidelines
ASSEMBLY
ALWAYS CLEAN UNIT THOROUGHLY BEFORE FIRST
USE. SEE DISASSEMBLY AND CLEANING.
ᕡ
SET PORTION CONTROL. SEE PORTION CONTROL.
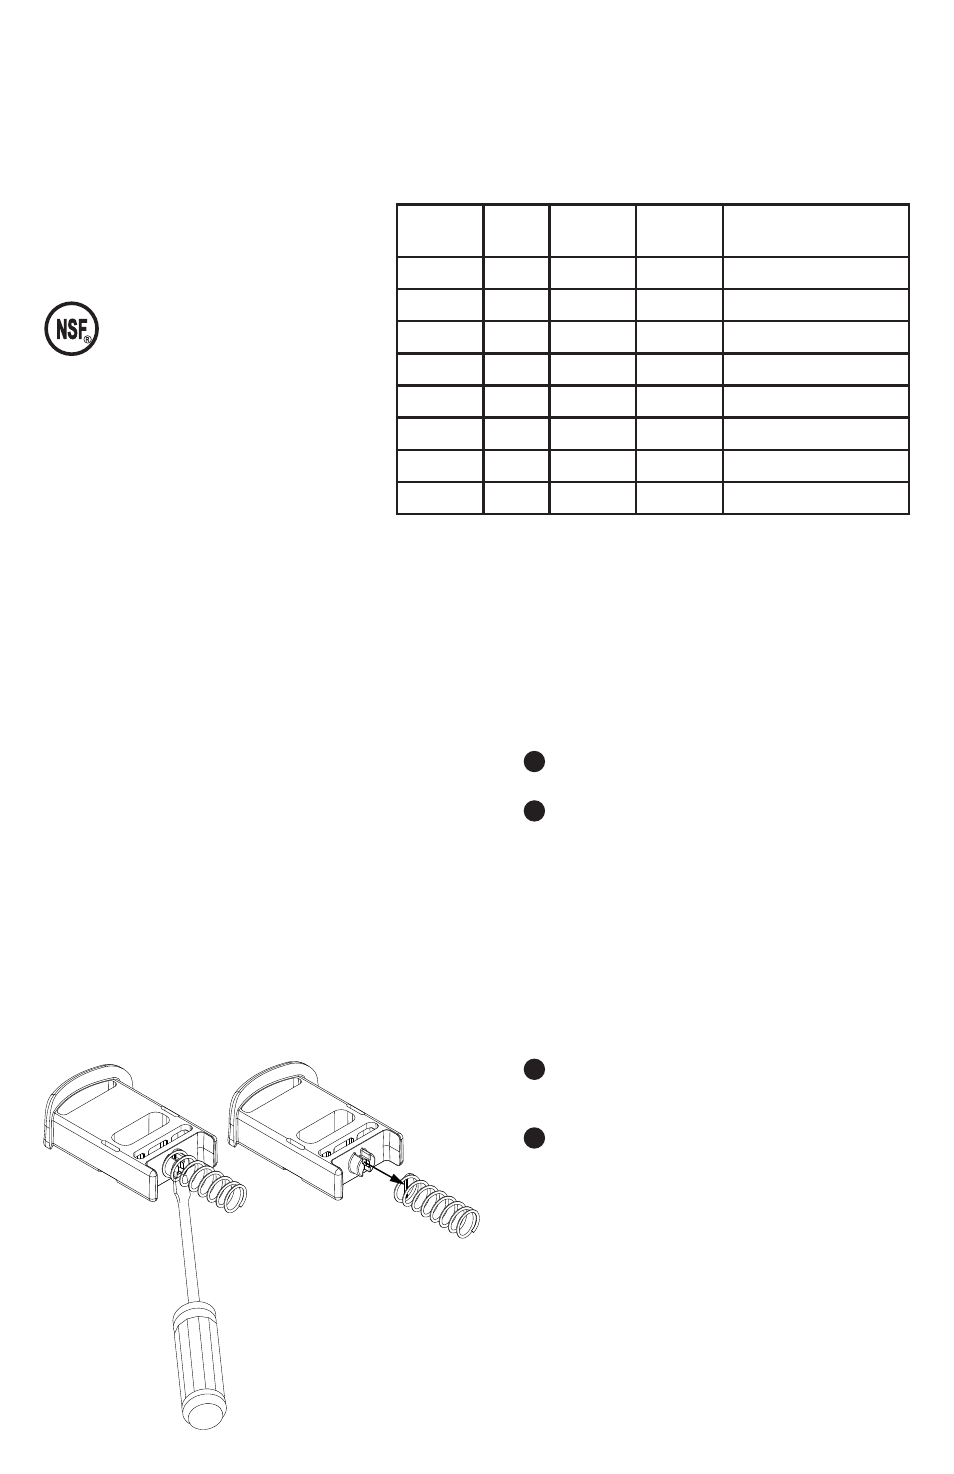
ᕢ
INSTALL SPRING ONTO CIRCULAR TAB OF
TRIGGER, IF NOT ALREADY INSTALLED.
A
Install straight end of spring into groove in
center of circular tab of trigger.
B
8VHDÀDWKHDGVFUHZGULYHUWRSUHVVGRZQRQ
straight end of spring to engage and snap
spring into circular tab of trigger.
ᕣ
INSTALL TRIGGER AND SPRING ASSEMBLY INTO
SLOT OF UNIT BODY.
• Set unit body upside down on countertop, with
slot on top, to assemble.
• Be careful to hold spring down so that it does not
spring up and out of unit body.
ᕤ
INSTALL CLOSER PLATE INTO UNIT BODY TO
SECURE TRIGGER AND SPRING ASSEMBLY.
A
Push trigger and spring assembly into unit
body until space is available for closer plate tab
to slide down into space.
B
Align groove of closer plate with key tab on
inside rim of unit body.
ᕥ
INSTALL SPREADER ONTO UNIT BODY TO SECURE
CLOSER PLATE.
• Rotate spreader clockwise to tighten.
ᕦ
FILL UNIT WITH PRODUCT TO DISPENSE.
• 5H¿OOZLWKSURGXFWZKHQSURGXFWLVGLVSHQVHG
GRZQWRUH¿OOOLQH
ᕧ
INSTALL LID ONTO UNIT BODY.
• Rotate lid clockwise to tighten.
PORTION CONTROL
Set portion control by selecting appropriate trigger as-
sembly. Trigger assembly includes trigger and spring.
Trigger part number and portion amount is stamped on
underside of each trigger.
DISASSEMBLY
ALWAYS CLEAN UNIT THOROUGHLY
BEFORE USE. SEE CLEANING.
ᕡ
REMOVE LID FROM UNIT BODY.
• Rotate lid counter clockwise to loosen.
ᕢ
EMPTY PRODUCT FROM UNIT.
• Tip over and pour product out of unit body.
ᕣ
REMOVE SPREADER FROM UNIT BODY.
• Rotate spreader counter clockwise to loosen.
ᕤ
REMOVE CLOSER PLATE FROM UNIT BODY.
• Set unit body upside down on countertop, with
removable parts on top, to disassemble.
• Push trigger and spring assembly into unit body
until space is available for closer plate tab to
release from space.
• Pull closer plate up and out of unit body.
ᕥ
REMOVE TRIGGER AND SPRING ASSEMBLY FROM
SLOT OF UNIT BODY.
• Be careful to hold spring down so that it does not
spring up and out of unit body.
ᕦ
REMOVE SPRING FROM CIRCULAR TAB OF
TRIGGER, ONLY IF NECESSARY FOR CLEANING.
• 8VHDÀDWKHDGVFUHZGULYHUWRSU\RIIVSULQJE\
pushing straight end of spring away and out of
groove in center of circular tab of trigger.
SAFETY GUIDELINES
According to food and safety regulations, most foods
must be stored and/or served at certain temperatures
or they could become hazardous. Check with local food
DQGVDIHW\UHJXODWRUVIRUVSHFL¿FJXLGHOLQHV
Be aware of the product you are
serving and the temperature the
product is required to maintain.
Server Products, Inc. can not be
responsible for the serving of
potentially hazardous product.
NSF International listed.
Optional Trigger Assemblies:
Trigger
Assembly
Trigger Color
Portion
Amount
Conversion
87126
87093 Green
1/2 tsp.
(.083 oz.) (2.465 mL)
87127
87097 Blue
1/3 tsp.
(.056 oz.) (1.642 mL)
87128
87098 Black
1/4 tsp.
(.042 oz.) (1.233 mL)
87129
87099 White
.15 tsp.
(.025 oz.) (0.739 mL)
87131
87104 Burgundy 1/8 tsp.
(.021 oz.) (0.616 mL)
87132
87105 Tan
1/16 tsp. (.010 oz.) (0.308 mL)
87133
87108 Pink
1/3 tsp.
(.056 oz.) (1.642 mL)
87134
87109 Yellow
1/3 tsp.
(.056 oz.) (1.642 mL)