Settings – Bosch TES50159DE VeroCafe Kaffeevollautomat schwarz User Manual
Page 28
Robert Bosch Hausgeräte GmbH
28
en
Information: Rinsing the i lter simultane
ously activates the setting for the change
i lter display (= LED
D
l ashes).
The i lter is no longer effective when the
change i lter display appears, or at the
latest after two months. It needs to be re
placed for reasons of hygiene and so that
there is no buildup of limescale (this could
damage the appliance). Replacement i lters
can be obtained from retailers (TCZ7003) or
from customer service (467873). If no new
i lter is inserted, change the setting for the
i lter (see "Water hardness”).
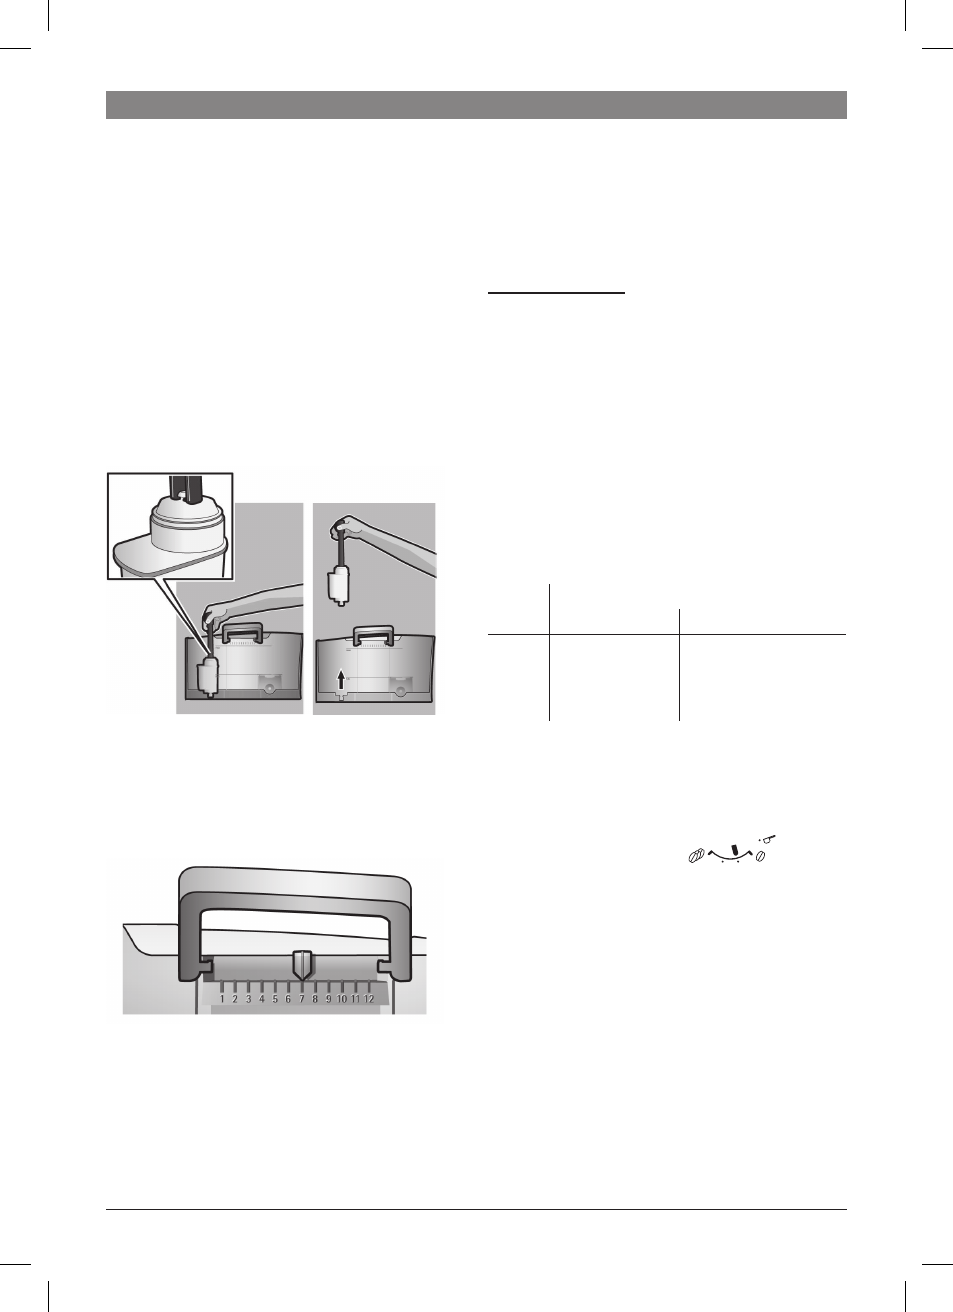
Information: You can use the i lter indicator
to mark the month in which you inserted the
i lter. You can also mark the month in which
you will need to replace the i lter next (at
the latest after two months).
Information: If the appliance has not been
used for a prolonged period (for example,
when you are on vacation), the existing i lter
should be rinsed before the appliance is
used again. To do so, dispense a cup of hot
water and pour it away.
Settings
You can customize the settings on the
appliance.
You can make the following adjustments:
Water hardness
The water hardness setting can be adjusted
on this appliance. It is important to set the
water hardness correctly so that the ap
pliance can accurately indicate when it is
time to run the descale process. The factory
setting for the water hardness is 4. You can
establish the water hardness either by us
ing the test strip provided or by asking your
local water provider.
Dip the test strip in the water briel y, shake
it gently and check the result after one
minute.
Level
Water hardness
German (°dH)
French (°fH)
1
2
3
4
17
814
1521
2230
113
1425
2638
3954
If you wish to change the default degree of
water hardness, or if you have inserted a
water i lter, proceed as follows:
1. Turn the rotary
knob (13) to position
2. Press and hold buttons
B
(11) and
A
(12) simultaneously for at least 5 sec
onds. The set water hardness is indi
cated by the number of LEDs that now
light up.
3. Now press the start button (10) repeat
edly until the required water hardness
is indicated, e. g., for water hardness 3,
LEDs
D
,
E
and
F
will light up.
4. Press and hold the start button (10) for
at least 5 seconds. The set number of
LEDs will light up to indicate that the se
lected water hardness has been saved
successfully.
TES501_1DE.indb 28
05.08.2011 15:34:47