Nova-Tech LMI Roytronic Series A Metering Pump User Manual
Page 25
25
MAINTENANCE
5.3
Liquifram
™
(Diaphragm) Replacement
ALWAYS wear protective clothing, face shield, safety glasses and gloves when working near
or performing any maintenance or replacement on your pump. See MSDS information from
solution supplier for additional precautions.
LMI metering pumps are designed for trouble-free operation, yet routine maintenance
of elastomeric parts is essential for optimum performance. This involves replacing the
Liquifram
™
, cartridge valves, O-rings, 4-FV cap assemblies and the injection check valve
spring. LMI recommends replacing these parts at least once a year; however, frequency
will depend on your particular application.
When replacing the Liquifram
™
, the cartridge valves, or O-rings, the injection check valve
spring should also be replaced (see next Section 5.4). A Spare Parts Kit or RPM Pro Pac
™
kit containing these parts may be obtained from your local distributor.
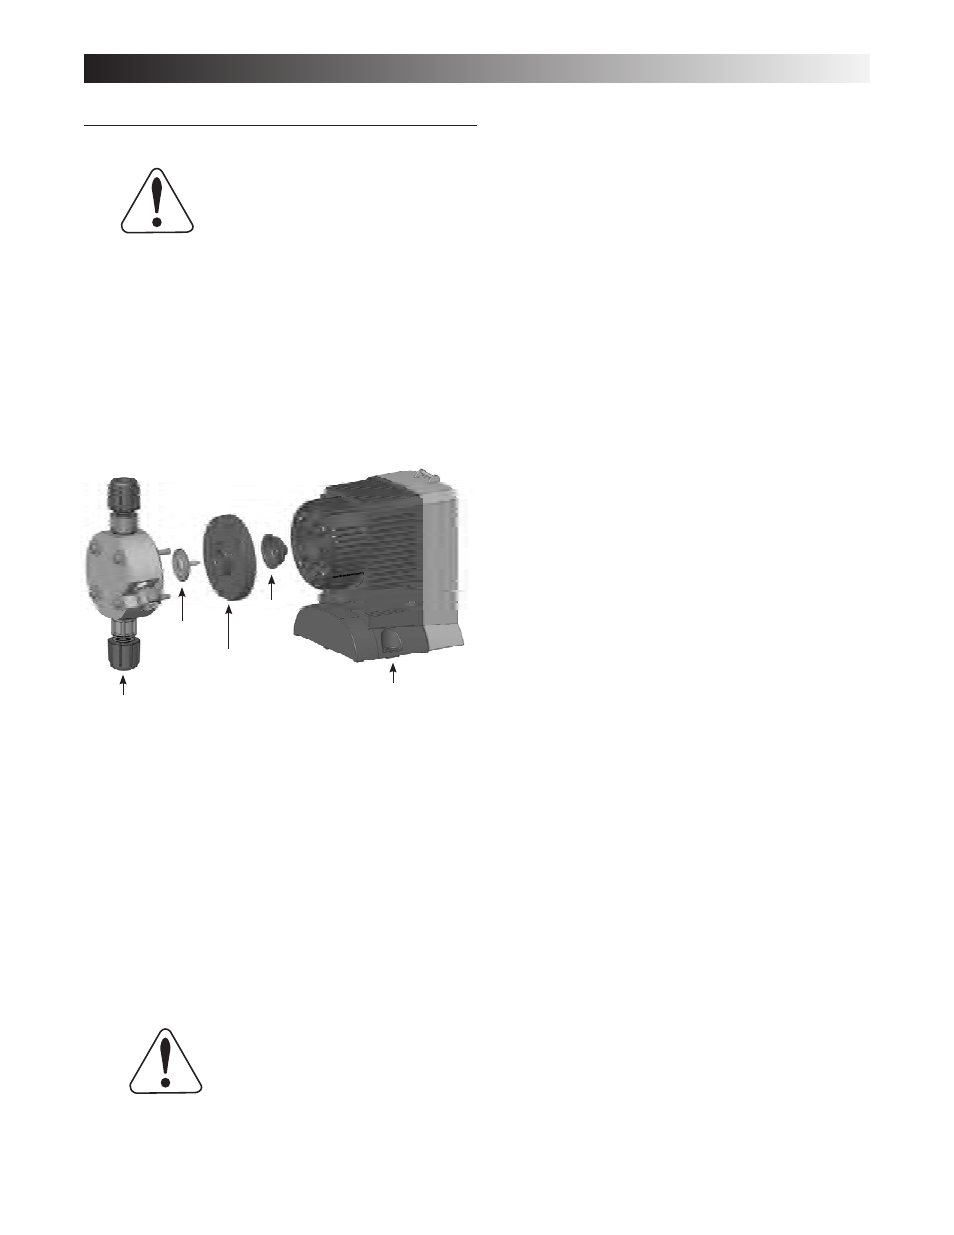
Replacing the Liquifram
™
:
1. Carefully depressurize, drain, and disconnect the
discharge line (see previous sections in this
manual).
2. Place the Foot Valve into a container of water or
other neutralizing solution. Turn the pump on to
flush the head assembly. Once the pump head has
been flushed, lift the Foot Valve out of the solution
and continue to pump air into the pump head until
the pump head is purged of water or neutralizing
solution.
If the liquid cannot be pumped due to Liquifram
™
rupture,
carefully disconnect the suction and discharge tubing
using protective clothing, gloves and face shield. Remove
the four screws and washers from the head and immerse
the head in water or other neutralizing solution.
3. Start the pump. While running, set the Stroke Adjustment Knob to 0% and turn the
pump off.
4. With the unit off, unscrew the Liquifram
™
by carefully grasping the outer edge and
turning it counter-clockwise Q. Discard old Liquifram
™
. Remove the Adapter Disk
(located behind the Liquifram
™
) and ensure that the diameter of the raised section is
the same as the diameter of the replacement Liquifram
™
.
5. Remove Adapter Disk and check condition of the Shaft Seal. Replace Shaft Seal if
necessary.
6. Replace the Adapter Disk so that the drain hole of the disk is oriented downward,
and the mounting holes line up with the mounting holes of the pump.
Be careful not to scratch the Teflon
®
face of the new Liquifram
™
.
7. Screw on the new Liquifram
™
clockwise P until turned all the way in. Start the pump
and turn the stroke knob to 100%. Stop the pump.
8. Remount the pump head using the four (4) screws and washers. Tighten in a criss-cross
pattern. After one week of operation, recheck the screws and tighten if necessary.
Head
Drive
Liquifram
™
Adapter Disk
Shaft
Seal