Nova-Tech CPWplus User Manual
Page 10
© Adam Equipment Company 2008
8
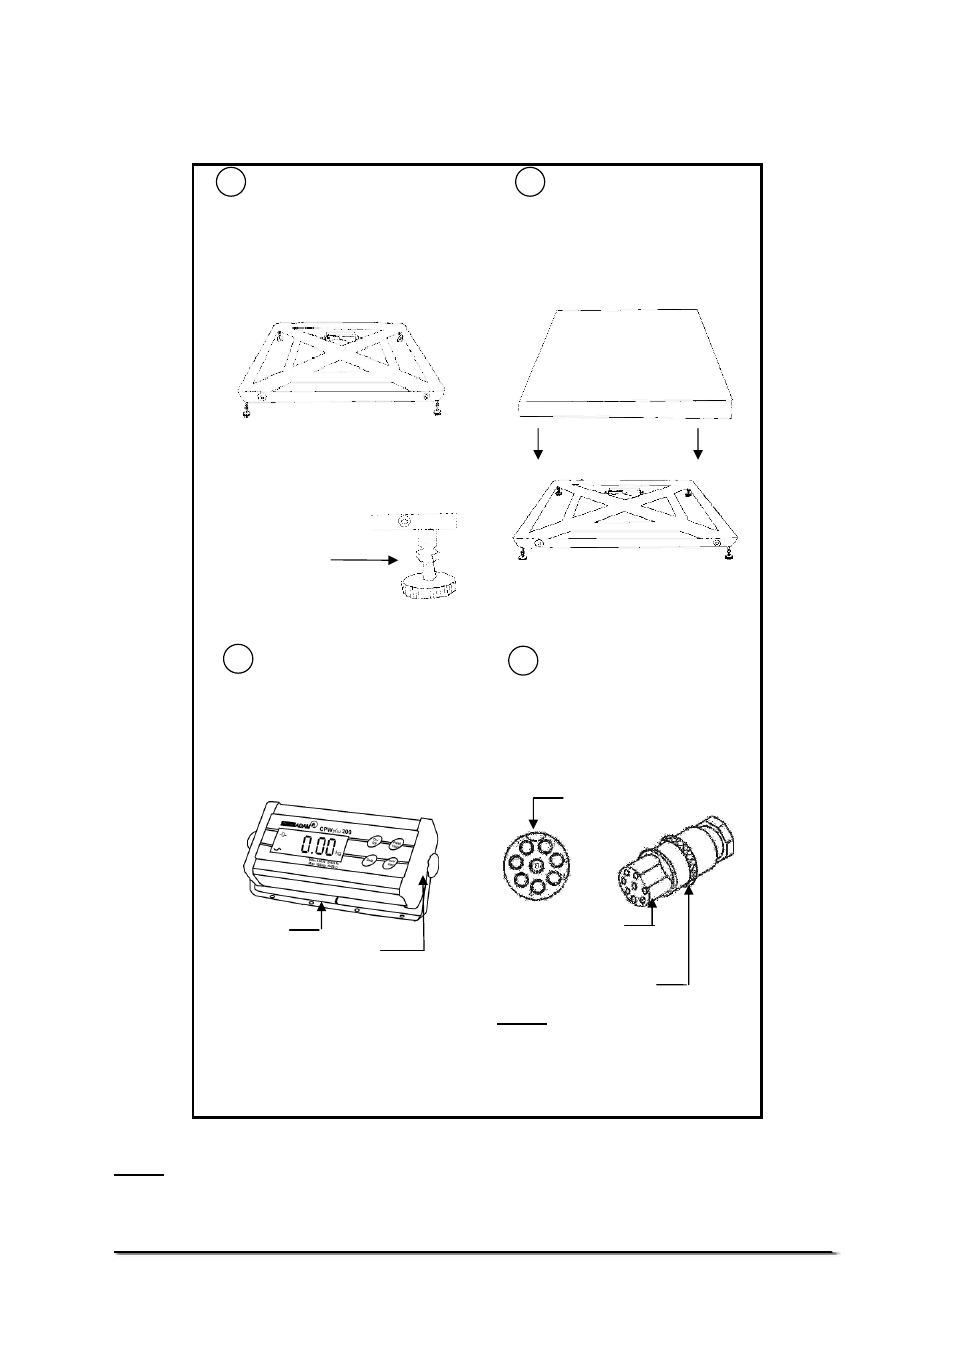
3.3.2 SETTING UP THE CPWplus
plus
plus
plus M & CPWplus
plus
plus
plus L SERIES
Remove the parts from the
packing carefully. Place the base
on a rigid floor.
Level the base using the four
adjustable feet.
Place the Stainless Steel pan
on the base, if it not already
assembled.
For CPWplus L, place the optional
rubber mat on the pan for animal
weighing.
The
indicator
is
separately
packed and comes attached to a
bracket with the help of two
thumb screws.
To adjust the angle of the indicator,
use the two thumb screws on the side
of the bracket that connects the
indicator. The Indicator can be placed
on any flat surface or mounted on the
wall.
Connect the cable attached to the
base to the connector at the rear
of the indicator. Tighten the ferrule
to secure the cable.
NOTE: When moving the scale,
take care to prevent bending of the
cable and connector too much as
over a period of time this can
weaken the wires in the connector
and cause malfunction.
NOTE: To re-charge the internal battery, connect the power supply module to the rear of the
indicator and apply power.
1
2
Adjustable feet
3
Thumb Screw
Bracket
4
Ferrule
Connector
on the
Indicator
Connector
attached to
the cable