Preparing the transceiver, 1 installing and removing the belt clip, 2 installing and removing batteries – MIDLAND Pacific User Manual
Page 23: English
7
ENGLISH
4. Preparing the transceiver
Make sure the following items are supplied in the package before
you start using your transceiver:
Transceiver;
•
Desk/wall support
•
NiMH battery pack
•
Belt clip;
•
Desktop charger along with adaptor;
•
2-way car lighter charger;
•
User manual;
•
If any of the above is missing or damaged contact your supplier
immediately.
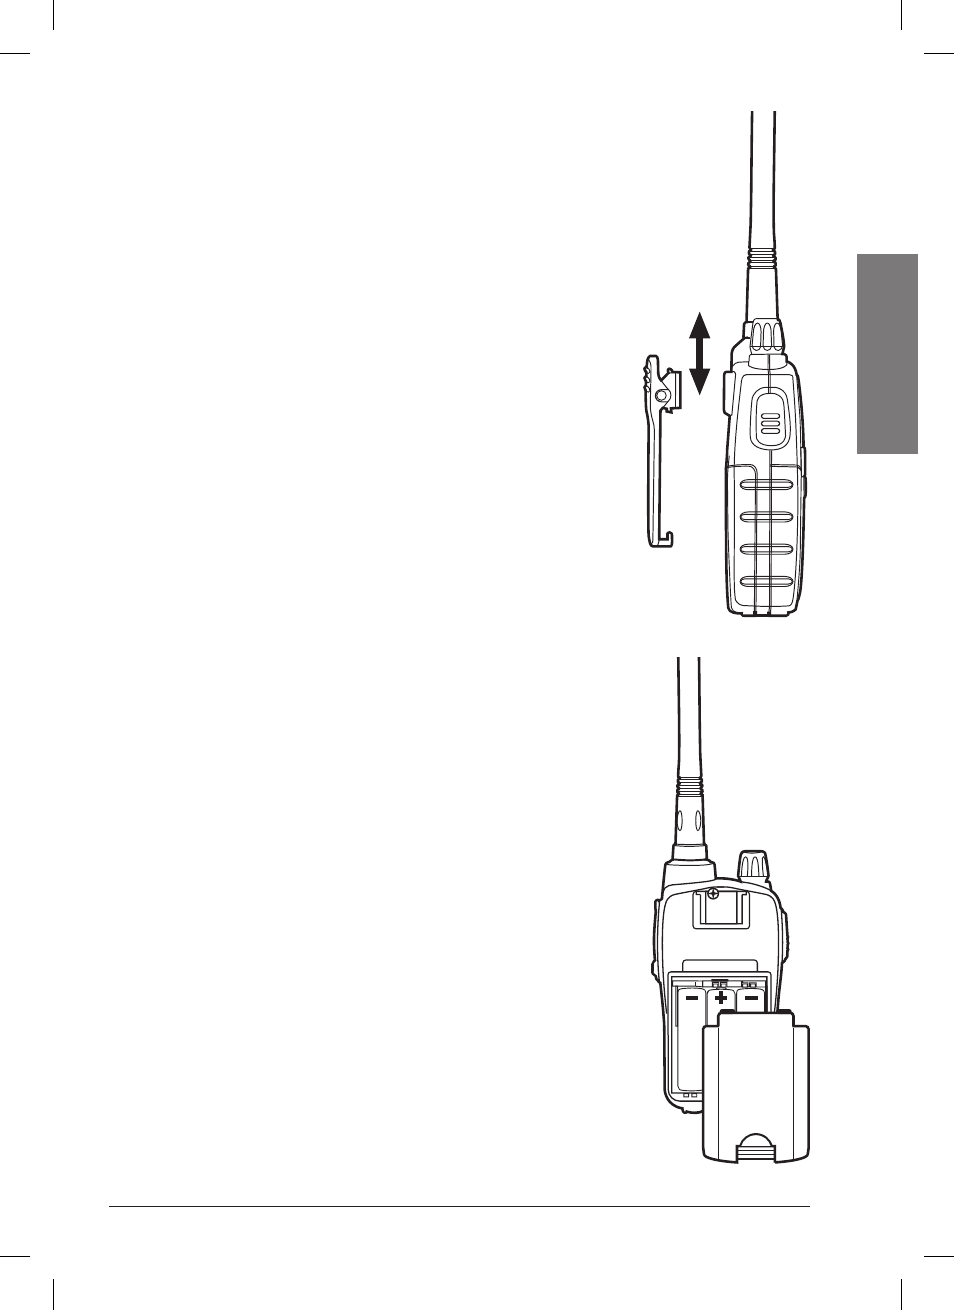
4.1 Installing and removing the belt clip
With the belt clip you can easily attach the transceiver to your belt.
The clip however, must be removed in order to install or change the
batteries. To remove the belt clip follow the instructions of picture 1.
To fix the clip back to the device slot it in the guides at the back of the
transceiver until it clicks into place.
4.2 Installing and removing batteries
The transceiver is operated by the supplied NiMH battery pack or by
4 optional AA battery. These can be either one of two types:
• Rechargeable NiMH (1,2 V) - available in different capacity (in
mA/h). Batteries with higher capacity will supply longer charger
but will require longer times to recharge.
• Non-rechargeable alkaline (1,5 V)
! Do not install rechargeable and alkaline batteries at the same
time in your transceiver. Always use the same batteries as a
set (type and make) so that you can be sure their level of
charge is the same.
! If you do not use the transceiver for a long time remo ve the
batteries/ battery pack.
4.2.a Installation
1) Remove the belt clip as explained in paragraph 4.1;
2) Open the batteries compartment as shown in picture 2;
3) Insert the battery pack into the battery compartment as shown in
picture 2.
4) Replace the cover on the batteries compartment.
5) Replace the belt clip.
! If you use the batteries, be careful to insert them with the
correct polarity as illustrated inside the compartment.
! Be careful to snap close the battery cover.
a
b
c
d
e
f
i
g
e
h
e1
1
2
3
8
9
10
4
6
7
5
a
b
c
d
e
f
i
g
e
h
e1
1
2
3
8
9
10
4
6
7
5
Picture 1
Picture 2