Assemble mix housing – Magnum Venus Plastech Pro Gun CPD_PRTM - 1:1 User Manual
Page 28
1:1 Classic Pro Gun Manual
Rev. 05/2012
Page | 28
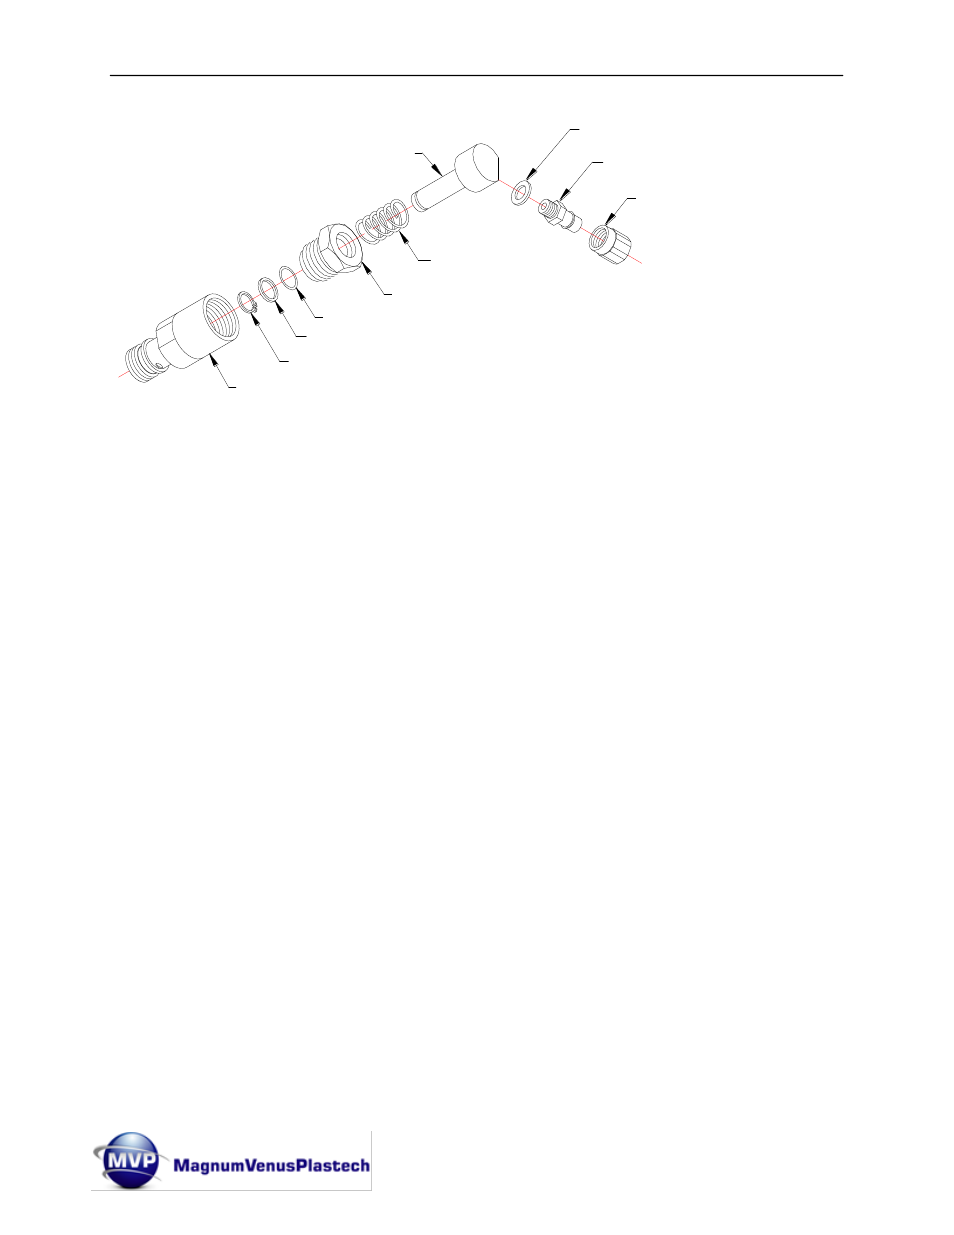
FLUSH BODY
PUSH STEM
O-RING
BACK-UP RING
GRIP RING
SPRING
FLUSH VALVE BODY
HOSE CLAMP
BARBED FITTING
SEAL
9.
Install the spring and push stem into the flush body.
10. Install a new o-ring onto the end of the push stem sticking out of the flush body.
11. Install the back-up ring onto the end of the push stem against the new o-ring.
12. Install the grip ring onto the end of the push stem.
13. Thread the auto/manual flush body assembly into the flush valve body.
14. Screw the flush valve assembly (5104-01-01) into the front side port on the resin
side of the gun block
Note: If using o-ring part number O-K-008 (o-ring is used on the flush button),
you do not need to replace the o-ring unless it is showing obvious signs of wear
or damage. This o-ring is specially designed for use with all solvents.
Note: In some cases O-K-008 o-ring can be replaced with the more economical o-
ring (O-E-008).
Assemble Mix Housing
1.
Install the new Face seals (58694-1) into the front of the gun block.
2.
Mount the Mix chamber (58692-3 or DUO-4101) to the gun block using the four
Cap screws (FS-832-10-GR8).
N
ote: the hardener side of the mix chamber is marked with an “H” and the mix
chamber should be mounted so that the hardener side is on the right hand side of
the gun.