V-7 valves, Reassembling the valve, Disassembling the valve (continued) – Liquid Controls V-7 Valves User Manual
Page 11
11
V-7 Valves
Disassembling the Piston Assembly
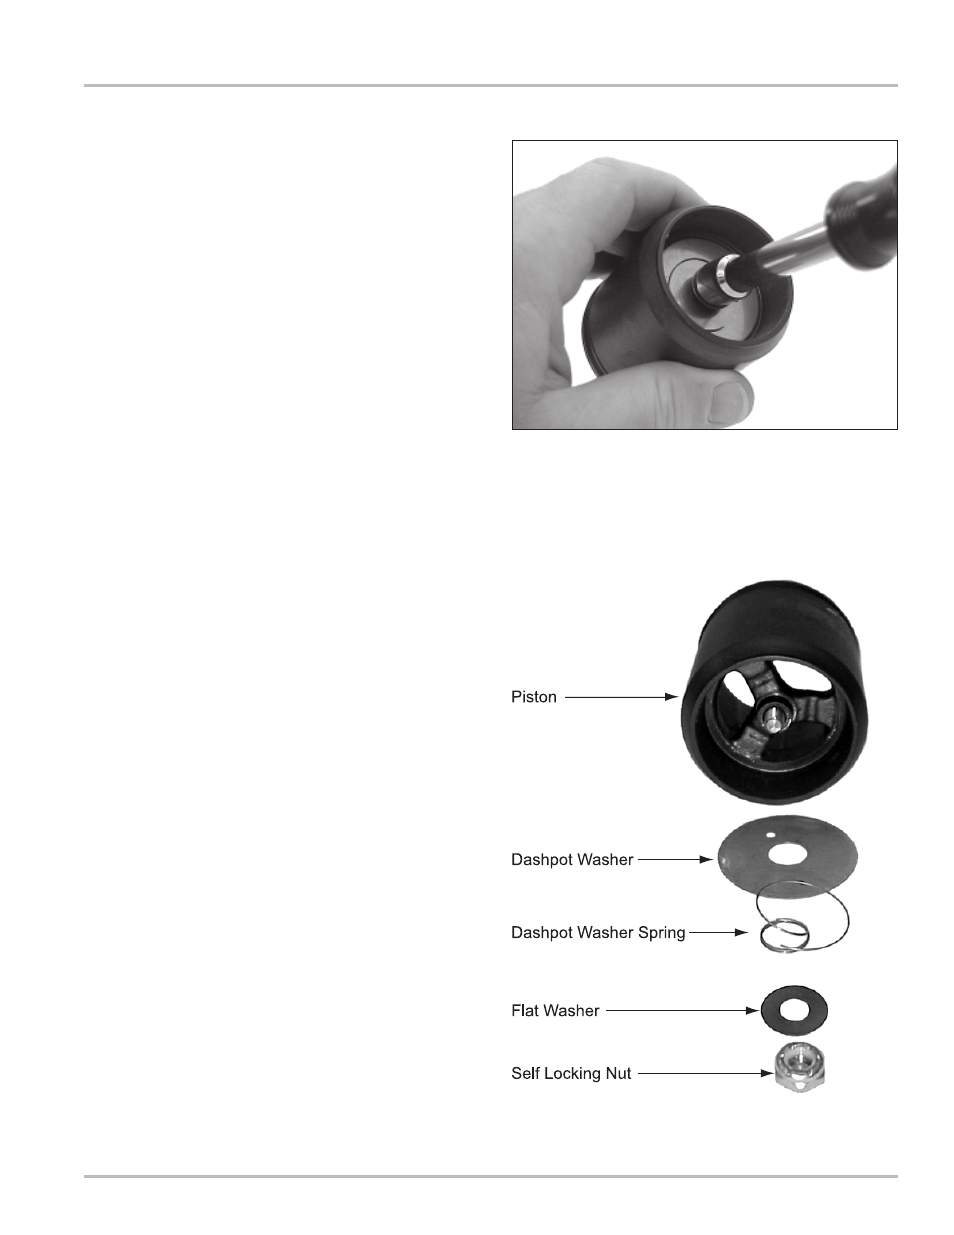
8. Use a 7/16” wrench to remove the nut from the valve
shaft (Figure 18a).
9. Remove the nut, washer, spring, dashpot washer,
and piston from the valve shaft (Figure 18b).
Reassembling the Valve
1. Place the piston on the valve shaft.
2. Place the dashpot washer, spring, and washer on
the valve shaft and secure by placing the nut on the
end of the valve shaft.
3. Place the compression spring into the valve housing.
4. Insert the valve shaft and piston assembly into the
valve housing. The piston will rest on the
compression spring.
5. Place the assembly on a flat surface with the piston
facing down.
6. Press down on the valve housing, compressing the
compression spring and forcing the end of the valve
shaft to protrude out of the valve housing.
7. While keeping pressure on the valve assembly, insert
the link connector through the valve shaft opening
and the valve handle opening.
8. When the link connector in completely inserted
through these two elements, place the flat end of the
link connector over the two studs and secure with
the retaining clip.
When reassembly of the V-7 valve is complete, it may be
returned to service. Follow the installation instructions
which begin on Page 5.
Disassembling the Valve (continued)
Figure 18b: Piston Assembly Disassembled
Figure 18a: Piston Assembly