V-7 valves, Disassembling the valve, Warning relieve internal pressure – Liquid Controls V-7 Valves User Manual
Page 10
10
V-7 Valves
Disassembling the Valve
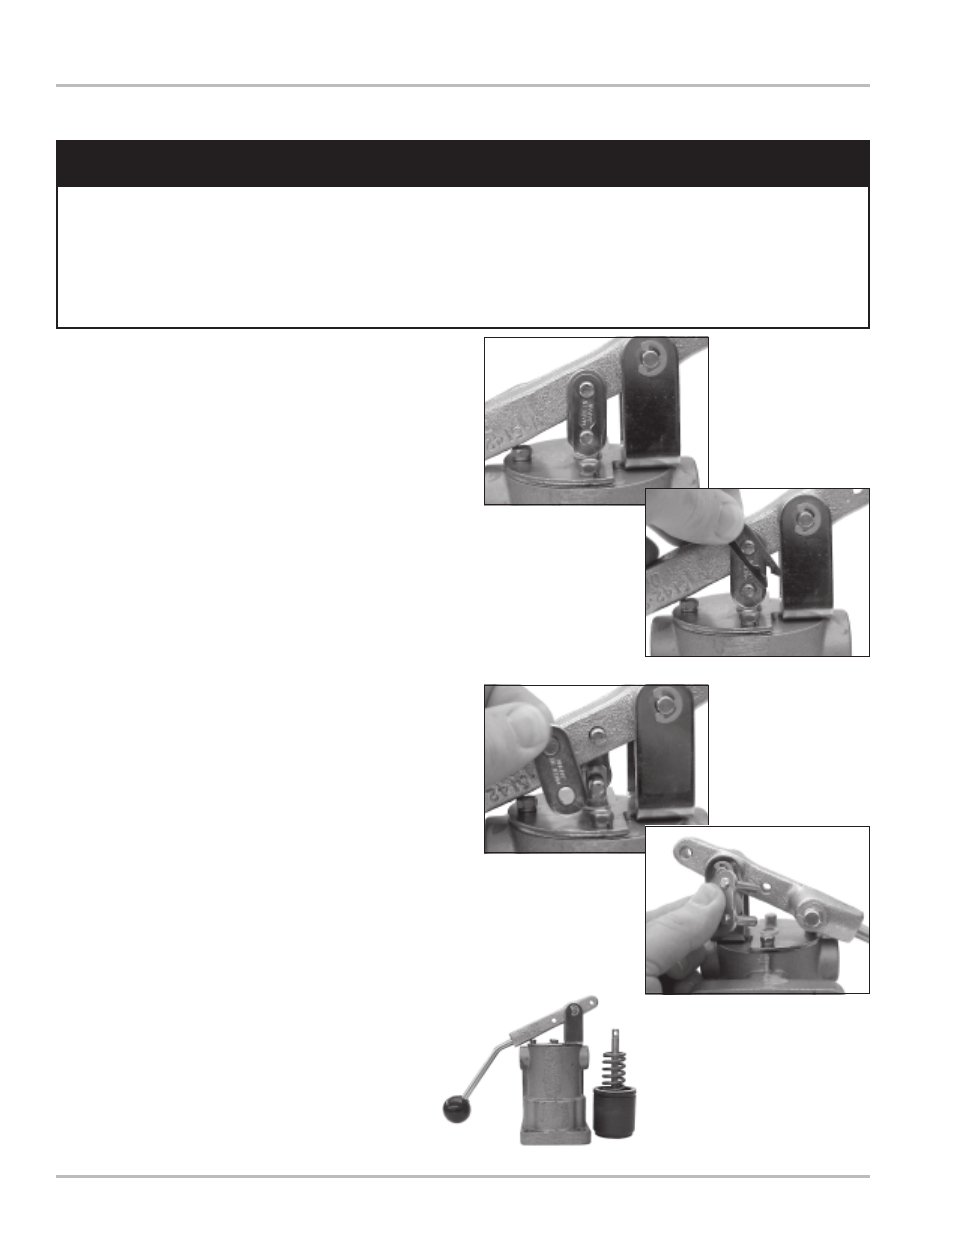
To perform maintenance on a V-7 valve, or to repair a V-
7 valve, it must be removed from the meter. Note the
orientation of the valve so that it can be replaced in the
proper orientation. Drain all the fluid from the metering
system prior to valve removal.
1. Remove the four screws and washers holding the
valve to the meter.
2. Remove the valve from the piping connection.
NOTE: The valve piston is under pressure exerted by
the valve compression spring. Exercise caution when
disassembling the valve.
3. Place the valve on a flat surface with the valve piston
facing down (Figure 17a).
4. Remove the retaining clip from the connection link.
A screwdriver may be needed to pry the retaining
clip off (Figure 17b).
5. Press down on the valve housing so that the valve
piston is forced into the valve, pushing the valve shaft
and handle away from the valve housing.
6. While keeping pressure on the valve, remove the
two pieces of the connection link (Figure 17c-d).
7. Slowly release the valve until the compression spring
exerts no pressure. As the valve housing is lifted,
the piston assembly and compression spring should
easily slide out of the housing (Figure 17e). The
piston and seals may now be inspected, cleaned and
replaced as needed.
!
!
!
!
! WARNING
Relieve Internal Pressure
All internal pressure must be relieved to zero pressure before
disassembly or inspection of the meter or any of the meter accessories.
Serious injury or death from fire or explosion could result from
maintenance of an improperly depressurized and evacuated system.
Figure 17a
Figure 17c
Figure 17d
Figure 17e: Piston Assembly Removed
Figure 17b