Pos functions lcr 600 tickets – Liquid Controls LCR 600 - Quick Reference User Manual
Page 2
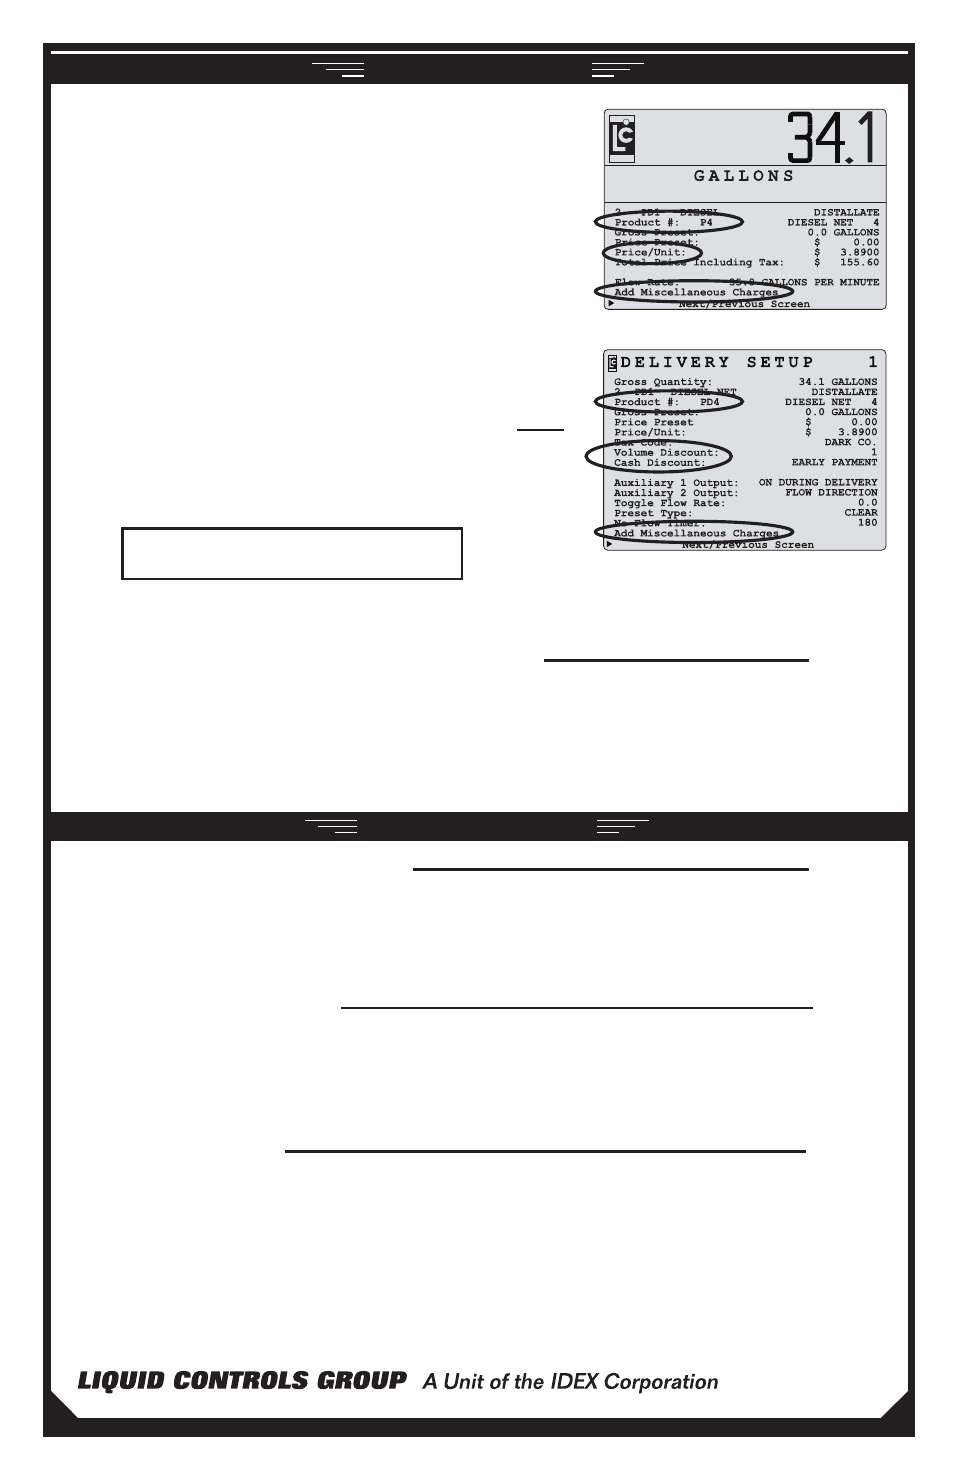
LCR 600’s with the point of sale (POS) upgrade can print taxed,
discounted, and priced tickets. Taxing, discounts, and price are
determined by the settings programmed to the
Product #. The
Product # field appears on the POS Delivery Screen and the
POS Delivery Setup 1 screen. The
Product # can be changed
before a delivery. The tax, price, and discount settings of the
Product # displayed on the screen are applied to the delivery
ticket.
A new
Price, Cash Discount, and Volume Discount can
be changed individually (without selecting a new
Product #)
before a delivery; however, the tax structure can not be changed.
If a value of one of these fields is changed, each ensuing delivery
will use the new value. The
Price field appears on the POS
Delivery Screen and the POS Delivery Setup 1 screen. The
Cash
Discount and Volume Discount fields appear on the POS
Delivery Setup 1 screen.
POS FUNCTIONS
LCR 600 TICKETS
To print a duplicate delivery ticket:
1. Press RELEASE on the printer. Insert a blank delivery ticket.
2. Press FORWARD on the printer to engage the ticket.
3. Turn the LCR 600 selector switch to PRINT and then to STOP.
4. When the ticket finishes printing, press RELEASE on the printer. Remove the ticket.
5. Insert a blank delivery ticket and press FORWARD on the printer to engage the new ticket
To print a shift ticket:
1. Press RELEASE on the printer. Insert a blank delivery ticket.
2. Press FORWARD on the printer to engage the ticket.
3. Turn the LCR 600 selector switch to SHIFT PRINT.
4. When the ticket finishes printing, press RELEASE on the printer. Remove the ticket.
5. Insert a blank delivery ticket and press FORWARD on the printer to engage the new ticket
To print a diagnostic ticket:
1. Press RELEASE on the printer. Insert a blank delivery ticket.
2. Press FORWARD on the printer to engage the ticket.
3. Turn the LCR 600 selector switch to SHIFT PRINT for less than 2 seconds and turn the switch to PRINT.
4. When the ticket finishes printing, press RELEASE on the printer. Remove the ticket.
5. Insert a blank delivery ticket and press FORWARD on the printer to engage the new ticket
ADD A MISCELLANEOUS CHARGE TO A DELIVERY
1. Turn the selector switch to RUN to start a delivery.
2. Turn the selector switch to STOP to pause the delivery.
3. Move the pointer to the
Add Miscellaneous Charges field and press ENTER.
4. Move the pointer to a charge on the list, press ENTER, enter a quantity into the field box, and press ENTER.
5. Move the pointer to
Next/Previous Screen and press ENTER.
6. Turn the selector switch to RUN to resume the delivery.
CHANGE THE PRODUCT # OR A POS FUNCTION
1. Move the pointer to the POS function you wish to change and press
ENTER
.
2. Select a new product, cash discount or volume discount from the list box
(or enter a new price into the field box).
POS function fields can be locked for security
measures. See manual EM150-11 page 41.
105 Albrecht Drive • Lake Bluff, IL 60044-2242 • 1.800.458.5262 • www.lcmeter.com
To add a miscellaneous charge to a delivery, you must start the delivery, pause the delivery, then select a
charge from the list box (6 possible miscellaneous charges that can be programmed into the LCR 600.)