Agri-Fab 45-0298 User Manual
Page 7
7
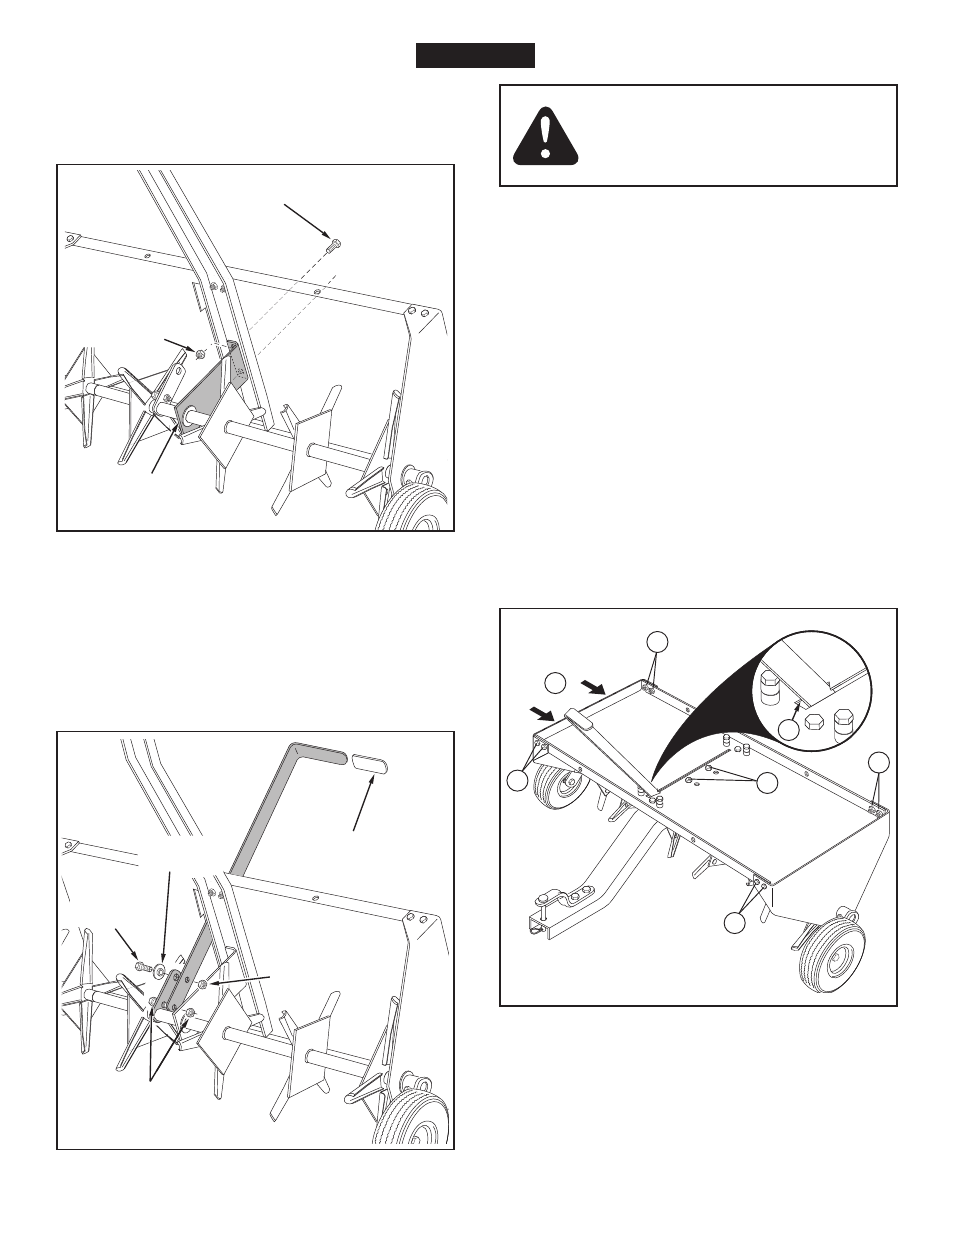
7. Tip the aerator back and fasten the middle brace to
the bottom of the tongue using two 3/8" x " hex bolts,
and 3/8" nylock nuts.
Do not tighten till step 20. See
figure 11.
8. Place the lift handle through the slot in the tray. Fasten the
lift handle to the smaller hole in the middle wheel bracket
using the bolt and nylock nut which you assembled
earlier (figure 3). Fasten the lift handle to the larger hole
in the wheel bracket using a 3/8" x -/4" hex bolt, the
shoulder spacer, and a 3/8" nylock nut.
Tighten. See
figure 12.
19. Push the grip onto the lift handle. See figure 12.
FIGURE 12
FIGURE 11
FIGURE 13
c
c
c
c
d
b
a
PUSH AGAINST
THIS SIDE
20. Perform the following steps in sequence to assure secure
locking of the lift handle. Refer to figure 13.
a. Turn the aerator upright, then place the lift handle
into the transport locking notch at the front end of
the slot in the tray.
b. Stand on the right side of the aerator and push
against the tray, which will force the lift handle over
to the right side of the notch.
c. Keep the tray and lift handle in this alignment and
tighten the eight bolts at the corners of the tray.
d.
Tighten the two bolts which fasten the middle brace
to the tray.
e. After performing these steps, some effort should
be required to shift the lift handle from the transport
locking notch over into the slot to lower the aerator.
When the aerator is raised, the lift handle should
spring back over into the transport locking notch.
3/8" x 1"
HEX BOLT (D)
3/8" NYLOCK
NUT (J)
MIDDLE
BRACE
3/8" x 1-1/4"
HEX BOLT (C)
3/8" NYLOCK
NUT (J)
SHOULDER
SPACER (U)
PRE-ASSEMBLED
NUT AND HEX BOLT
GRIP (V)
CAUTION: The Lift Handle can drop
to the rear unexpectedly. It will not lock
securely in transport position until step
"c" below is completed.
ENGLISH