5. network – CNB HDS4848E User Manual
Page 34
33
2-5. NETWORK
Under Network menu, Network configuration options for network Address, DDNS, Remote
Notification and Transmission can be set up.
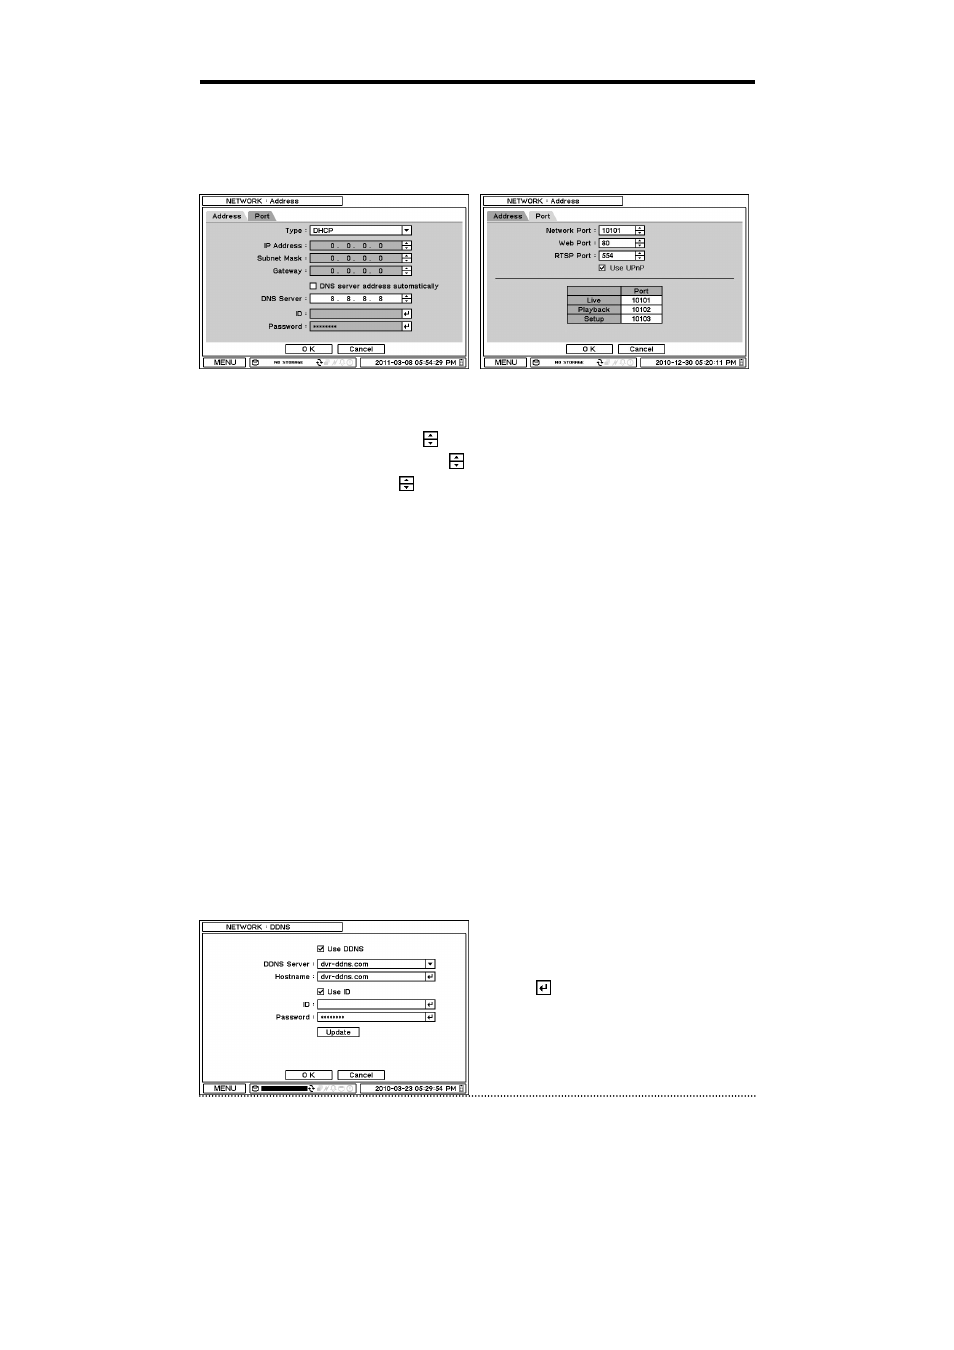
2-5-1. MENU > NETWORK > Address
In Address, Information such as Type, IP address, Subnet Mask, Gateway Port and DNS can be
set for network connections.
•
Type: Select the type of network configuration from: Static IP, DHCP and ADSL(with PPPoE).
•
IP Address: Enter IP address using
button.
•
Subnet Mask: Enter Subnet Mask using
button.
•
Gateway: Enter Gateway using
button.
•
DNS: Set up the IP address of the DNS server. If you set up the DNS Server, the domain name
of the DVRNS server instead of the IP address can be used during the DVRNS Server setup.
•
DNS sever address automatically: Select this option to get DNS Server Address
automatically when use DHCP or PPPoE option.
In Port, Select appropriate port number for external access to the system. The port list shows
necessary ports to be opened for each operation.
•
Network Port: Set port for DVR Remote Client.
•
Web Port: Set port for Web Remote Client.
•
RTSP Port: Set port for Android based devices.
•
iPhone Port: Set port for iPhone.
•
Use UPnP: Select this option to perform the registration automatically on DVR without port
forwarding settings manually on a NAT device.
Note
: ID and Password are required in ADSL(with PPPoE) type.
Note
: Default TCP port is 10101 but it can be set from 1500 to 32000 if it is necessary.
2-5-2. MENU > NETWORK > DDNS
In the DDNS, network options for DDNS can be selected.
DDNS: Dynamic Domain Name Server allows dynamic network connections.
Note
: “dvr-ddns.com” and “www.dyndns.org” offer free registrations for DDNS service.
Please refer to the appendix for DDNS set up
page.
•
Host Name: Name the DVR or site where it
is located using the virtual keyboard by
pressing
.
•
ID/Password: ID and Password are
required for Authentication.
Note
: Use ID/Password registered in DDNS.