Seal and spacer replacment, Page 34 – Hydrotech 2510 Econominder Service Manual User Manual
Page 34
MODEL 2510 & 2510 ECONOMINDER
seal and spacer replacment
Page 34
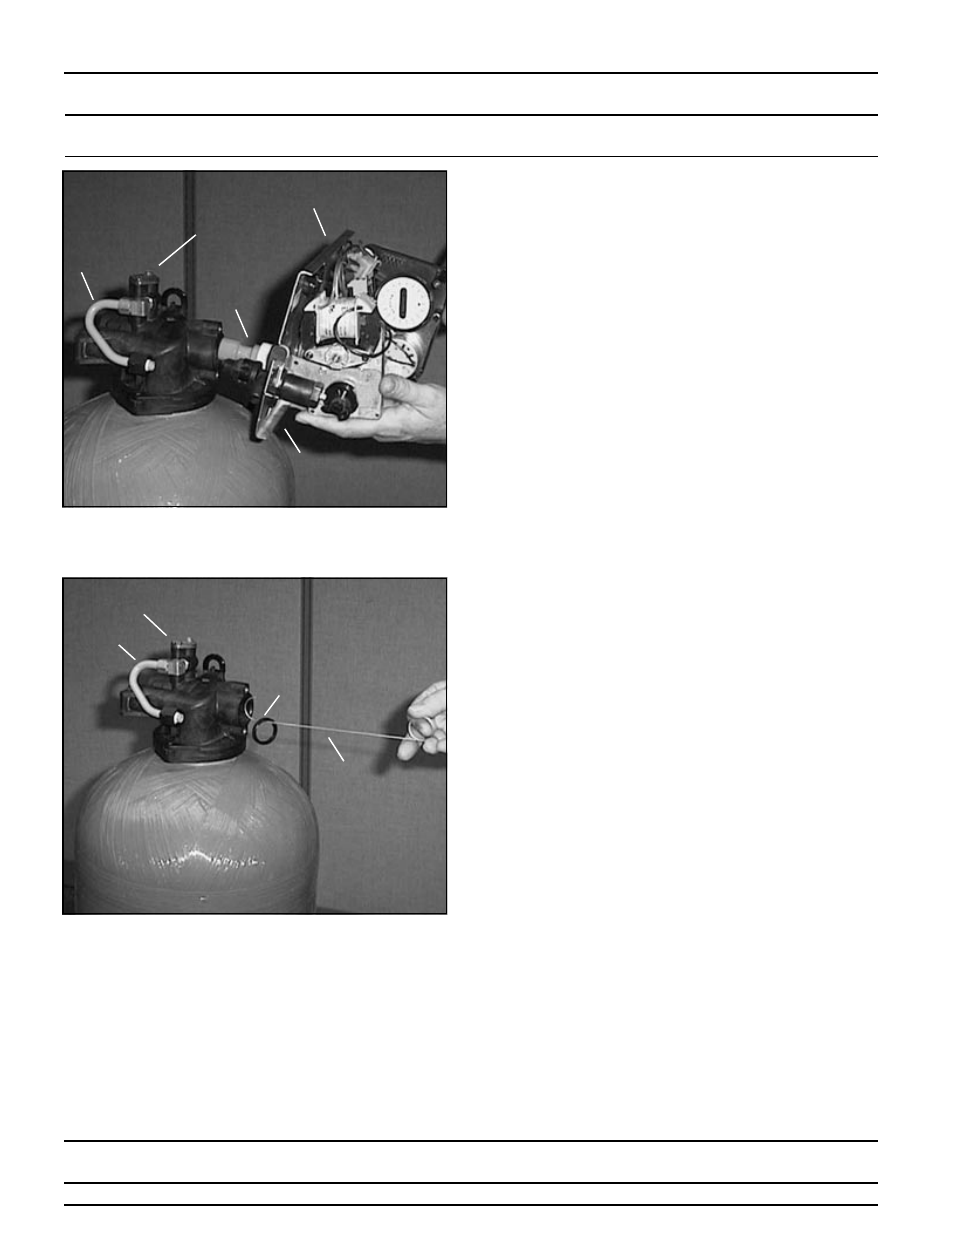
Figure 1 Removing Power Head And Piston Assembly
Figure 2 Removing Special Tool From Valve Body
After Inserting Seal
INJECTOR
LINE TO
BRINE
VALVE
BRINE VALVE
ASSEMBLY
PISTON
BACK PLATE
SEAL
SEAL
HOOK
INJECTOR
BRINE
TUBE
9.
Alternately remove the remaining seals and
spacers in accordance with steps No. 6 and 8.
10. The last or end spacer odes not have any holes for
the pins of the spacer tool to engage, therefore if
the end spacer does not come out on the first try, try
again using the wire hook with the finger loop.
11. To replace seals, spacers and end ring, use special
tool with the brass sleeve on one end. This is a
double-purpose tool., (See Fig. 4). The male end
acts as a pilot to hold the spacers as they are
pushed into the valve body and the brass female
end is used to insert the seals into the valve body.
12. To restuff a valve body, first take the end ring (the
plastic or brass ring without holes), then with your
thumb press the button on the brass sleeve end, the
large dia. inner portion is now exposed (See Fig. 4).
Place the end ring on this pilot with the lip on the
end ring facing the tool, and push the tool into the
valve body bore until it bottoms. While the tool is in
the valve body, take a seal and press it into the
inside diameter of the exposed brass female end
(See Fig. 5).
13. Remove the tool, turn it end for end and insert it into
the valve body bore. While holding the large dia. of
the tool, slide it all the way into the valve body bore
until it bottoms, then push the center button to push
the seal of the tool and leave it in place in the valve
body (See Fig. 6).
14. Remove the tool from the valve body and push the
center on the brass female end to expose the pilot
on the opposite end. Place a spacer on this end and
insert the spacer and tool into the valve.