Sketch 1 sketch 3 sketch 2 sketch 4 – APW Wyott CMW-24 User Manual
Page 6
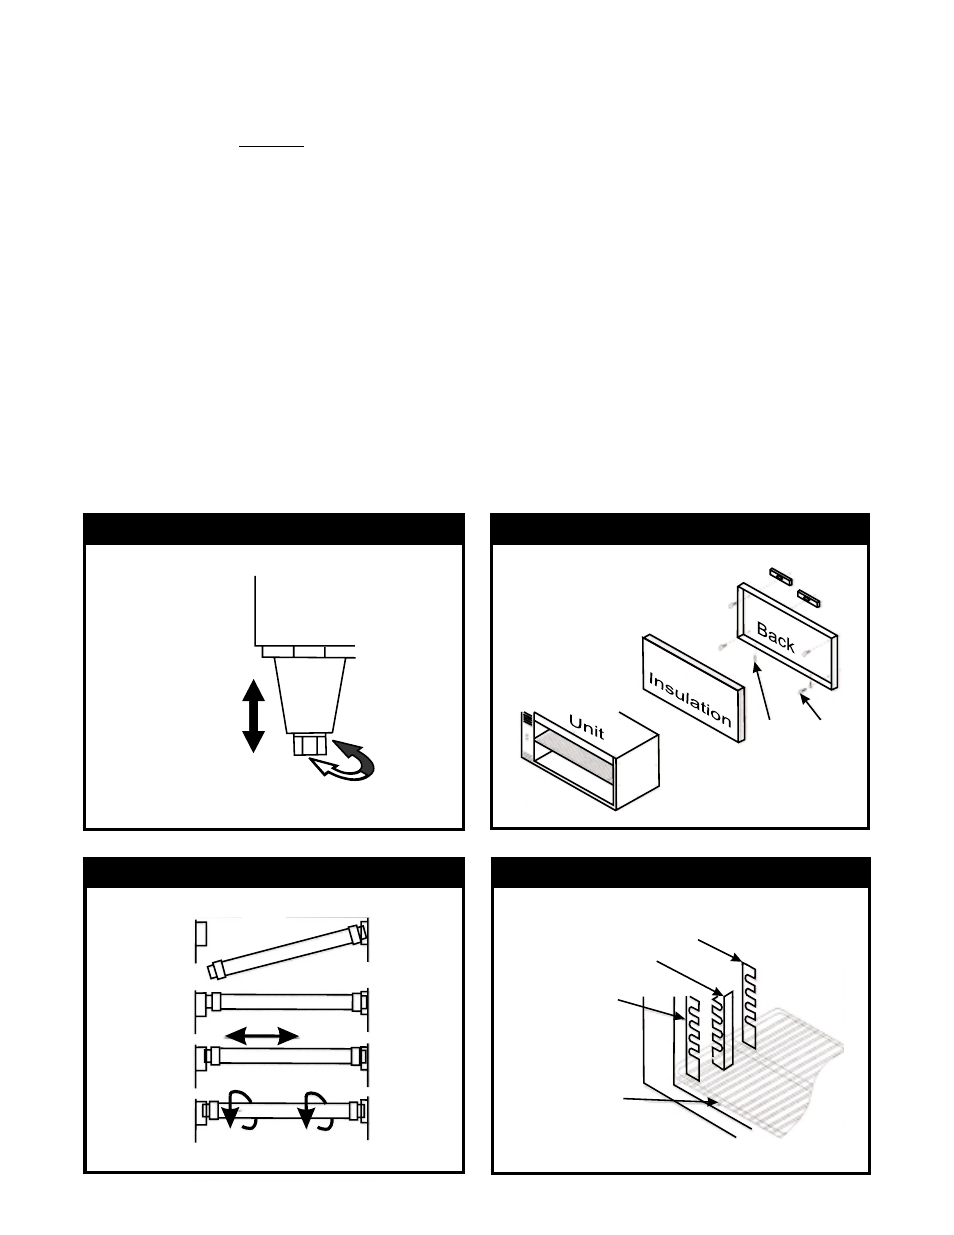
WALL MOUNTING (sketch 2)
HEATER INSTALLATION (Sketch 3)
I.
Begin by removing the two screws on the bottom of the unit along the rear.
2.
Pry out the back at the bottom and remove it by pulling out and down.
3.
Remove (but
discard) the insulation.
4.
Use the back as a template to locate holes for wall attaching lag bolts( not supplied).
5.
Fasten the back to the wall with lag bolts or with anchor fasteners, making certain the back is level
securely fastened.
6.
Replace the insulation.
7.
Hang the unit onto the wall-mounted back and secure it by replacing the two screws in the bottom of
the unit.
I.
Push one end of the heater into one socket as far as it will go.
2.
Swing other end of heater up in line with the opposite socket.
3.
Release heater and it will snap into place. Grasp the heater and move it back and forth to insure that
it is centered correctly.
Choose desired rack level and insert rack by placing the left pivot point behind the switch slide, lining up the
rack evenly and pushing it straight back until the pivot points can be inserted into the rack pivots. The rack
should tilt smoothly and readily (See Sketch 4.)
DO NOT
Turn here for
adjustment
Back
Retaining
Bolts
Lag
Rack Stop
Rack Pivot
Slide Switch
Rack
Sketch 1
Sketch 3
Sketch 2
Sketch 4
6