Hellwig Sway Bar 55857 User Manual
Page 7
11
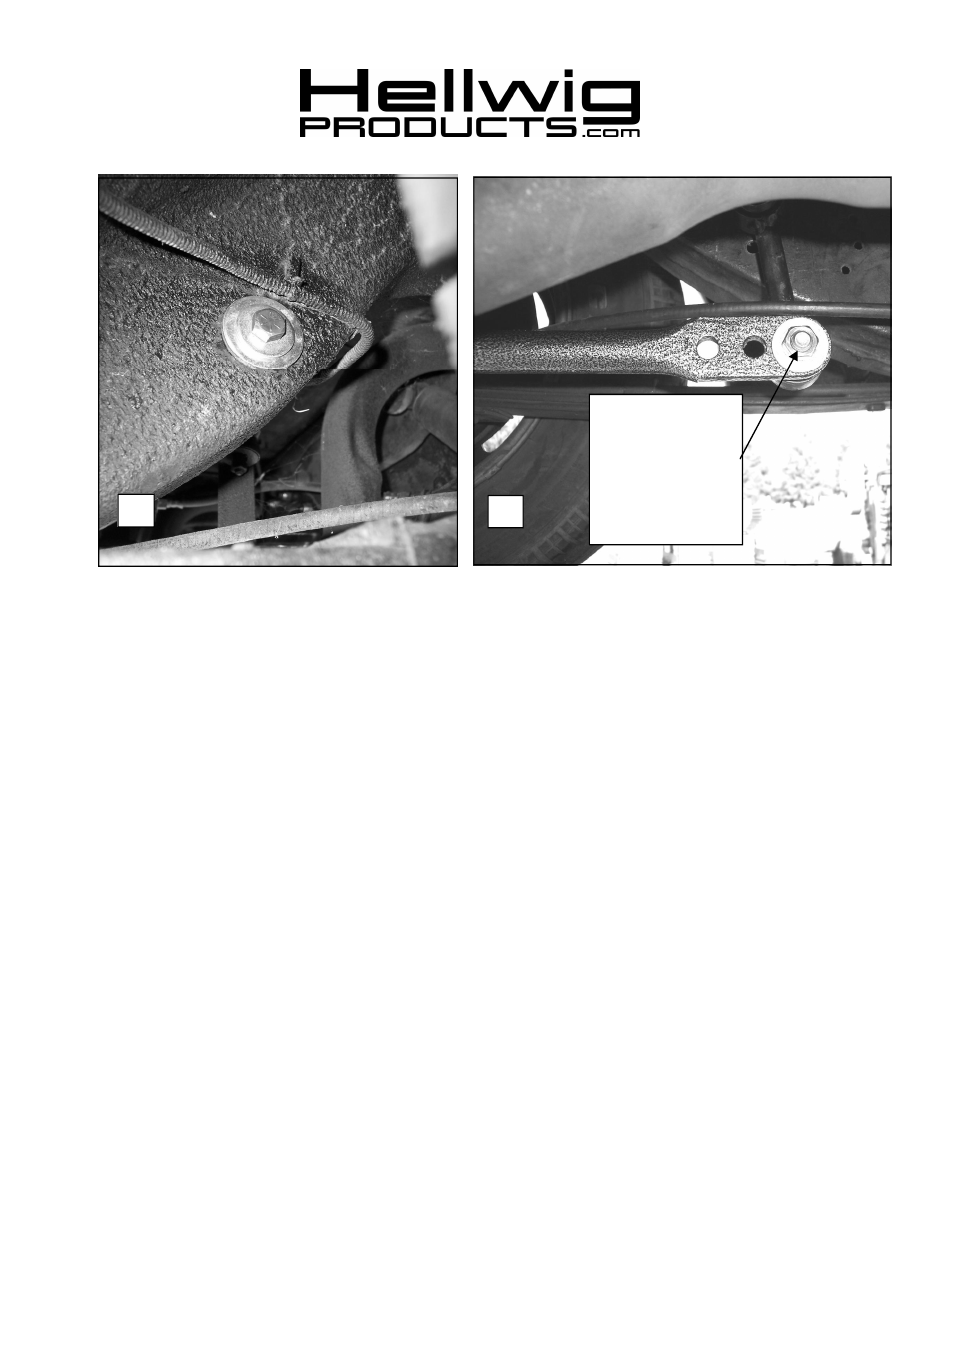
Attach end link to
outer hole before
driving. DO NOT
use inner holes until
first driving vehicle
with end link in outer
position.
12
559-734-7451 800-367-5480 FAX 559-734-7460
22.
Bounce the vehicle checking for clearance on all under carriage components: fuel tank, shocks,
exhaust, differential, brake and fuel lines, etc. Test drive the vehicle and recheck all clearances
and the installation alignment. Adjust as needed. Re-check your installation after one week of driv-
ing and periodically on a regular basis.
23.
The sway bar has three end link mounting holes. The end link MUST be
mounted on the outer hole for initial use. SEE PHOTO 12. For a firmer setting,
use the inner holes. You must use the outer mounting hole as shown in photo 12
until you are accustomed to the vehicles new handling characteristics. After driv-
ing vehicle, a firmer setting may be selected if desired. It is recommended that
the outer hole be used for street driving.
ATTENTION INSTALLER: BE SURE THAT THE CUSTOMER RECEIVES
THIS INSTRUCTION SHEET, ALL IMORTANT NOTE CARDS AND THE
WARRANTY FORM
5822 (R-5822)
11/08/07