Asus WL-HDD2.5 User Manual
Page 20
10
ASUS 802.11g WL-HDD2.5
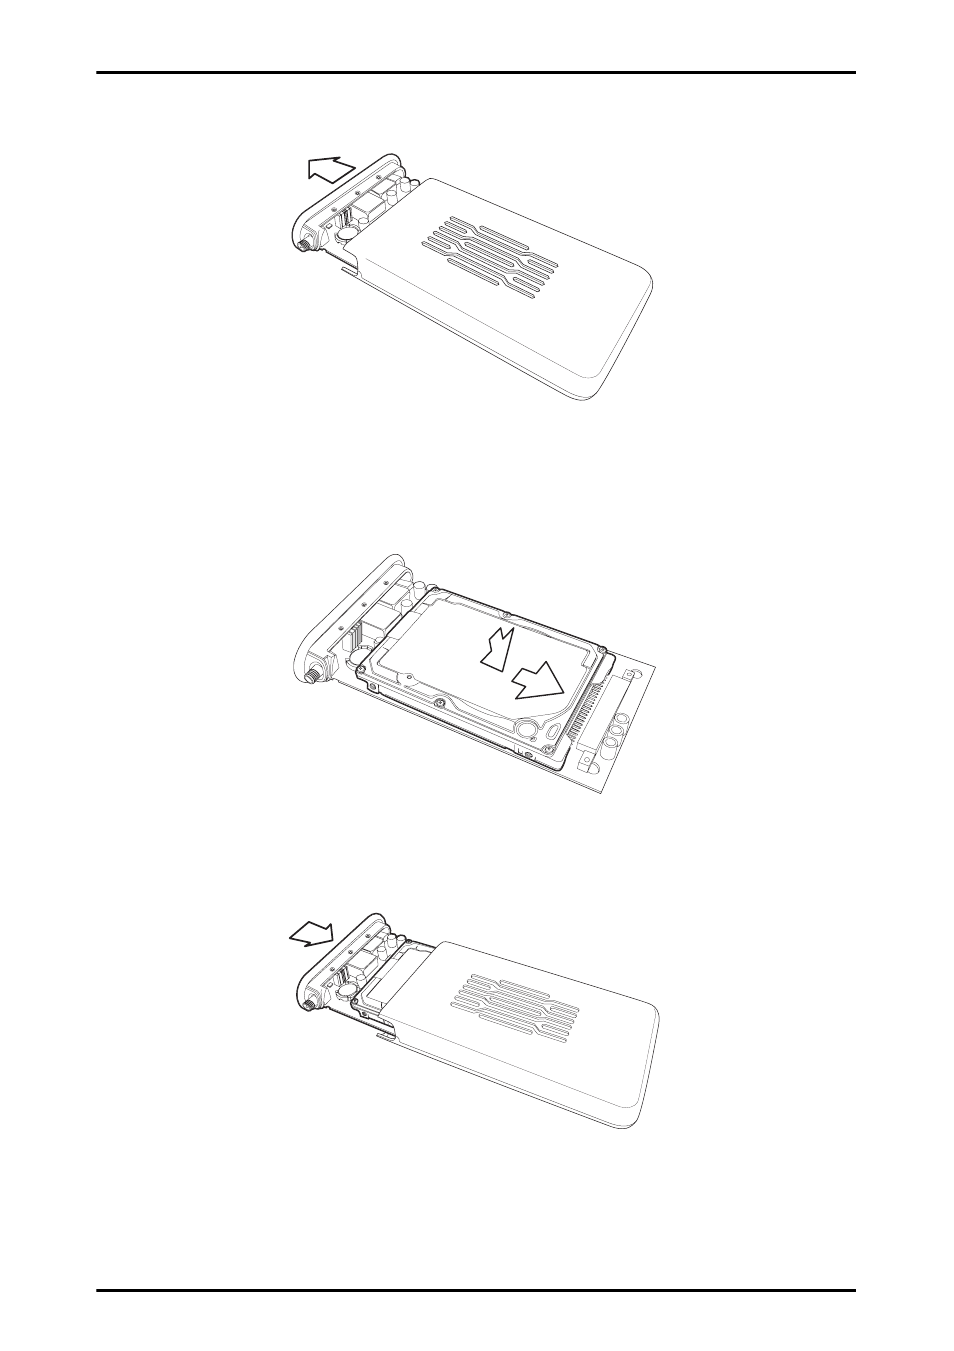
2. Remove the front cover and slide out the internal circuit board.
3. Insert the hard drive into the slot. Make sure that the hard drive
connecting pins and the connector are properly aligned for a sta-
ble connection.
4. Insert the circuit board back inside the outer shell and replace the
front cover.
See also other documents in the category Asus Computer Accessories:
- PCE-N13 (65 pages)
- WL-167g (44 pages)
- WL-167G V3 (2 pages)
- PCI-N10 (34 pages)
- USB-N10 (46 pages)
- USB-N13 (69 pages)
- EEE PAD PC TF101 (4 pages)
- 1 E1309 (70 pages)
- GIGAX1024P (10 pages)
- GIGAX1024 (8 pages)
- GigaX 1124 (10 pages)
- AP100 (32 pages)
- GIGAX1024P (41 pages)
- P4SDX (64 pages)
- P4SDX (2 pages)
- WL-HDD2.5 (58 pages)
- WL-HDD2.5 (14 pages)
- WL-HDD2.5 (84 pages)
- TM-55 (2 pages)
- GX900 (13 pages)
- Miracast Dongle (22 pages)
- VC60 (38 pages)
- VC60 (38 pages)
- CP220 (27 pages)
- GX800 (10 pages)
- SD222-YA (24 pages)
- FlexSlim Drive (14 pages)
- Vito W1 (32 pages)
- CrossLink Plus (92 pages)
- KR External HDD (14 pages)
- RAIDR Express PCIe SSD (24 pages)
- CD-S400 (8 pages)