Troubleshooting, C. factory reset, D. testing the transmitter – Flowline XP89 EchoSafe User Manual
Page 9: E. additional information, A. viewing programmed values, B. viewing test p
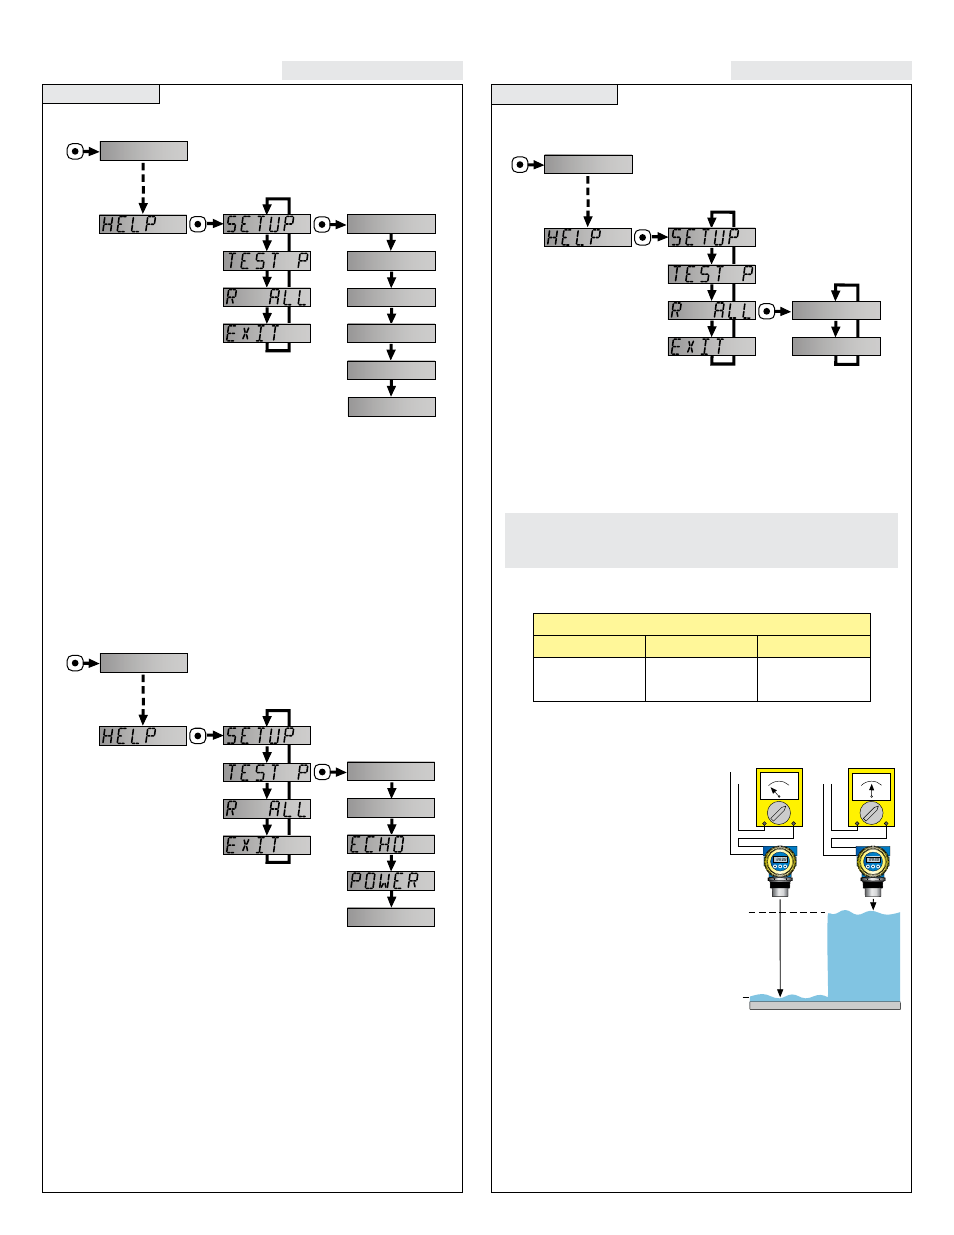
C. Factory RESET:
1. Press the SELECT/FAST button and hold it for 5 seconds until
MENU appears.
2. When HELP appears, press the SELECT/FAST button. The dis-
play will rotate between SETUP, TEST P and R ALL.
3. When R ALL appears, press the SELECT/FAST button.
4. Unit will reset.
Note: FACTORY RESET resets the transmitter back to its origi-
nal factory default settings: (20 mA = Minimum Range, 4mA =
Maximum Range and SAFE = 22mA).
D. Testing the Transmitter
1. Connect a multi-meter in series
with the black wire to read the
current output.
2. Verify that the current increas-
es (tank filling) and decreases
(tank emptying) appropriately
in the calibrated span.
3. If not, carefully observe and
attempt to correlate any instal-
lation, level or application event
for more specific troubleshoot-
ing.
4. Write down the information in
TEST P (SEGMENT, RANGE,
ECHO, POWER, VER) and have it ready when you contact your
Flowline representative.
E. Additional Information:
Go to www.flowline.com and click
on the nav-bar “Application Info” button for FAQ’s, tech-tips, case
studies, white papers, glossary and success stories.
Step Fifteen
Step Fourteen
SELECT
FAST
SELECT
FAST
SELECT
FAST
0(18
:$,7
(;,7
TROUBLESHOOTING
Transmitter
XP88-0
XP89-0
4 mA Setting
26.4 (7.5m)
32.8 (10m)
20 mA Setting
8 (20 cm)
12 (30 cm)
Factory Set Points
Power
Supply
Power
Supply
20 mA
4 mA
mA
4
5
6
mA
19
20
21
Black
Red
EchoSafe
EchoSafe
Black
Red
TROUBLESHOOTING
A. Viewing Programmed VALUES:
1. Press the SELECT/FAST button and hold it for 5 seconds until
MENU appears.
2. When HELP appears, press the SELECT/FAST button. The dis-
play will rotate between SETUP, TEST P and R ALL.
3. When SETUP appears, press the SELECT/FAST button. You will
now begin viewing calibration settings (UNITS, HEIGHT, FILL
H, SAFE, REV mA) that are programmed in the transmitter.
When complete the display will revert back to the HELP menu.
B. Viewing TEST P:
1. Press the SELECT/FAST button and hold it for 5 seconds until
PROG appears.
2. When VALUES appears, press the SELECT/FAST button. The
display will rotate between SETUP, TEST P and RESET.
3. When DIAG appears, press the SELECT/FAST button. You will
now begin viewing diagnostic values (LEVEL, TEMP ECHO,
POWER, MOUNT and VER) that may be relevant to the trans-
mitter and it’s performance in your application.
When complete the display will revert back to the VALUES menu.
SELECT
FAST
SELECT
FAST
SELECT
FAST
0HQX
81,76
+(,*+7
),//+
6$)(
5(90$
'21(
SELECT
FAST
SELECT
FAST
SELECT
FAST
0(18
:$,7
5$1*(
9(5