Illumination, Repair, Safety testing approvals – Fill-Rite 900D Series Digital Liquid Meter User Manual
Page 8
8
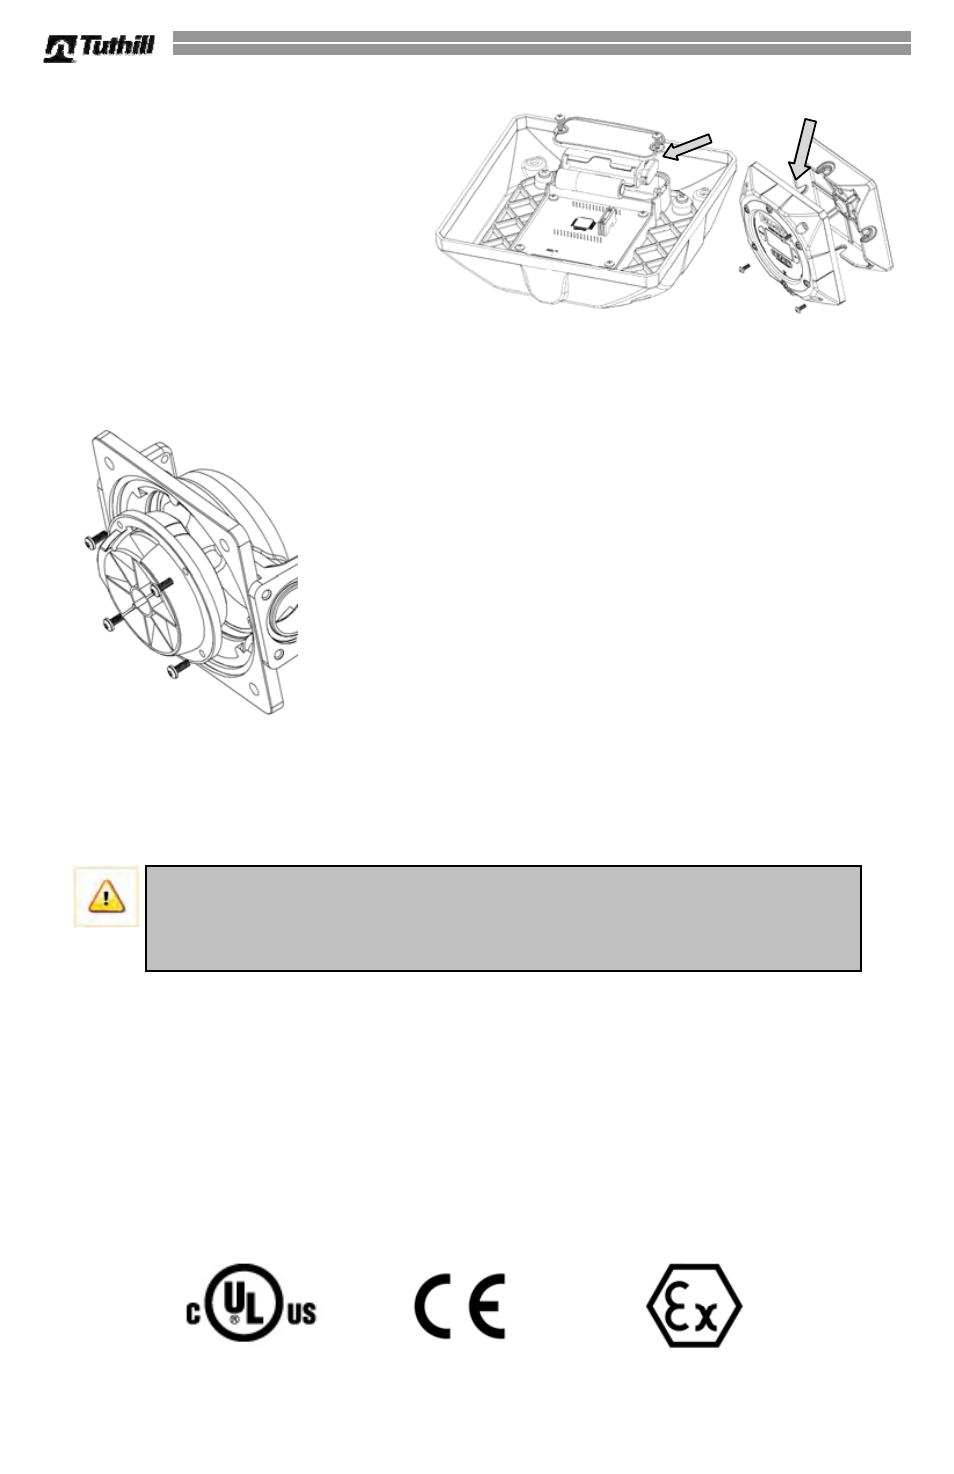
Accessing the Battery
For access to the batteries (2 AA cell
batteries) (figure 1):
1) Remove the four screws at the top
and bottom of the front bezel (Torx
#T25).
2) Lift bezel off. Batteries are located
on the back side of the display; use
a Phillips head screwdriver to remove the cover screws to access the batteries.
3) Reassemble by reversing this procedure.
Meter Chamber Assembly
The Meter Chamber consists of upper and lower chambers, a
nutating disc, and four screws (figure 2).
1) To expose the meter chamber assembly, gear train and
seal remove 4 screws.
2) The meter chamber can be dislodged by removing 4
screws.
Reassemble by reversing this procedure.
Illumination
Units equipped with the pulser / external power option offer illumination for the digital display.
To turn the light on, press and release the “CAL” button. The display will remain illuminated
for 10 seconds after turned on.
Repair
Meters needing repairs should be taken to an authorized repair facility. Meters MUST be
triple rinsed before taking them in for repairs.
Safety Testing Approvals
The
Fill-Rite 900D series meters have been tested for compliance to the standards set forth
by Underwriters Laboratories (UL), UL Canada, ATEX, and other testing organizations.
To
determine which specific compliances apply to your particular meter, refer to the
faceplate for information and compliance logos.
IMPORTANT! If replacing any components of the meter chamber, the
complete assembly must be replaced due to its precision method of
construction. This will assure a proper fit, and correct operation of the
chamber.
Figure 1
Figure 2