Attaching the printer, Installing paper, Warranty – Datamax-O'Neil VMP-1000_2000 Wall Mount Vibration Bracket User Manual
Page 2: No liability for negligent use, Mounting the bracket
Attaching the Printer
1. Note the placement of the printer in relation to
the bracket (Figure 7).
2. With the paper exit facing you, slide the printer
onto the bracket. When attached, the security
catch “clicks” into place (Figure 7).
3. Secure the printer to the bracket using the
#8-32 x 3/8, Phillips or Torx, pan head screw
(Figure 8).
4. Proceed to Installing Paper.
Note: When mounted to the bracket, the
VMP 1000 printer requires a specific
configuration command to maintain Top of
Form (TOF). For information, see Orientation
Guidelines in the previous section.
Note: To prevent the printer from dislodging,
the printer must be secured to the bracket
using the security screw. Failure to do so may
cause injury or damage to the printer.
Figure 7
Security Catch
Figure 8
Locking Screw
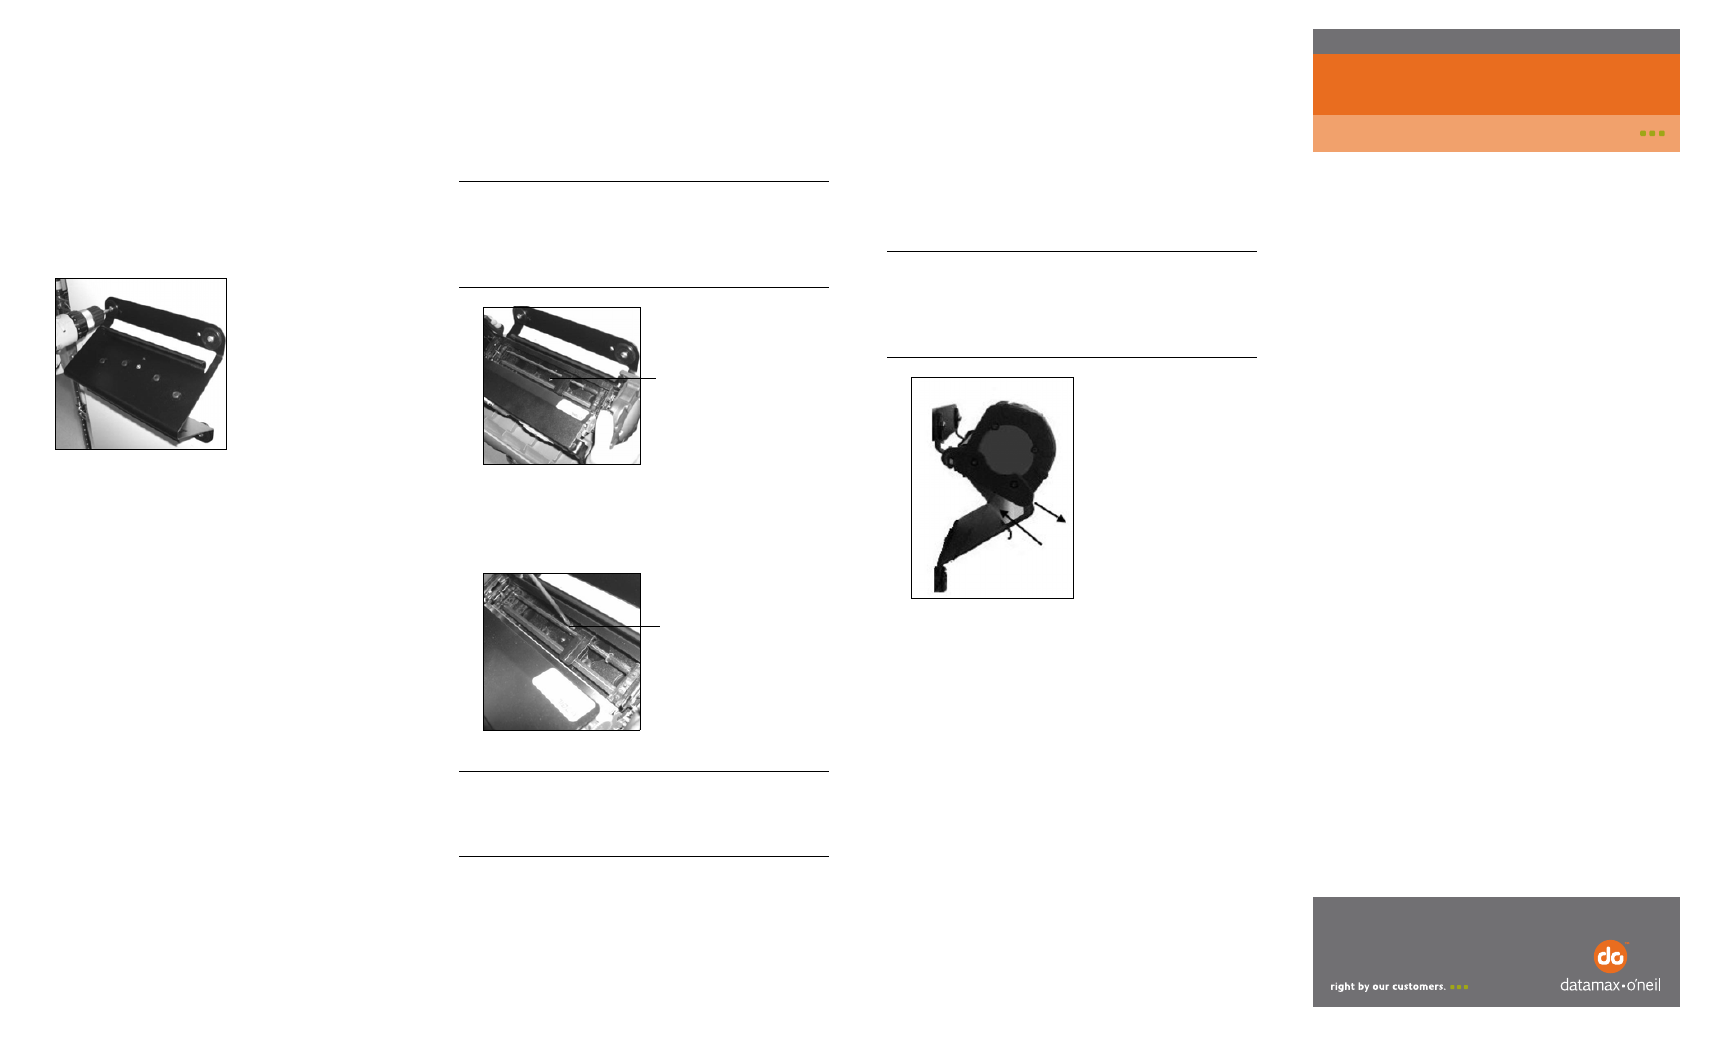
Installing Paper
1. Route the paper over the Bottom Paper Guide
and through the Paper Slot of the bracket
(Figure 1).
2. Route the paper over the Top Paper Guide and
into the printer.
3. Feed the paper through the printer. The paper
feeds from the mounting surface and exits
toward you (Figure 9).
Warranty
The Company warrants that Datamax-O’Neil products are free from
defects in manufacturing materials and workmanship for one (1) year
from date of original purchase to Buyer/Distributor (OEMs 90 days from
the date of purchase). Batteries, cables, power supplies, and other
accessories will be warranted for ninety (90) days. Datamax-O’Neil
makes no other warranties, expressed or implied, including implied
warranties of merchantability and fitness of purpose.
If you try to repair, disassemble, or change the product in any way, or use
parts not provided by Datamax-O’Neil without prior, written authorization,
all warranties are void. For complete warranty and service information,
see the Warranty Card included in your original packaging.
No Liability for Negligent Use
In no event shall Datamax-O’Neil be held liable for any damages
whatsoever (including, without limitations, damages for loss of profits,
business interruption, loss of information, or other pecuniary loss) arising
out of negligence in use and care of the product.
COPYRIGHT © 2010, DATAMAX-O’NEIL
Note: When mounted to the bracket, the
VMP 1000 printer requires a specific
configuration command to maintain Top of
Form (TOF). For information, see Orientation
Guidelines in the previous section.
Figure 9
Paper
In
Paper Exit
Mounting the Bracket
1. Use the bracket as a template to mark the four
mounting holes on the mounting surface. For
information on mounting/installation, see the
Orientation Guidelines in the previous section.
2. Drill the mounting holes at the marked locations.
3. Attach the bracket to the mounting surface using
¼-20 pan head screws (Figure 6). Thread the
screws through the washers, bracket, and
mounting holes. Tighten securely.
4. If needed, use additional mounting hardware to
secure the bracket to the mounting surface.
Proceed to Attaching the Printer.
Figure 6
VMP1000/2000 Wall Mount Vibration Bracket
110114-003
Instruction Sheet