Datamax-O'Neil PrintPAD MC70, CN3 5-Up Settlement Room Bracket User Manual
Guidelines, Mounting the settlement room bracket
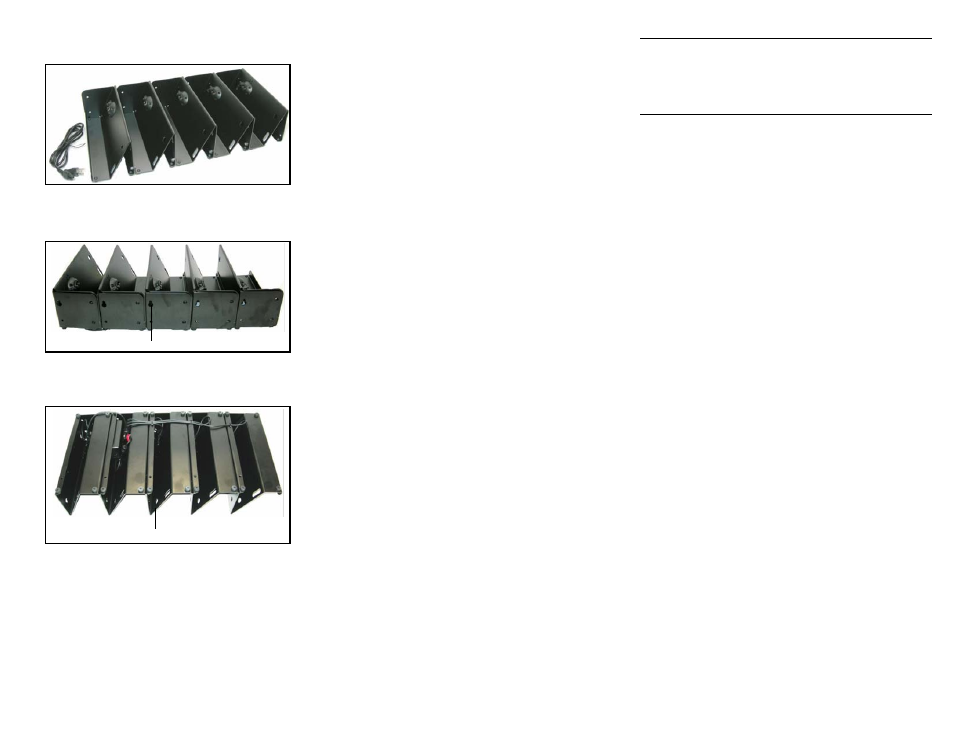
5-Up Settlement Room Bracket
(220267-100)
Back View of 5-Up Settlement Room Bracket
to show mounting hole locations (20) for
vertical installation
Bottom View of 5-Up Settlement Room
Bracket to show mounting hole locations (5)
for fixed horizontal installation
Guidelines
General Guidelines
•
The Charging Brackets are designed to be used on
a shelf, desktop or as a wall-mounted unit. It is not
intended for vehicle mounting.
•
Position the chargers so there is enough room to
properly remove the printer(s).
•
The desktop cradle charger and charging brackets
take approximately 7-9 hours to charge each
printer. If multiple printers are attached, the charge
time remains at approximately 7-9 hours per
printer; however, charge times may vary.
•
Do not allow charge contacts to come in contact
with metal objects or short the two charging posts.
•
When mounting the charging bracket(s), only
mount them to wall studs.
Safety Guidelines
•
Position the chargers so they are protected from
environmental elements such as direct sunlight,
moisture, high temperature, tools, and boxes.
Position the chargers in a secure area in normal
traffic patterns.
•
Do not use the chargers if they appear damaged.
•
To reduce risk of electric shock, unplug the
chargers before cleaning.
•
Batteries become warm to the touch during
charging. If the battery becomes too hot to touch,
discontinue charging and contact Datamax-O’Neil.
•
Use of any charger or battery not approved by
Datamax-O’Neil for use with their printers could
cause damage to the batteries or printer and will
void the warranty.
•
Do not insert foreign objects into the chargers.
•
Do not disassemble, incinerate, or short circuit
batteries, the chargers, or related components.
•
Use appropriate hardware when mounting the
charging bracket(s). Datamax-O’Neil does not
accept liability for improperly mounted charging
brackets. Datamax-O’Neil does not accept liability
for poorly placed printers and/or chargers.
Power Cable Guidelines
•
Do not install cables or connections near wet areas.
•
Do not install cables near heat sources.
•
Do not install cables near, or around sharp edges.
•
Do not "pinch" cables during installation.
Mounting the Settlement Room
Bracket
If the charging brackets will be mounted on a
vertical surface or on a wall, use the following
procedure to mount them.
1. Locate the wall studs.
2. Use the charging bracket as a template to mark the
mounting holes on the mounting surface. Use both
the upper and lower holes to mount the charging
bracket to the mounting surface. There should be a
minimum of four mounting points at the ends of the
bracket assembly. For guidelines on mounting, see
the Guidelines in the previous section.
3. Drill the mounting holes at the marked locations.
When drilling the mounting holes, verify that you
drill the holes into the stud.
4. Attach the charging bracket to the mounting
surface as follows:
Wood Surface: Use four #10 pan head wood
screws with washers (not included). #10 wood
screws should not be used on any other type of
surface.
5. Verify the charging bracket is level and secure.
6. Thread the screws through the washers, charging
bracket, and into the mounting holes, then tighten
securely. Make sure the charging bracket is flush to
the wall and there are no pinched cables.
7. Insert the power cable into the AC charger block,
and route cable away from printer egress and
normal traffic patterns. (See Power Cable
Guidelines) Plug the AC charger into the wall.
If the charging brackets will be mounted on a
horizontal surface, use the following procedure to
mount them:
1. Insert the power cable into the AC charger block
and route the cable under or behind the bracket
and away from printer egress and normal traffic
patterns. (See Power Cable Guidelines) Hold in
place with cable ties and extra holes supplied on
the bracket as required to insure the cable is not
pinched.
2. Place the unit on the desktop, shelf or cabinet.
(Extra holes on the bottom of the bracket have
been supplied if you would like to permanently affix
the unit in place.)
Mounting holes
Mounting holes
CAUTION: The loaded weight of the 5-Up Settlement
Bracket can exceed 30 lbs. It is not recommended that the
bracket be fastened directly to a drywall surface, but
rather a wood or metal surface. The preferred method of
installation would be on a desk top or shelf.