Datamax-O'Neil PrintPAD Hinge and_or Latch Replacement Kit User Manual
Datamax-O'Neil Printers
Replacing a Hinge (continued)
7. Carefully tighten the hinge to the printer cover
using the included #3 screws.
The screws are tightened when the screws are
flush with the hinge(s).
8. If you are replacing both hinges, repeat steps
5 through 7.
Note: Your printer may have come with #4
screws included. If the included #3 screws are
loose while tightening the hinge, re-use the #4
screws that were originally used with the hinge
(removed in step 2).
Warning: Do not overtighten the screws. Once
the screws are tightened and flush with the
hinge(s), do not rotate past another 1/4 turn.
Replacing a Hinge
1. Place the printer on a flat surface and open the
printer cover.
2. Using a #1 Phillips screwdriver, unscrew and
remove the existing hinge screws (Figure 2).
3. Remove the hinge from the printer cover.
4. If you are replacing both hinges, repeat steps
2 and 3.
5. Verify the hinge slots (Figure 3a) align with the
hinge indents on the printer case (Figure 3b).
6. Place the new hinge in the hinge recess with the
hinge knuckle facing up (Figure 4).
Figure 2
Figure 3a
Figure 3b
Hinge
Slot
Hinge
indent
Figure 4
Hinge knuckle
220222-000 Hinge and/or Latch
Replacement Kit
Overview
Use the information in this instruction sheet to
replace a hinge and/or latch.
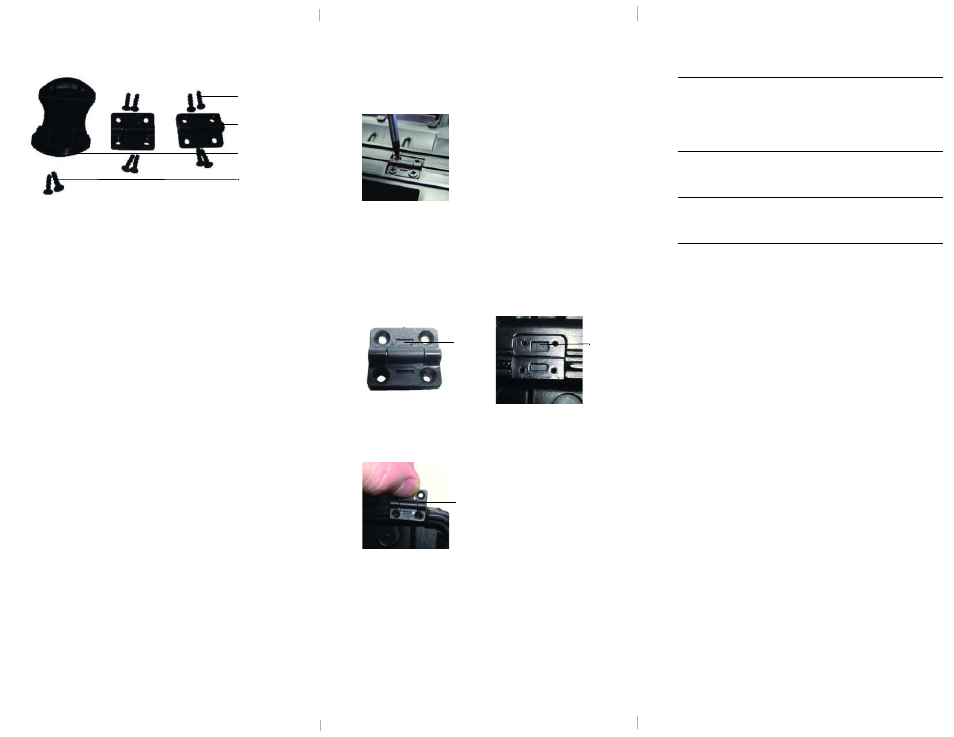
Parts List (Figure 1)
•
(1) Latch
•
(2) #2 x 1/4 Phillips flat, hi-lo, latch screws
P/N 370205-206
•
(2) Hinges
•
(8) #3 x 3/8 Phillips flat, hi-lo, hinge screws
P/N 370208-306
Required Tools
•
#1 Phillips head screwdriver
General Guidelines
•
Parts not suitable for young children; may be a
choking hazard.
Latch screw (2)
Latch (1)
Hinge (2)
Hinge screw (8)
Figure 1