Datamax-O'Neil I-Class Backing Only Cutter Option User Manual
Page 5
3
Setup and Configuration
The printer will automatically sense the presence of the Cutter and allow it to be enabled for cutting the
media as it is being printing. If you wish to enable the Cutter it must be enabled within the menu system.
To ‘Enable’ or ‘Disable’ the Cutter follow the steps below.
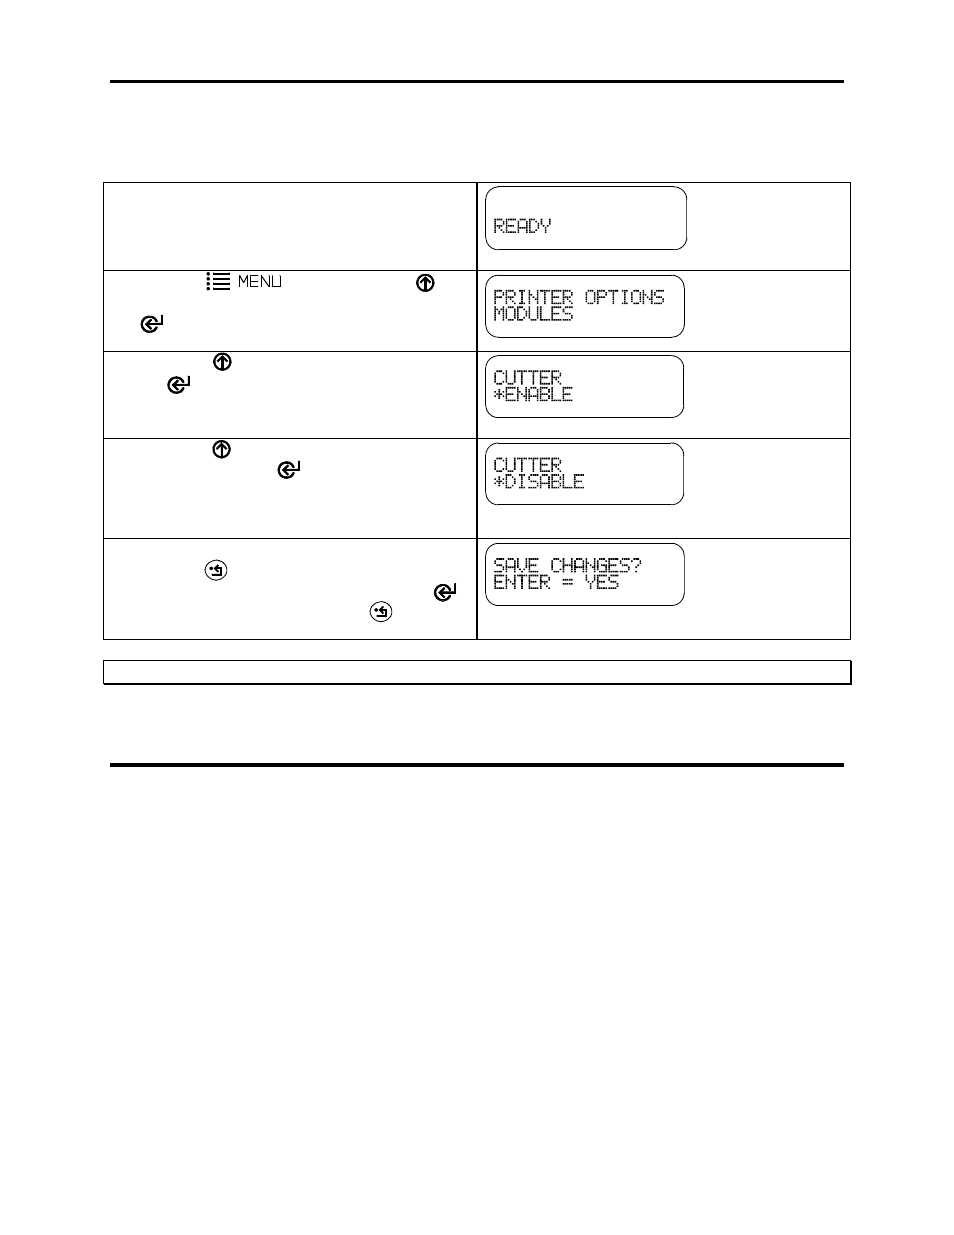
Verify the printer is in the ‘Ready Mode’
Press the button. Using the
button scroll to ‘Printer Options’ and press the
button.
Using the button scroll to ‘Cutter’ and press
the button.
Using the button scroll to either ‘Enable’ or
‘Disable. Press the button to select the
displayed setting, an asterisk will appear to the
left of the setting indicating that it is selected.
Once you have selected the desired setting
press the button repeatedly until the ‘Save
Changes’ message is displayed. Press the
button to save the changes or the button to
discard the changes.
Note: The use of the cutter can also be controlled via software commands from the host.
Routing the Media through the Cutter
Open the printer’s media door.
Load the printer with media, (see the Operator’s Manual for additional information).
Route the media through the printer placing the free end of the media on the platen. Ensure that the
free end of media has a clean edge, (i.e., media is firmly attached to the backing and the label has a
straight cut). Close and latch the printhead.
Press the feed button.