Installing the battery, Charging the battery, Installing the paper roll – Datamax-O'Neil ANDES 3 Quick Start Guide User Manual
Page 2: Tearing paper
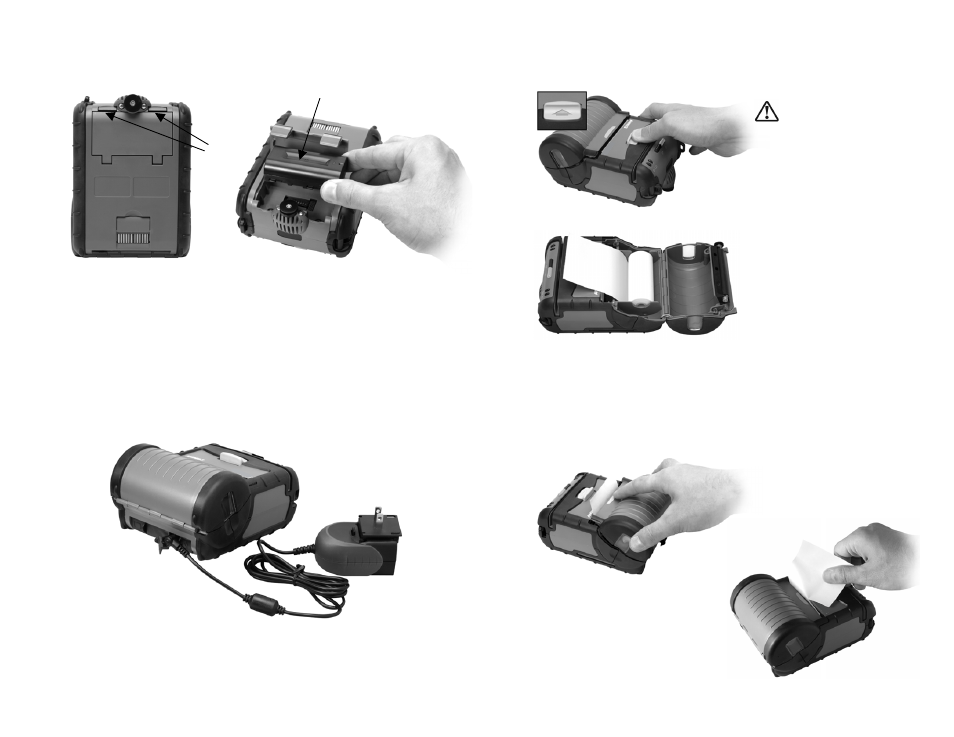
Installing the Battery
1. Open Battery Door Latch.
2. Install Battery.
Charging the Battery
1. Plug battery charger adaptor output cable into the battery
charger connector.
2. Plug battery charger adaptor into the appropriate AC line
voltage socket.
3. Battery charging LED (Amber) will illuminate indicating
charging.
4. LED will illuminate green after battery is charged.
5. Charge the battery for 3 hours before using printer first time.
Installing the Paper Roll
1. Slide paper door lock forward. While holding the lock button
in maximum forward position, open the paper door.
2. Install Paper Roll
3. Align paper, making sure that paper extends 4cm above the
paper tear bar.
4. Gently press paper door down applying pressure at the center
of the paper door. The click sound indicates the door is locked
5. Turn on the printer by pressing the Power button and test the
paper advance function by pressing the Paper Feed button. Verify
that paper advances correctly.
Tearing Paper
Li-Ion
Battery
Pull Paper Roll Leader Out of Printer.
Note Direction of Paper Travel.
Note: ensure battery is properly seated
before closing door
Battery
Door
Latches
CAUTION:
Avoid touching the print head or
reduction gear while the door is
open. Inspect the reduction gear,
remove dust or paper fragments
using low-pressure air (Do not use
a brush to clean!)
1. To tear paper, pull one edge
of the paper against the tear bar.
Note: Pulling paper up and/or sideways without
using the tear bar can cause a paper jam due to
paper misalignment in printhead mechanism.