Installation – CHIEF NS1D12-20-28-36-41 User Manual
Page 4
NS1D12-20-28-36-41
Installation Instructions
4
INSTALLATION
IMPORTANT ! : If installing doors and side panels (not
included) on an S1 rack, the doors must be installed
before installing the side panels.
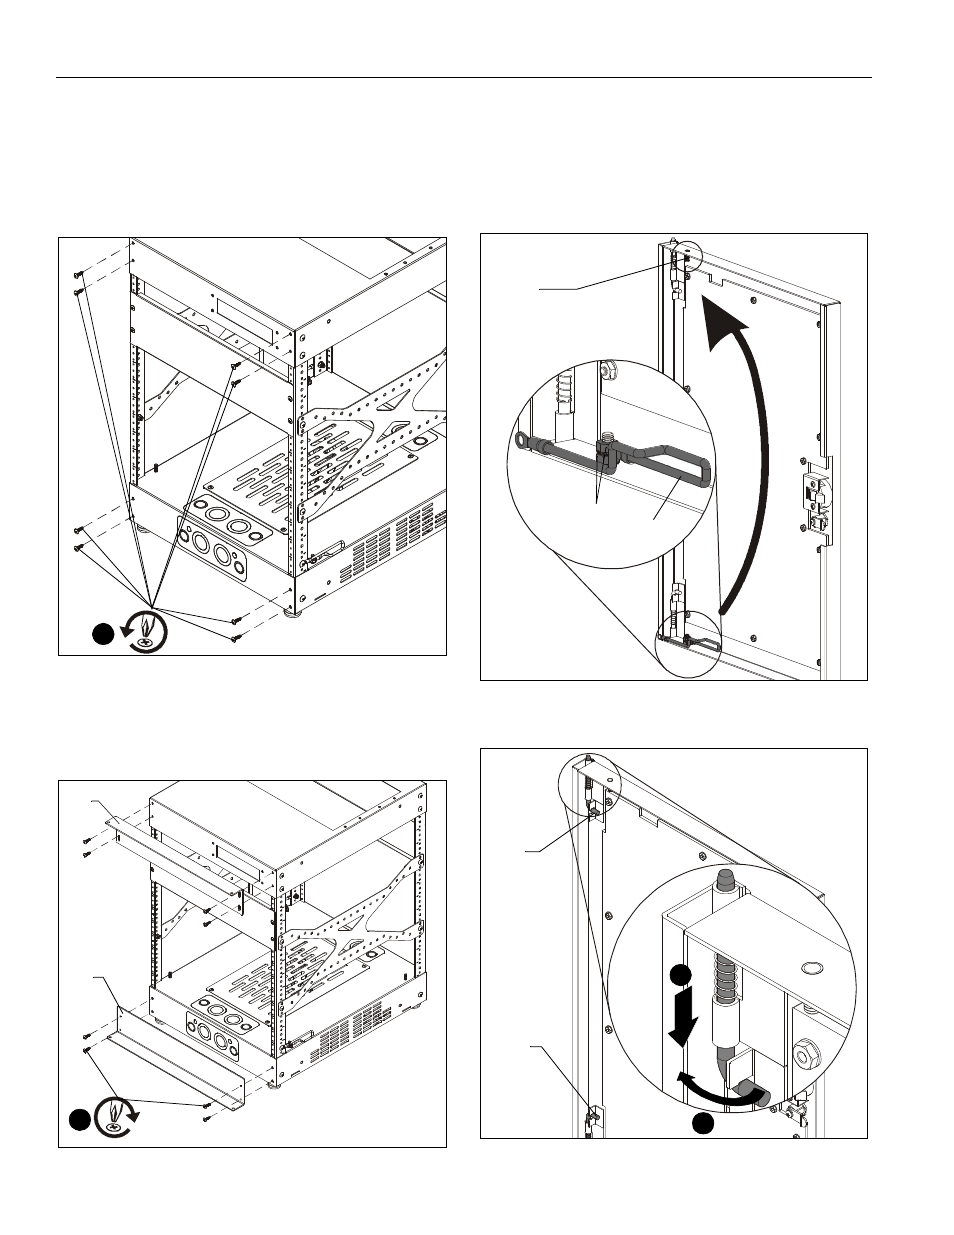
1.
Remove and save four screws from both top and bottom of
rack front. (See Figure 1)
Figure 1
2.
Add top door support (C) and lower door support (D) to rack
front. (See Figure 4)
3.
Attach door supports using eight screws removed in Step 1.
Figure 2
IMPORTANT ! : If the door is to be attached with the pull-
ring handle on the right side, the two nuts and grounding
wire already installed on the door must be removed and
reinstalled on the opposite end of the door before the
door is installed. The grounding wire should be on the
BOTTOM of the installed door. (See Figure 3)
Figure 3
4.
Rotate two spring handles (one at bottom and one at top) on
inside of door. (See Figure 4)
Figure 4
x 8
1
(NS1D12F shown)
3
x 8
(NS1D12F shown)
(C)
(D)
Move to
grounding
screw
Move two nuts
and grounding wire
NOTE: Door will
be flipped before
installation.
4
5
Lower
spring
handle
Upper
spring
handle
(View from back of door)