CHIEF PACLR1 User Manual
Page 5
Installation Instructions
PACLR1
5
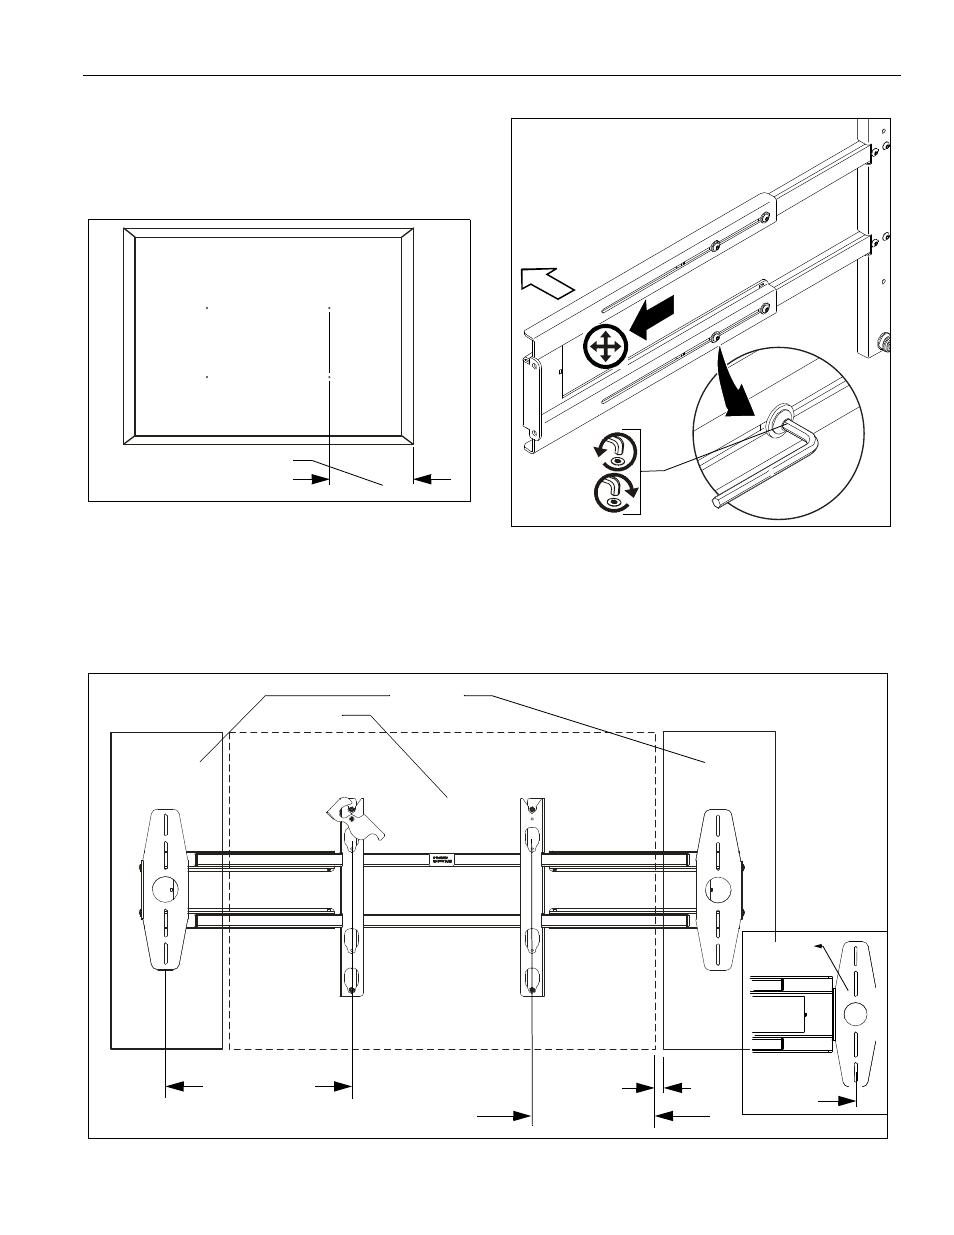
Adjust Speaker Rails for Display Width
1.
Turn display over and place on a clean dry surface.
2.
Measure the distance from the vertical center line of
mounting holes in display to the outermost edge of the
display.
Figure 3
3.
Loosen eight button head cap screws and slide speaker
rails outward until required distance between speakers is
obtained. (See Figure 4) and (See Figure 5)
4.
Tighten eight button head cap screws.
Figure 4
NOTE:
An additional 1 3/4” (each end) of speaker rail
extension can be obtained by inverting the speaker
mounting bracket as shown in DETAIL “A” in figure
below. (See Figure 5)
Dimension from
Step 2
Front
X8
Figure 5
Display
Speakers
1/8" min
Dimension from
Step 2
Add 1 3/4"
Inverted
DETAIL "A"
114.5" max. (400 x 400)
(16.25 with brkt inverted)
18.5" max. (200 x 200)
(20.25 with brkt inverted)
- PACPC1 (8 pages)
- CMS Series Columns (8 pages)
- CPA Series Columns (4 pages)
- PAC390 (2 pages)
- KTA1005 Series (8 pages)
- KFA225 Series (12 pages)
- PAC391B (8 pages)
- KTA1007 Series (4 pages)
- KSA1024B (8 pages)
- PAC392B (8 pages)
- KTP Series (8 pages)
- KSA1011 (8 pages)
- FSA1015 (8 pages)
- OFB214 (4 pages)
- KTA220_225 (8 pages)
- KSA1021 (8 pages)
- KSA1022 (16 pages)
- KSA1250 (8 pages)
- KSA1250 (16 pages)
- KRA500 (4 pages)
- PAC261 Series (12 pages)
- KSA1023 (12 pages)
- KSA1020 (12 pages)
- FSA1001 (1 page)
- FSA1002 (2 pages)
- FSA1003 (1 page)
- FSA1005 (1 page)
- PAC200 (6 pages)
- MAC722 (8 pages)
- FSA1009 (8 pages)
- FSA1008 (1 page)
- PAC720 (6 pages)
- KSA1018 (8 pages)
- KSA1012 (1 page)
- MAC720 (6 pages)
- KTA1000 (4 pages)
- FSA1013 (8 pages)
- KTA1001 (8 pages)
- KSA1014 (6 pages)
- KSA1017 (8 pages)
- KTA1003 (6 pages)
- KSA1019 (8 pages)
- KTA1004 (8 pages)
- PAC775 (4 pages)
- PAC790 (8 pages)