Center speaker installation, Adjustments – CHIEF TA350 User Manual
Page 7
Installation Instructions
TA350
7
Attach to Side Speaker Bracket (if applicable)
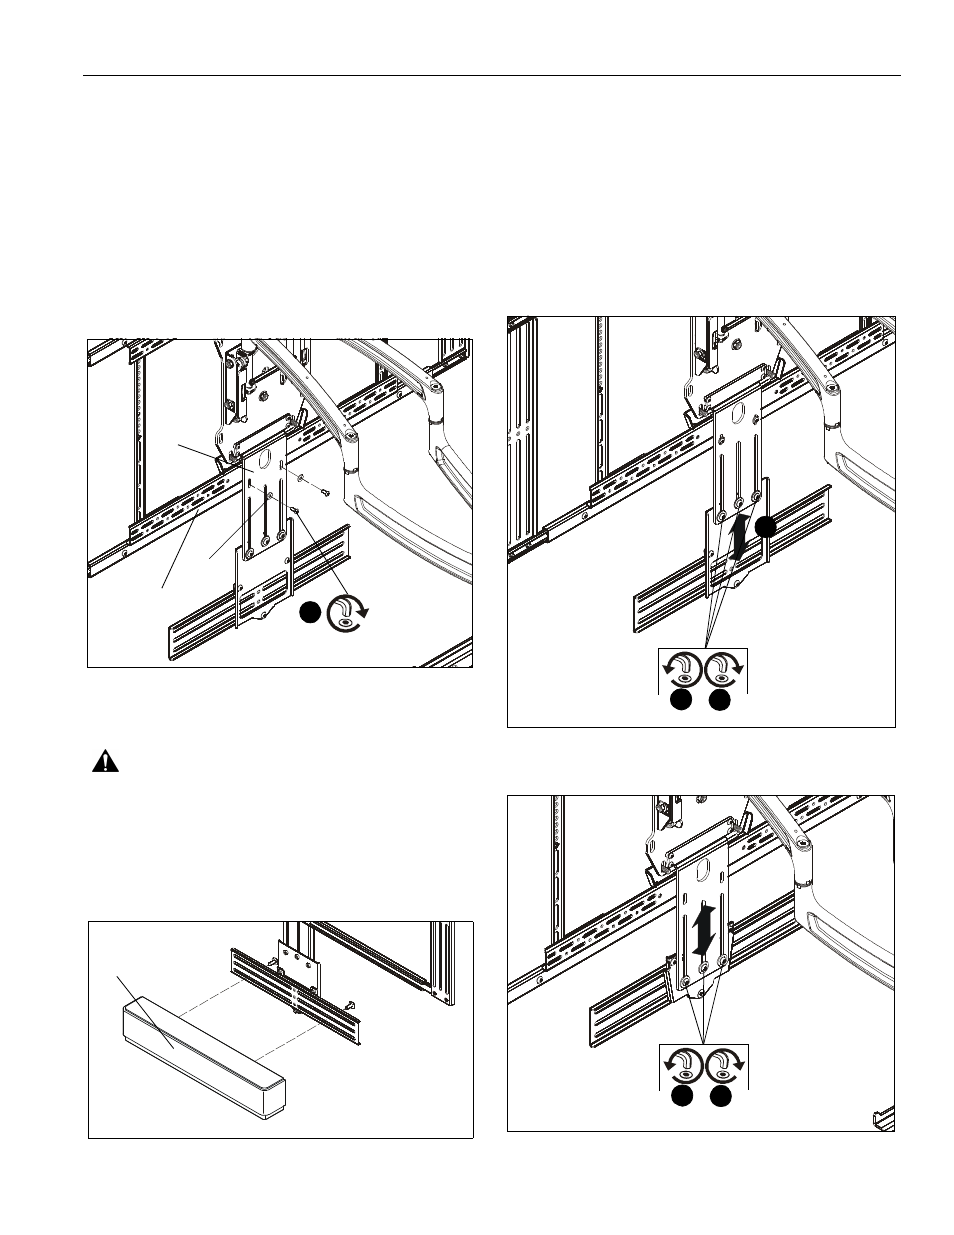
If side speaker brackets (TA300) have been installed to mount
side speakers, the attachment bracket should be attached to
the horizontal rail of the side speaker brackets for additional
support.
IMPORTANT ! : If installing below display,install both
side speaker brackets prior to installing center speaker
bracket to ensure an even mount.
1.
Use two #10-24 x 1/2" button head cap screws and two #10
washers (provided with TA300) to connect horizontal
bracket on side speaker brackets to attachment bracket (A).
(See Figure 9)
Figure 9
Center Speaker Installation
WARNING:
Exceeding the weight capacity can result in
serious personal injury or damage to equipment! It is the
installer’s responsibility to make sure the combined weight of
all equipment and accessories mounted on the TA350
bracket does not exceed 10 lbs (4.54 kg).
1.
Attach center speaker to center speaker bracket (B) using
appropriate hardware (not provided). (See Figure 10)
Figure 10
Adjustments
Height Adjustment
1.
Loosen three 1/4-20 x 3/8" button head cap screws (E)
holding extension bracket (C or D) to attachment bracket
(A). (See Figure 11)
2.
Adjust height of center speaker bracket (B) as desired. (See
Figure 11)
3.
Tighten three three 1/4-20 x 3/8" button head cap screws
(E) holding extension bracket (C or D) to attachment
bracket (A). (See Figure 11) or (See Figure 12)
Figure 11
Figure 12
x 2
x 2
(A)
TA300
1
speaker (example)
2
1
3
(long extension)
(short extension)
1
3