Installation – CHIEF KSA1019 User Manual
Page 5
Installation Instructions
KSA1019
5
INSTALLATION
WARNING:
IMPROPER INSTALLATION CAN LEAD TO
DISPLAY FALLING CAUSING SERIOUS PERSONAL
INJURY OR DAMAGE TO EQUIPMENT! DO NOT substitute
hardware! Use only hardware provided by manufacturer.
WARNING:
EXCEEDING THE WEIGHT CAPACITY CAN
RESULT IN SERIOUS PERSONAL INJURY OR DAMAGE
TO EQUIPMENT! It is the installer’s responsibility to make
sure the combined weight of all components does not exceed
the weight capacity of the product to which this accessory is
attached.
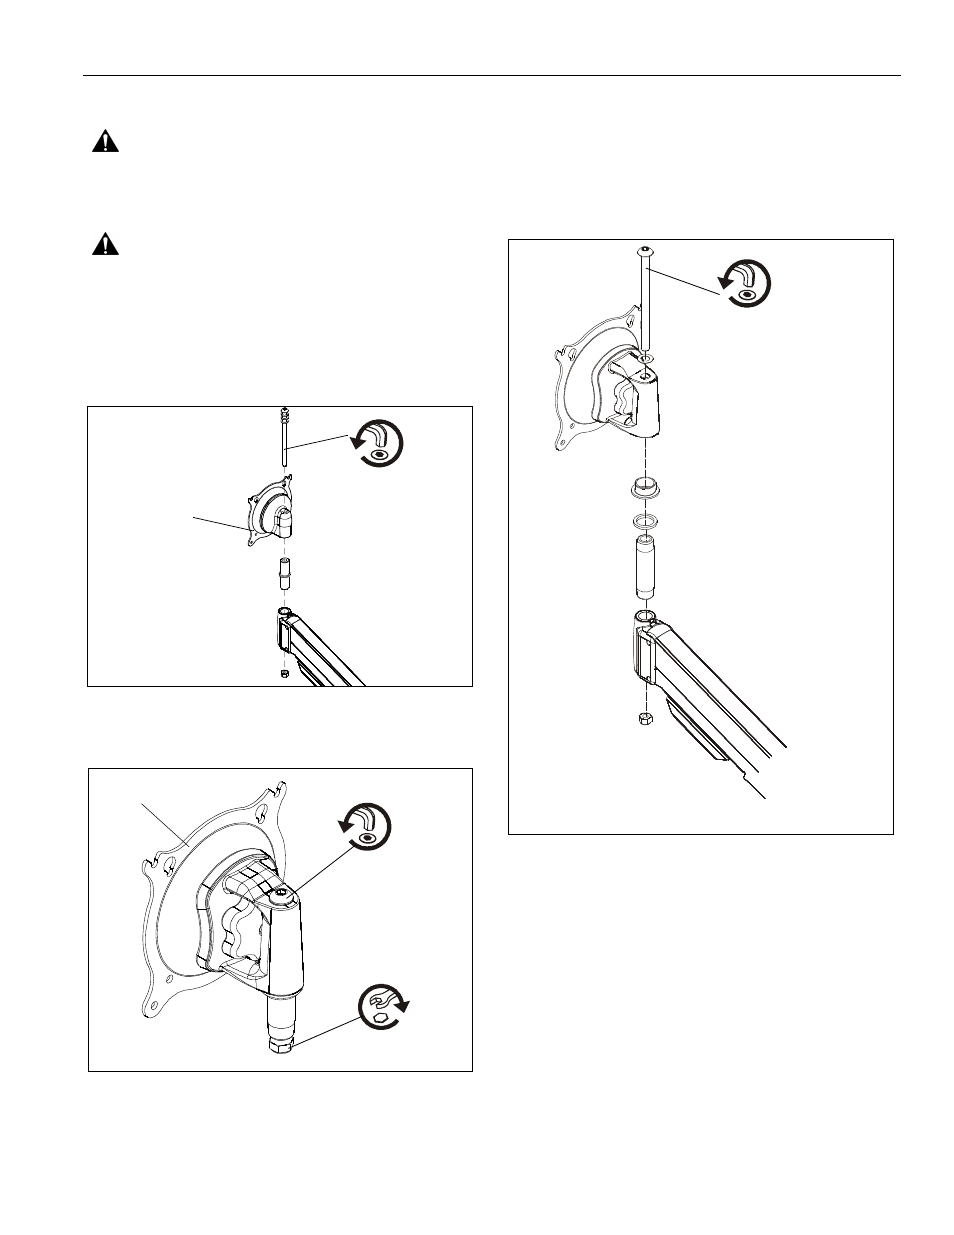
1.
Loosen nut at bottom of head assembly and button head
cap screw at top to remove head assembly. (See Figure 1)
Figure 1
2.
Loosen and remove nut at bottom of KSA-1019 assembly
(A) and button head cap screw at top. (See Figure 2)
Figure 2
3.
Place new head assembly on arm, tightening the button
head cap screw and nut. (See Figure 3)
NOTE:
If mounting to height-adjustable arm, the 5/16-18 x
5 1/2" button head cap screw (E) must be used in place
of the screw pre-assembled on the assembly.
IMPORTANT ! : All pre-assembled washers and spacers
must be reassembled when attaching KSA1019 to
mounting arm. (See Figure 3)
Figure 3
x 1
Head
Assembly
x 1
x 1
(A)
x 1*
*use (E) with height-adjustable arm