CHIEF F-Series User Manual
Page 14
Model: F-Series
Installation Instructions
14
ADJUSTMENT
ARM
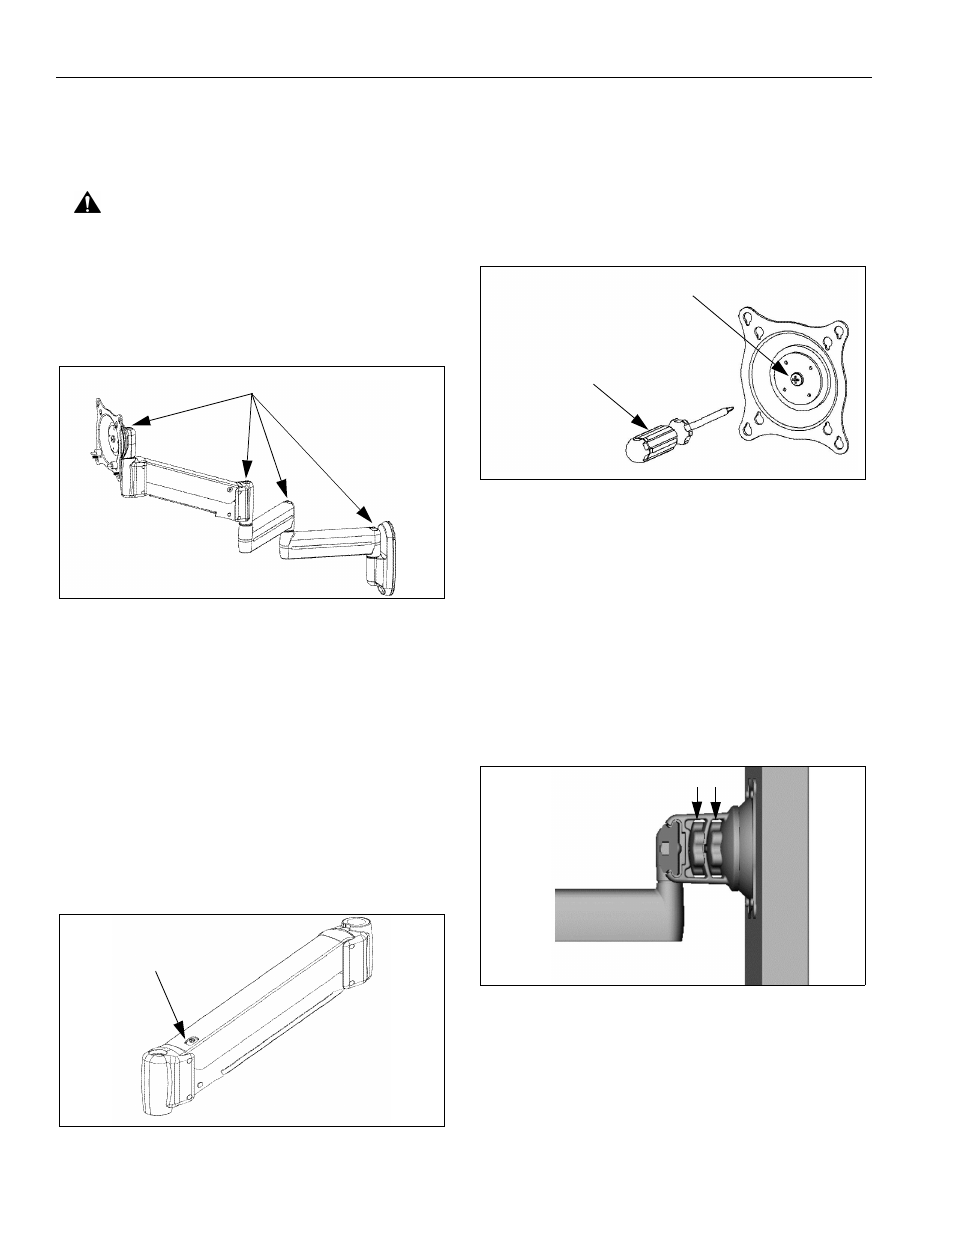
PIVOT / SWING
CAUTION: If washer (80) has been used to assemble
FCY-210/-220 arms, then forced movement of arms
without loosening screw (30) will damage arm and/or Y-
connector (See Figure 17)(See Figure 19).
1.
Using 3/16" hex key, slightly loosen or tighten the
adjustment screw(s) as necessary (See Figure 23).
Figure 23: Pivot / Swing Arm Adjustment
HEIGHT ADJUSTABLE (IF APPLICABLE)
1.
Using 5/32" hex key, slightly loosen or tighten the
adjustment screw as necessary (See Figure 24).
•
If display settles on its own, then rotate
adjustment screw counterclockwise (towards the
"+" symbol).
•
If display rises on its own, then rotate adjustment
screw clockwise (towards the "-" symbol).
NOTE: It may be necessary to raise or lower the height
adjustable arm to expose the adjustment screw.
Figure 24: Height Adjustable Arm Adjustment
CENTRIS HEAD
SINGLE DISPLAY AND FCY-210/-220
1.
If previously attached, disconnect cables from display,
then remove display.
2.
Using Phillips screwdriver, slightly loosen or tighten
the adjustment screw as necessary (See Figure 25).
Figure 25: Single Display Adjustment
3.
Install mount and then display cables. See "DISPLAY
INSTALLATION."
DUAL / TRIPLE DISPLAY (FMA-220/-320 ONLY)
1.
LATERAL POSITION ON ARRAY:
•
Using your fingers, slightly loosen adjustment
knob "A" (See Figure 26).
•
Slide display to desired position.
•
Using your fingers, tighten adjustment knob "A".
Figure 26: Dual / Triple Display Adjustment
2.
PITCH / YAW / ROLL:
•
Using your fingers, slightly loosen adjustment
knob "B" (See Figure 26).
•
Adjust display as desired.
•
Using your fingers, tighten adjustment knob "B".
Adjustment Screws
Adjustment Screw
Adjustment Screw
Phillips Screwdriver
A
B