CHIEF TPS Series User Manual
Page 7
Installation Instructions
TPS Series
7
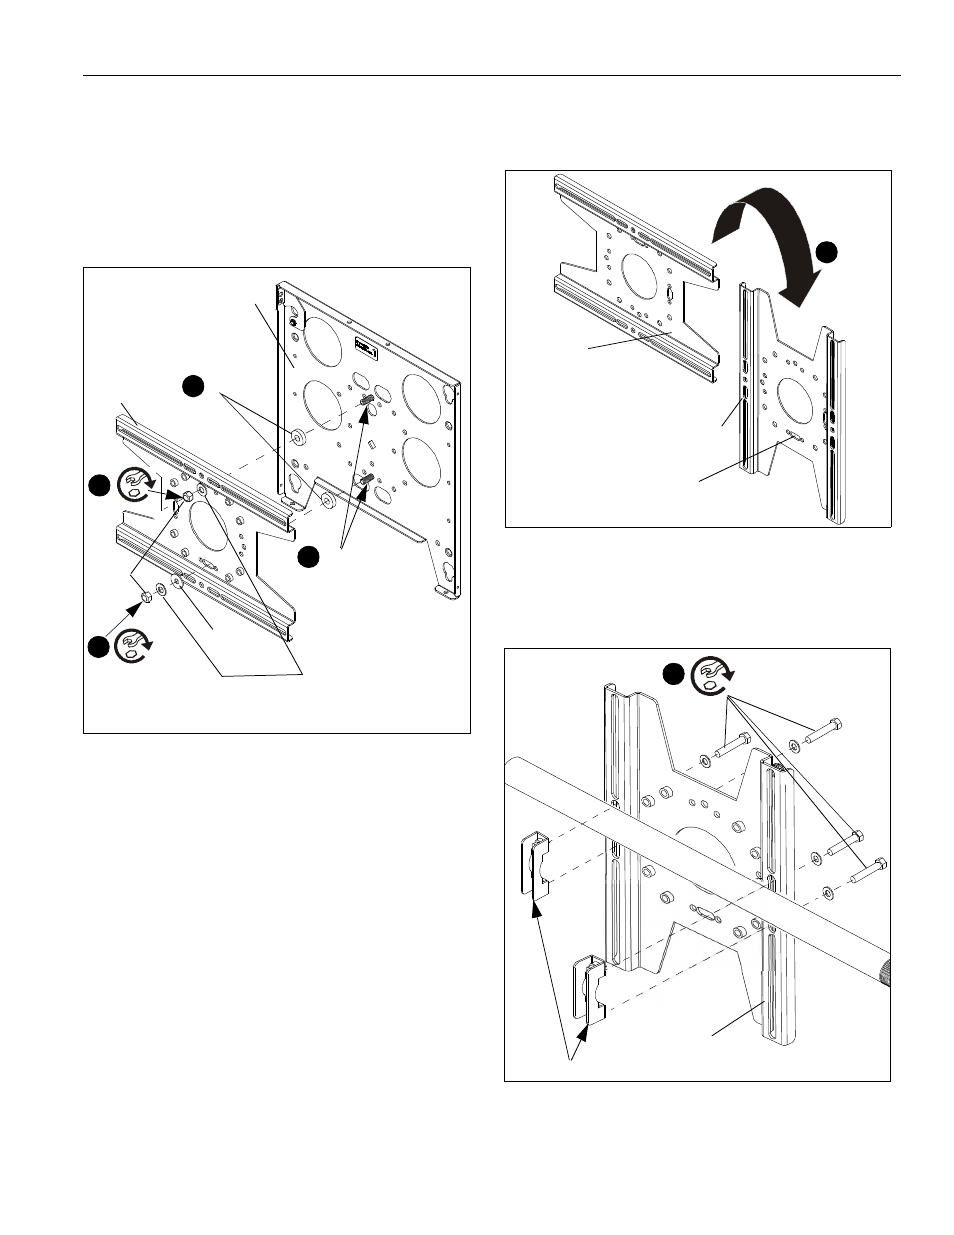
4.
Align mounting studs on faceplate (A) with center upper
mounting hole and lower center slot in truss plate (B).
5.
Install two 1.055" x .406" x.250" Nylon spacers (D) onto
mounting studs on TPS faceplate (A). (See Figure 5)
6.
Place the two mounting studs on faceplate through center
upper mounting hole and lower center slot in truss plate (B).
7.
Secure top of TPS faceplate (A) to truss plate (B) using one
3/8" flat washer (E), and one 3/8" Stover lock nut (C). (See
Figure 5)
Figure 5
8.
Secure bottom of TPS faceplate (A) to truss plate (B) using
one .094" washer (F), one 3/8" flat washer (E), and one
3/8" Stover lock nut (C). (See Figure 5)
9.
Proceed to Display Installation section.
Horizontal Installation
1.
Rotate the truss plate (B) 90° and verify it is properly
oriented for horizontal mounting. (See Figure 6)
Figure 6
2.
Securely anchor truss plate (B) to horizontal pole using
Chief TPK accessory clamps (not included) following
instructions included with TPK clamp kit. (See Figure 7)
Figure 7
Mounting Studs
(D) x 2
(A)
(B)
(E) x 2
(F) x 1
(C) x 2
Note: Trusses not shown for clarity.
(x 2)
5
7
8
4
1
Lower center slot
Recessed, slotted flat surface
against pole
(B)
Horizontal
TPK clamps (not provided)
2
Installation
x 4
(B)