Burke Flooring EcoFitness Interlocking Tile Installation User Manual
Page 3
Page
3
Burke Flooring Products, a Division of Burke Industries
2250 South Tenth Street, San Jose CA 95112
(408) 297-3500
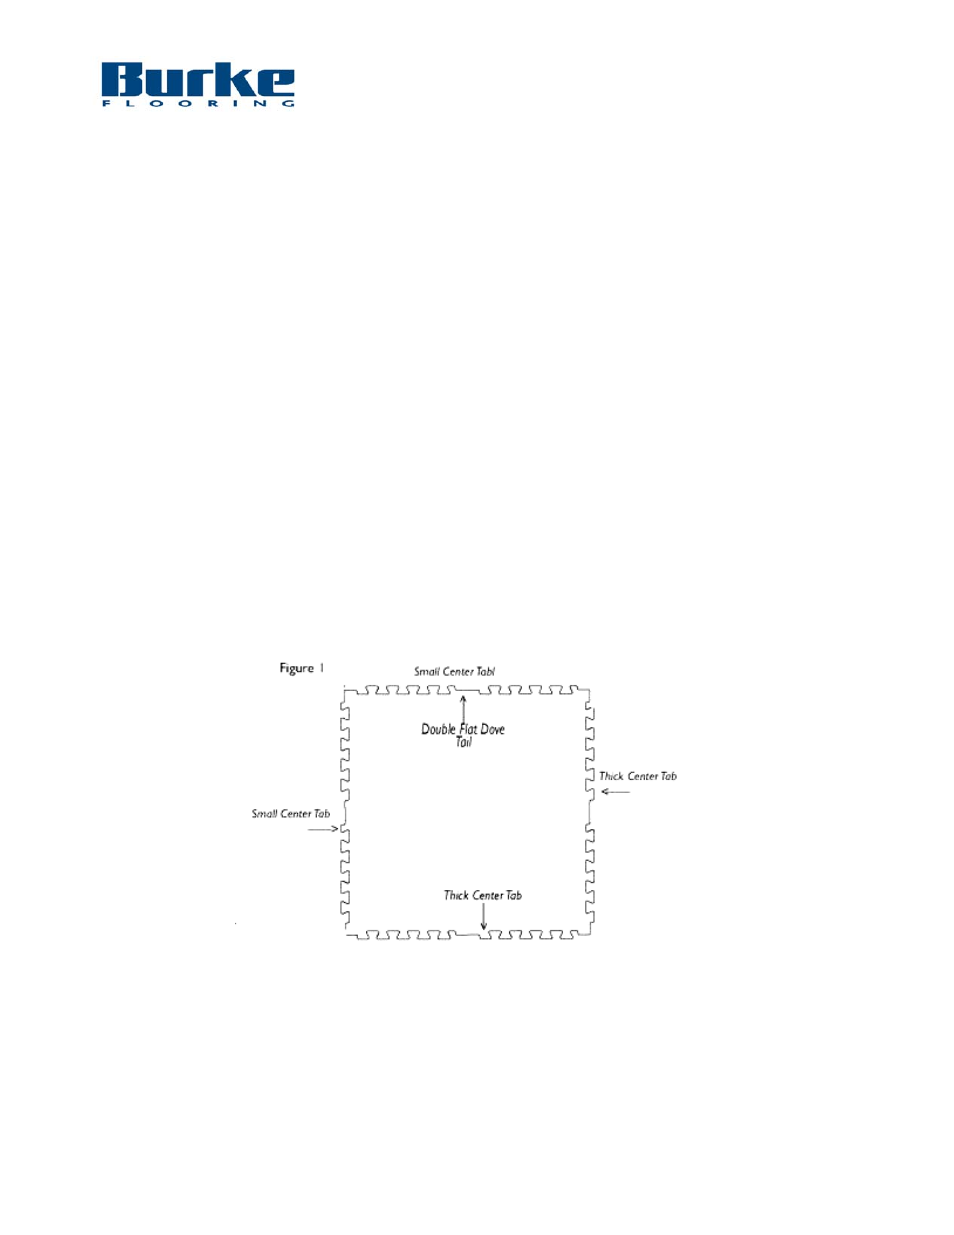
INSTALLATION
EcoFitness Interlocking Tile does not require any specialty tools. However, it is very important to
understand that the tiles are designed to fit together only in certain way. They cannot be assembled
randomly.
Step One - Identify the Top Surface of the Tile from the Bottom
First note that there is a top surface to the tile and a bottom surface. This is because the fingers of the
interlocking design will tend to lift on one side and lay flat on the other. The gaps between the
interlocking dovetails are greater and much more visible on the bottom of the interlocked tile.
However, the gaps are very tight when viewed from the top surface of the tile.
Hold the tile in front of you. In the center of each of the tile’s four sides you will see a “double flat
dovetail.” On two sides of the tile, the tabs extending from the “double flat dovetail” are thin. The
tabs on the other sides are thick. The orientation of these four tabs is important (see figure I).
To identify the top of the tile from the bottom, flip the tile from front to back. Make sure that the
“double flat dove tail” on the top of the tab is extended on the left. Then rotate the tile until the two
small center tabs are at twelve o'clock and nine o'clock (see figure I). Repeat this process with each
tile so that the orientation of these center tabs is the same for all tiles.
Step Two - Decide Tile Layout
EcoFitness Interlocking Tile may be laid in straight rows and columns. Another option is to lay the
tile in an “Ashlar” or brick pattern by offsetting either the rows or the columns by 50%. In other
words, the tile can be laid “point to point” or in the offset “Ashlar” method. There is some locking
benefit to the offset “Ashlar” brick pattern.