American Expedition Vehicles JK snorkel Kit User Manual
Page 6
4
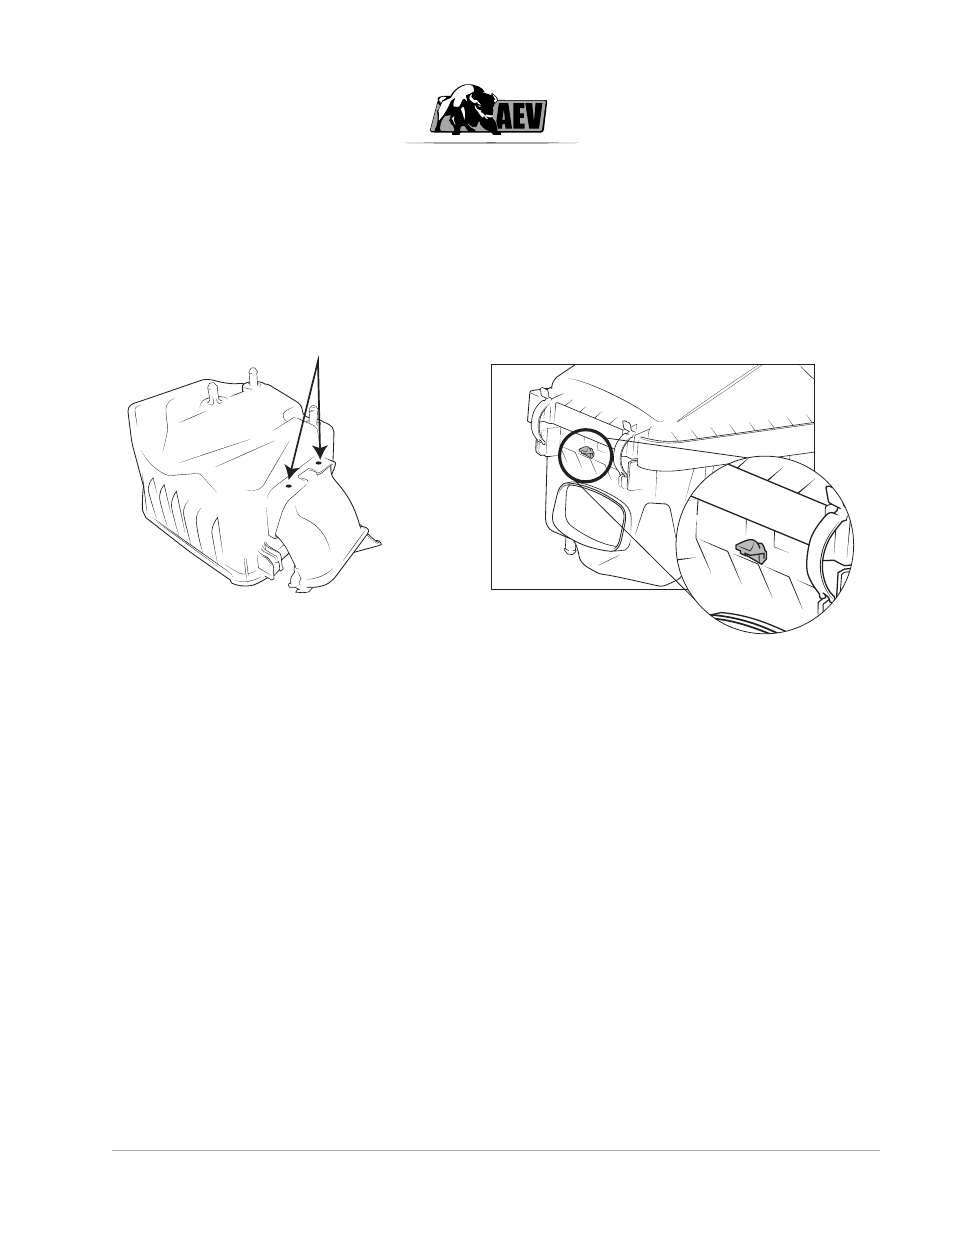
3. Remove the short factory “snorkel”.
a. 3.6 L Gas Models: you will need to drill out the rivets that attach the factory “snorkel” to
the airbox. (Fig. 4.1)
b. 3.8 L Gas Models: Squeeze the “snorkel” from the inside of the airbox and remove.
4. 3.8 L Gas Models: Cut off the small locator on the factory airbox (shown in gray Fig. 4.2)
5. Install the AEV Snorkel into the factory airbox.
a. 3.6 L Gas Models: Drill through the existing airbox rivet holes into the AEV Snorkel with a 5/32”
drill bit. Secure with the supplied rivets.
b. 3.8 L Gas Models: Push Snorkel end in the airbox opening to snap in.
6. Use Silicone to seal the snorkel to airbox joint. There are several drain holes in the bottom of the fac-
tory airbox, for typical usage (dust and occasional water crossings) we recommend leaving these holes
open. For extreme water use, using silicone to seal these holes shut is correct, but after all deep water
crossings or when the airbox is subjected to prolonged submersion, inspection for water in the airbox
is recommended.
7. Install the snorkel/airbox back into the vehicle. Lubricate the rubber airbox isolators to get the airbox
to seat properly.
3.6 L airbox rivets
Figure 4.1
Figure 4.2
3.8 L Airbox