Quest, Technical installation data – Alera Lighting QST User Manual
Page 2
© 2010 Alera Lighting, a division of Hubbell Lighting, Inc. Because of continuing product improvement programs, Alera Lighting reserves the right to change specifications
without notice. 701 Millennium Blvd. Greenville, SC 29607 / Tel 864.678.1000 / Tech Support 864.678.1580 / Website www.aleralighting.com
Page 2/2 Rev. 01/15/10
CuRveS / QST TID
Quest
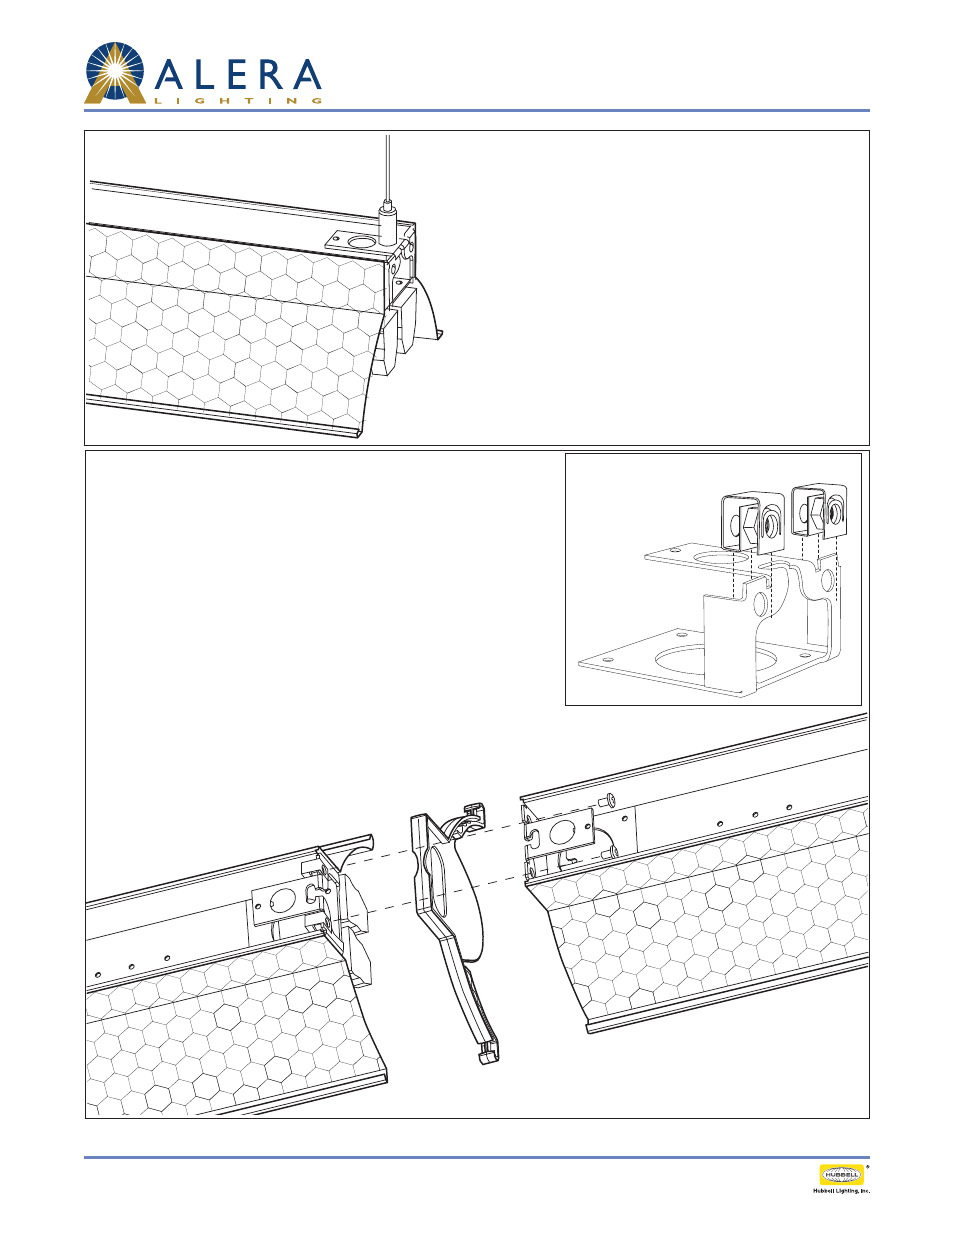
Technical Installation Data
Tinnerman Nut Retainer
Connection Instructions:
1. Remove screws holding ballast cover in place and set both aside.
2. Install first fixture in row with two hangers.
3. Place bolts through internal endcap of suspended fixture.
4. Slide coupler over end of fixture with bolts
5. Install Tinnerman nut retainers as indicated on second fixture and slide it
over bolts and secure to nuts. Ensure coupler covers entire reflector and snaps
on returned end on bottom. Failure to cover entire reflector will result in
misalignment of fixture. (A long magnetic screwdriver is recommended.)
6. Repeat steps 3, 4, and 5 until row is complete.
7. Attach end of row end cap with screws after fixture balancing is complete.
8. Replace ballast covers with screws.
9. Remove plastic film on reflectors last to avoid fingerprints.
Suspension Instructions:
1. Set cable length the same on all hangers by pushing down
on the plunger/cable.
2. Loosen nut on cable gripper. Slide threaded end of cable
gripper into slot at end of hanger bracket.
3. Direct excess cable down ballast wireway.
4. Tighten nut so cable gripper is secure to bracket.
5. Push plunger/cable down to adjust cable to proper
suspension length if necessary.
6. For fine tuning of fixture balance, loosen nut and slide
gripper left or right down the slot. Sliding gripper will change
centering of fixture and fixture will automatically balance.
Retighten nut to secure gripper.
Note: All fixtures balancing should be completed prior to
replacing covers.