SM Pro Audio IN5E: USB Audio Interface and Stand alone Mixer User Manual
Page 9
Step 3 Monitor the results from your speakers or headphones.
7.4 The IN5E as a computer interface
The IN5E can act as a pretty nifty Interface for your computer. As all major operating systems come with
plug and play it’s just about connecting the IN5E via USB cable. As no drivers are needed the IN5E works
with low latency drivers (Core Audio) within your Mac OS X System. Under Windows we recommend that
you install the Freeware ASIO4all (www.asio4all.com) to have decent ASIO drivers within your DAW.
Step 1 Connect the IN5E with a compatible USB cable to your computer.
Step 2 Connect your microphone to one of the microphone connections on the front of the IN5E and
increase the gain control to an acceptable level. Do the same with all other sources you want to record.
Step 3 Start your Sequencer. There you need to choose a audio channel and press the “Monitoring” but-
ton.
* Note: The function “Monitoring” may differ, depending which sequencer you use.
Now you should see the signal what’s coming from the IN5E into your DAW. If not, please consider the
manual of your sequencer. Adjust the gain control on the microphone to the correct level desired. You
should take note of the level meter indicators on your recording software while setting the gain.
Step 4 Hit the “Record” button in your Sequencer, and capture the signal from your microphone.
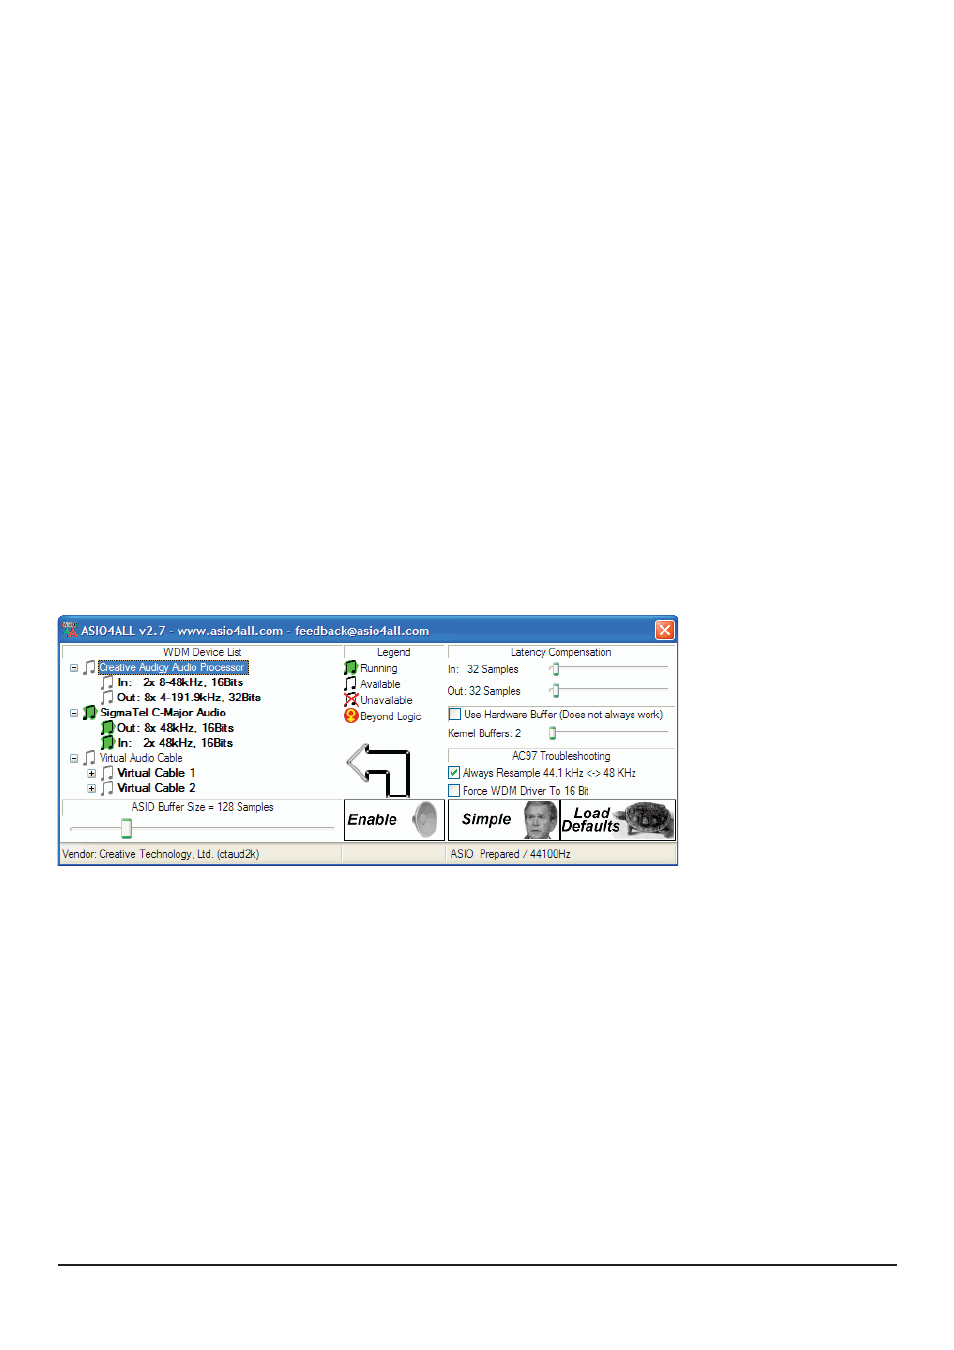
* Note: If you have heavy latencies within your system, please check the ASIO4all software panel and adjust the
buffer size as desired. Also check the “Audio Preferences” pane within your sequencer. The lateny depends on
many factors, e.g. how fast your computer is and what kind of drivers you have choosen.
This is the ASIO4all Software Panel, where
you can configure the soundcard’s latency.
9
Application Guide